
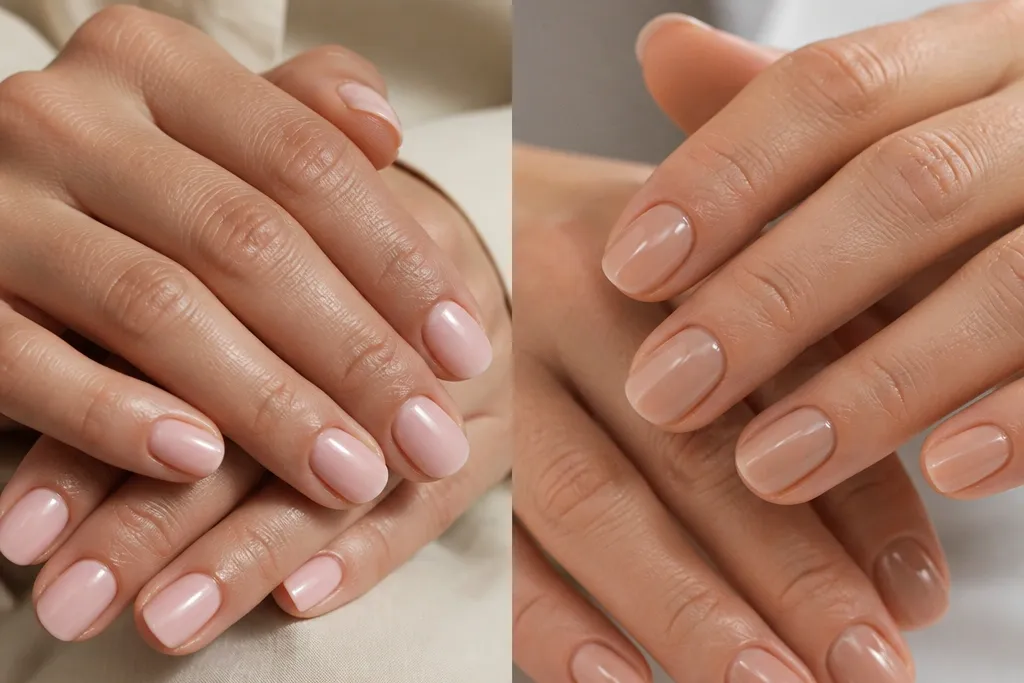
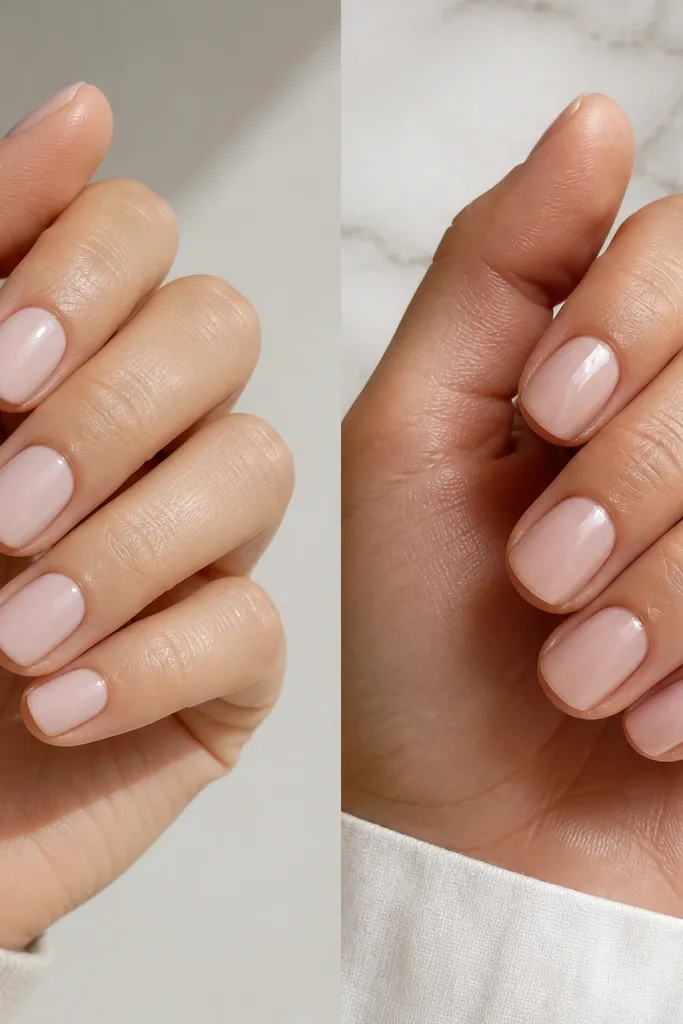
1. Milky Nude with Micro-Glaze Tips
I reach for this when someone wants “soft natural” but still wants to see something pretty in the light. The base is a milky nude jelly — sheer enough that your natural nail tone shows through. The micro-glaze tip is a narrow glossy band that sits just above the free edge, so it adds a little definition without making the nail look longer. This flatters fair to deep skin tones because the milky nude has a neutral, slightly pink cast that doesn’t fight your undertone. It also works on both warm and cool skin because the highlight is glossy, not yellow.
Start by prepping and buffing to remove shine, then apply a thin gel base or acrylic primer. Build the milky nude in two layers — first sheer, second a touch more opaque — and cure each layer fully. For the glaze tip, paint a 1mm-wide strip centered on each nail, keeping it off the sidewalls by a hair. Then cap the tip with a very thin top coat so the line stays crisp. Finish with a high-gloss top coat across the whole nail.
Editor's noteIf your nude looks too pale, mix in one drop of pink-beige to the milky shade before layering.
Skip thisDon’t make the tip band thicker than 1mm or it turns into a stubby French.
2. Sheer Rose Jelly with One Tiny Dot on the Side
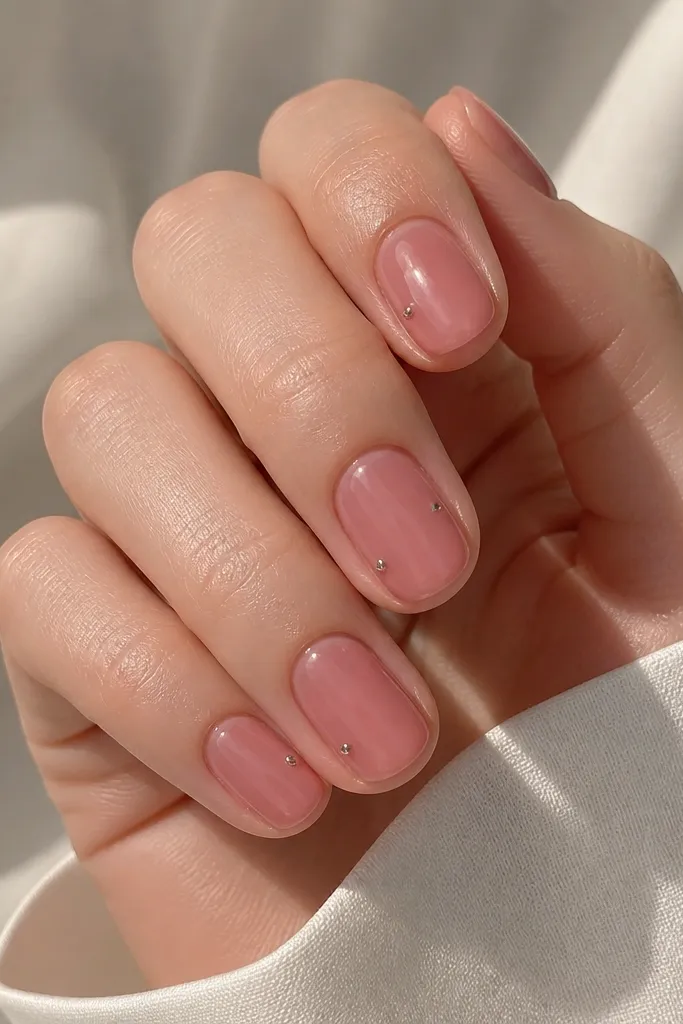
This is the “your nails are cute, but not loud” design. The sheer rose jelly gives you that healthy, hydrated look, and the single dot adds a focal point without crowding a short nail. I like metallic dots in champagne or soft gold because they blend with the rose instead of turning silver-cold. On lighter skin, it reads romantic; on deeper skin, it reads polished and warm. The side placement also makes fingers look longer because your eye lands slightly outward instead of across the nail.
Apply a sheer rose jelly base in two thin coats, then cure to a glassy finish. Use a dotting tool or a toothpick to place one tiny dot — about the size of a grain of rice — near the outer sidewall. Keep the dot 2-3mm above the bottom edge so it doesn’t look like a chip. Seal with top coat, then check under a lamp for any uneven edges and lightly smooth if needed.
Editor's noteFor acrylic sets, do the dot in gel polish on top of the cured acrylic then top coat over it so it stays sharp.
Skip thisSkip big decals on short ovals; they take over the nail and look heavy.
3. Satin Cocoa Swirl on Milky Base
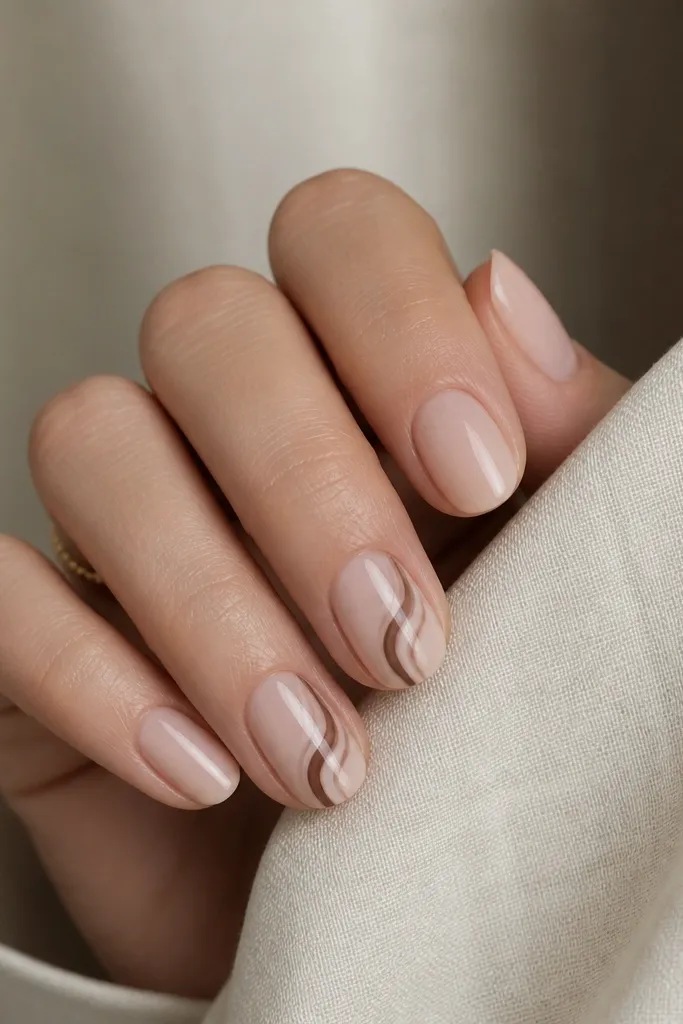
Matte swirls on a milky base make short ovals look styled without adding length. I use a satin cocoa color (not dark chocolate, more like warm latte) because it shows up on all skin tones and still looks gentle. The swirl placement — beginning near the cuticle and ending near the center — keeps it from looking like random scribbles. This design is flattering if you want something warm and cozy for fall or winter, and it also works for everyday because the colors are calm. It’s especially pretty on short nails because the swirl creates a vertical visual path.
Start with a milky nude base in two coats and keep it glossy. On accent nails, load a thin strip of satin cocoa polish on a detail brush and draw a small swirl that starts about 1.5mm from the cuticle. Curve it toward the middle so the thickest part sits around the nail’s center. Let it set for 30-60 seconds, then top coat everything except the swirl if you want the satin texture to stay matte. If you want the swirl to be slightly glossy, top coat it lightly and avoid flooding the edges.
Editor's noteUse a detail brush with a pointed tip and wipe it on a paper towel once — too much product makes the swirl blob.
Skip thisDon’t draw from the sidewall; swirls that touch the edges look messy on short ovals.
4. Clear Pink Builder + Ghosted French Smile
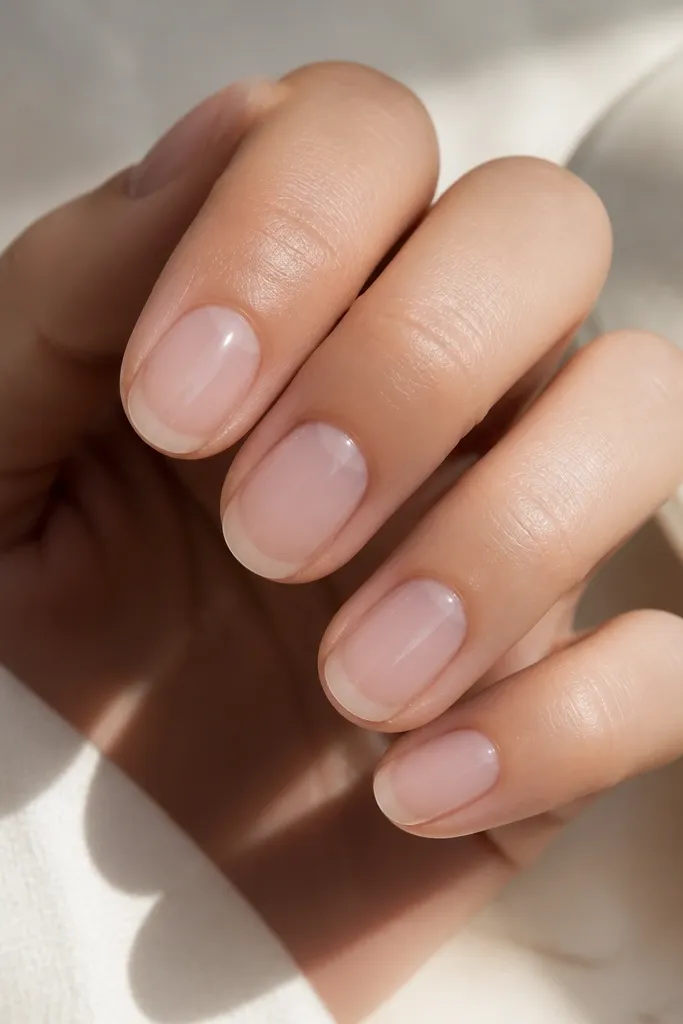
This is the design I do when someone says they want “nothing on my nails” but still wants definition. The clear pink builder makes the nail look like it’s growing in — smooth and natural — and the ghosted French smile is translucent, not opaque white. I use a soft pink-white mixed shade so the arc blends with the nail instead of looking like nail polish on top. It flatters short oval nails because the smile arc guides the eye along the curve of the tip. If you have warm or neutral undertones, this reads clean and flattering.
For acrylic, place a clear pink builder layer first and shape your oval with a gentle file. For gel, build with a rubber-base builder in a clear pink tone and thin it slightly at the center. Paint the ghosted smile arc with a sheer pink-white — keep it semi-transparent so you can still see the base through it. The arc should be about 2-3mm from the very edge at first, then you can adjust after cure. Finish with a glossy top coat and lightly buff the nail surface to remove any texture around the arc.
Editor's noteTo keep the arc even, mark the center with a tiny dot, then connect to both sides.
Skip thisDon’t use bright opaque white on a ghosted French — it will look like sticker art.
5. Baby Blue Micro French with Negative Space
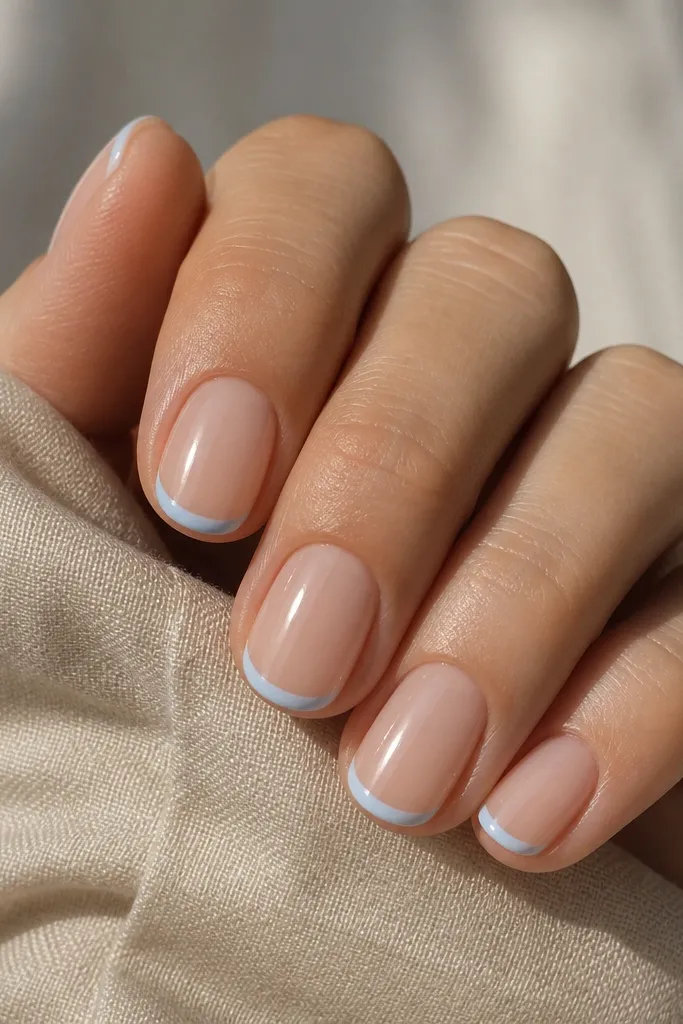
Negative space is the trick for short oval nails. This micro French uses baby blue — a soft, slightly gray-toned blue — and keeps the top area bare so the nails look light and airy instead of heavy. The line is thin and centered, so your fingers look longer and more delicate. This design flatters cool undertones and also works on warm skin if the blue has that gray softness. For everyday wear, it reads fresh without being loud.
Start with a nude base in two coats and keep it glossy. Use striping tape if you struggle with straight lines: place tape across the nail at the tip so it leaves a 1-1.5mm gap for the blue line. Paint the baby blue in one thin layer, then remove tape before it fully sets so edges stay crisp. Clean up the edges with a small brush dipped in acetone-free remover. Seal with a top coat, then run the brush along the tip to lock it in.
If your nude looks too yellow, choose a nude with a hint of pink — the blue will look cleaner.
Don’t wrap the blue line around the sidewalls; it should stay a centered micro band.
6. Champagne Chrome Half-Moon
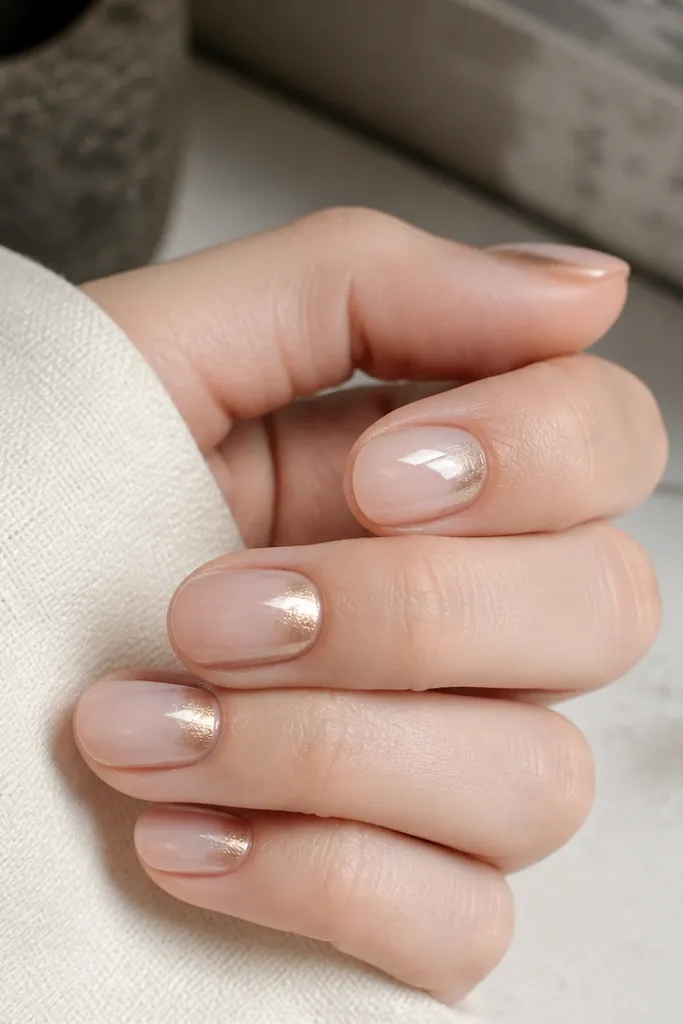
Half-moons make short oval nails look instantly polished because they anchor the design near the cuticle. I use champagne chrome instead of silver because it warms up the hand and looks flattering on both fair and deeper skin tones. The chrome is placed only in a half-moon shape so it doesn’t overwhelm the short length. When the rest of the nail is sheer and glossy, the chrome looks like light catching on jewelry. It also photographs well because the reflection stays controlled.
Apply a sheer nude base and cure it glassy. Sponge or stamp champagne chrome powder lightly onto the cuticle area, staying within a half-moon outline. Use a small makeup sponge and dab — don’t rub hard — so the edge stays soft. If you’re using chrome gel, cure the gel first, then apply chrome powder and seal with a top coat that doesn’t dull the shine. For acrylic, roughen the cured surface lightly where the chrome goes so it grips.
Keep the half-moon small: about 1/3 of the nail width, centered, so it stays elegant on short ovals.
Don’t bring chrome all the way to the sidewalls or it looks like a spill.
7. Mocha Marble Vein (One Nail Accent)
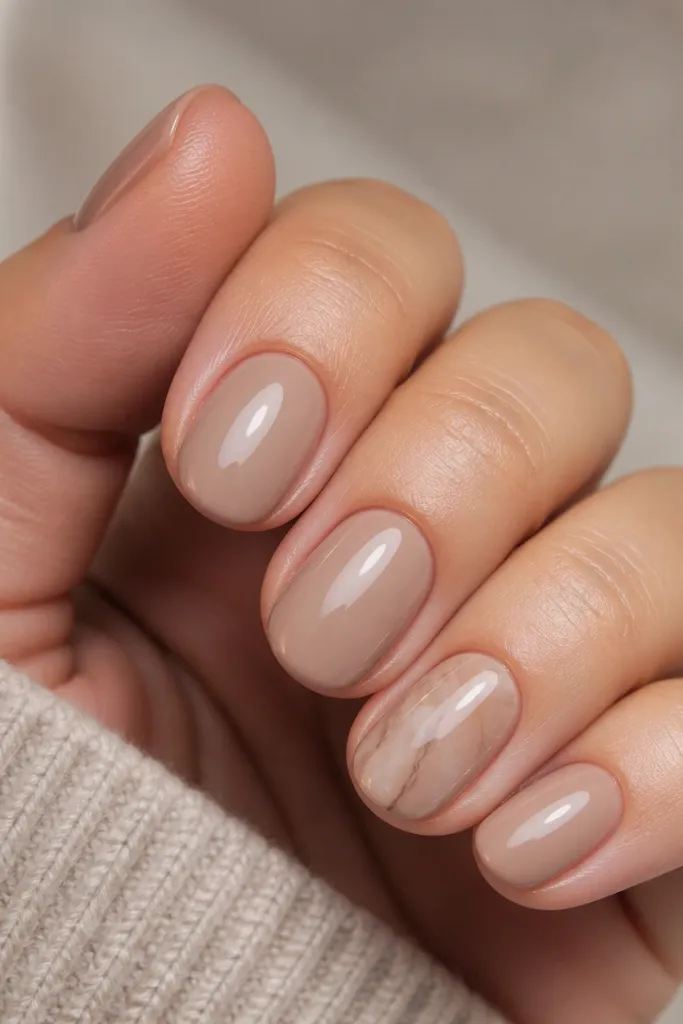
Marble can look expensive on short nails when you keep it minimal. I use a milky mocha base so the veins don’t jump out too harshly. The vein lines are thin and slightly irregular, like natural stone, and I put the marble on just one or two nails so the set stays clean. This looks great on medium to deep skin because the warm browns mimic jewelry tones. On fair skin, it still reads soft if your base is milky, not stark beige.
Paint all nails with a milky mocha base in two coats and cure fully. On the accent nail, add a second layer of a slightly darker taupe around the center area, then drag through with a fine liner brush to create vein paths. Use a lighter taupe or beige for one or two thinner “secondary” lines so it looks dimensional. Seal with a glossy top coat in two layers, letting the first settle so it doesn’t flood the veins.
Editor's noteDo the veins while the layer is slightly tacky for cleaner lines.
Skip thisSkip thick swirls — chunky marble veins make short ovals look bulky.
8. Pearlized Blush with Inner-Corner Glow
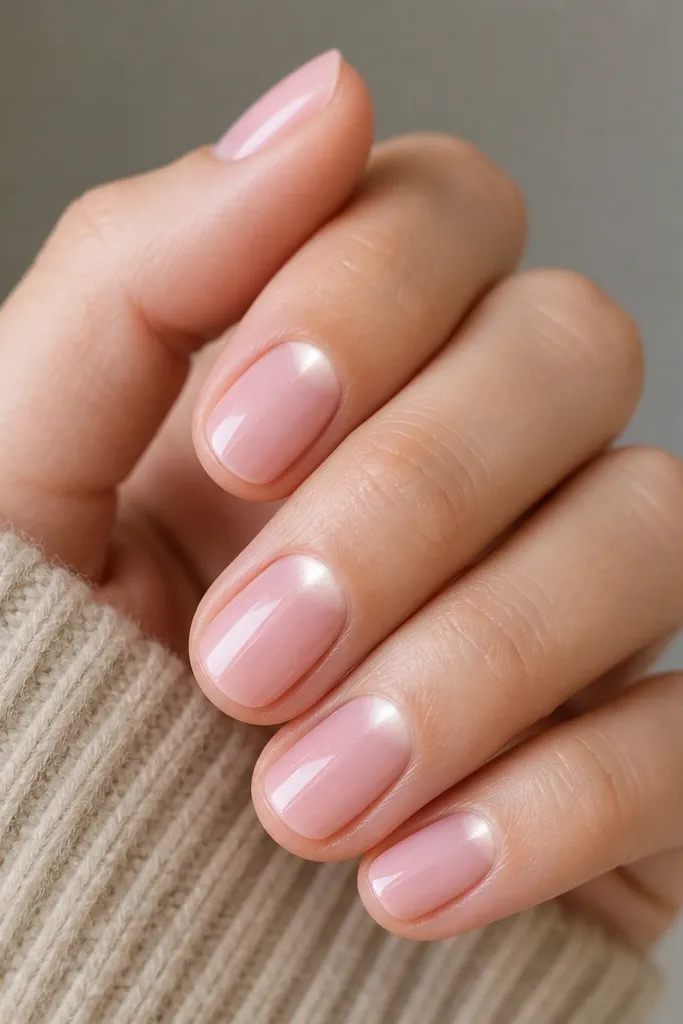
If you like a “glow from within” look, pearlized blush is the answer. The inner-corner glow makes the nail look like it has depth, even though it’s short. I keep the glow only near the cuticle inner corner (closest to the thumb side on each hand) so it doesn’t stretch across the whole nail. This design is flattering on every undertone because pearl shifts light instead of relying on a single opaque pigment. It’s also a great transition set for people who hate bright colors.
Start with a pearlized blush polish or mix a blush base with fine pearl powder if you’re doing gel. Apply two thin coats so it stays translucent and smooth. Use a tiny brush to add a slightly stronger pearl shade at the inner corner — just a small crescent near the cuticle. Blend outward with the brush tip using light pressure. Top coat with a glossy gel top and cap the free edge.
If your pearl looks chunky, thin it with a drop of clear gel so it levels before cure.
Don’t add glow to the outer corner too — it makes the nails look wider.
9. Clear Jelly Base + Tiny Red Outline Line
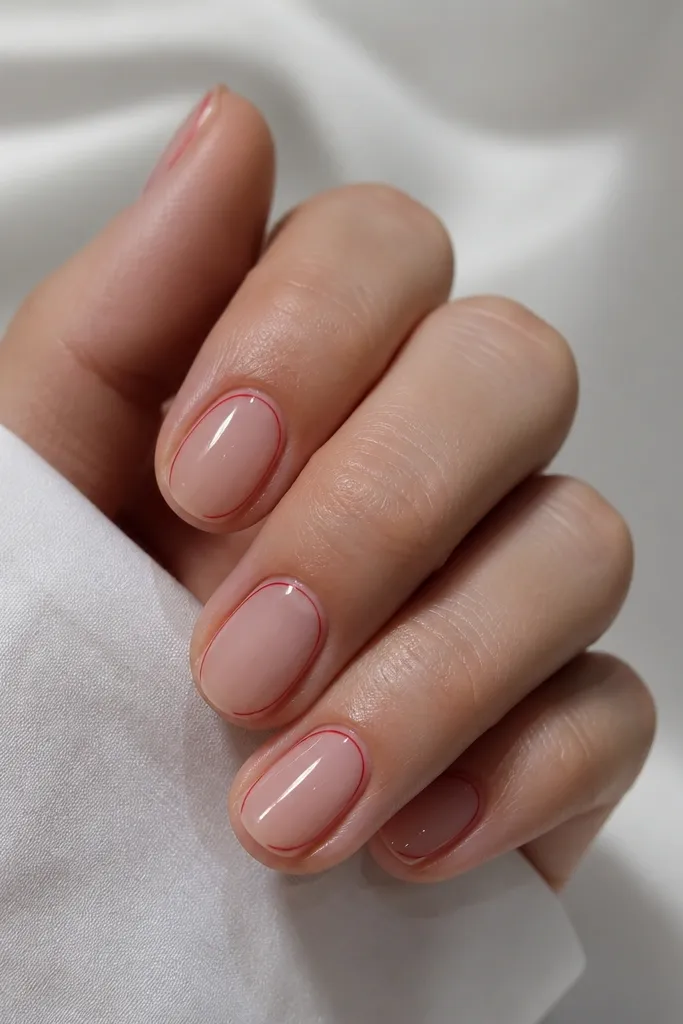
This is my go-to when you want a pop of color but you hate loud nail art. The clear jelly base keeps the nail looking clean and fresh, and the tiny red outline line adds a graphic detail without taking over. I use a true red that leans slightly cherry, not orange, because it looks crisp against the clear base. It flatters short oval nails by adding a thin vertical line along one side, which makes the finger look longer. It also suits both casual outfits and simple office wear because it’s one accent detail.
Apply a clear jelly base in two thin coats and cure. Use a striping liner brush to paint a single thin red line that sits 1mm above the sidewall edge, starting near the center and stopping before the tip. If you want it more defined, add a second pass only after the first line is cured. Seal with glossy top coat, then wipe the nail edges clean with a lint-free wipe so the line stays sharp.
Practice the line on a nail tip first — short ovals need steady pressure for a straight line.
Don’t outline both sides; two lines make short nails look boxed.
10. Olive Sage Solid with Matte Top + Glossy Center Dot
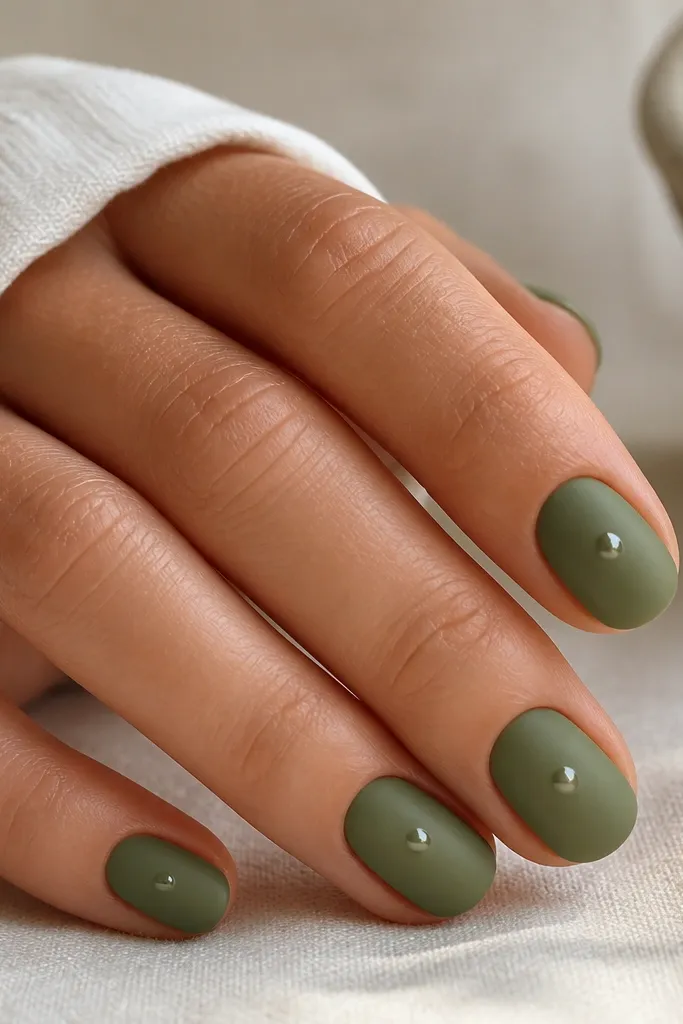
Matte is great for short oval nails because it softens the edges and makes the shape look smooth. Olive sage is a grounded green that looks good against a lot of skin tones, especially if you wear gold jewelry. The glossy center dot breaks the matte and creates a focal point that doesn’t need length. I like this for fall outfits, but I’ve worn it in summer too because the tone is calm. It also hides minor surface texture better than glossy-only sets.
Paint each nail with olive sage in two smooth thin coats and cure fully. Apply a matte top coat as the final layer, curing it until it turns fully non-gloss. Then take a tiny dot of clear gel or a glossy top and place it in the exact center of each nail. Cure the dot separately so it stays domed and shiny. Avoid extra top coat around the dot so the matte finish stays intact.
Use a toothpick for the dot if you don’t have a dotting tool — it gives a crisp point.
Don’t over-apply matte top; too thick can make the nail look dusty.
11. Soft Lavender Fade with Clear Cuticle Edge
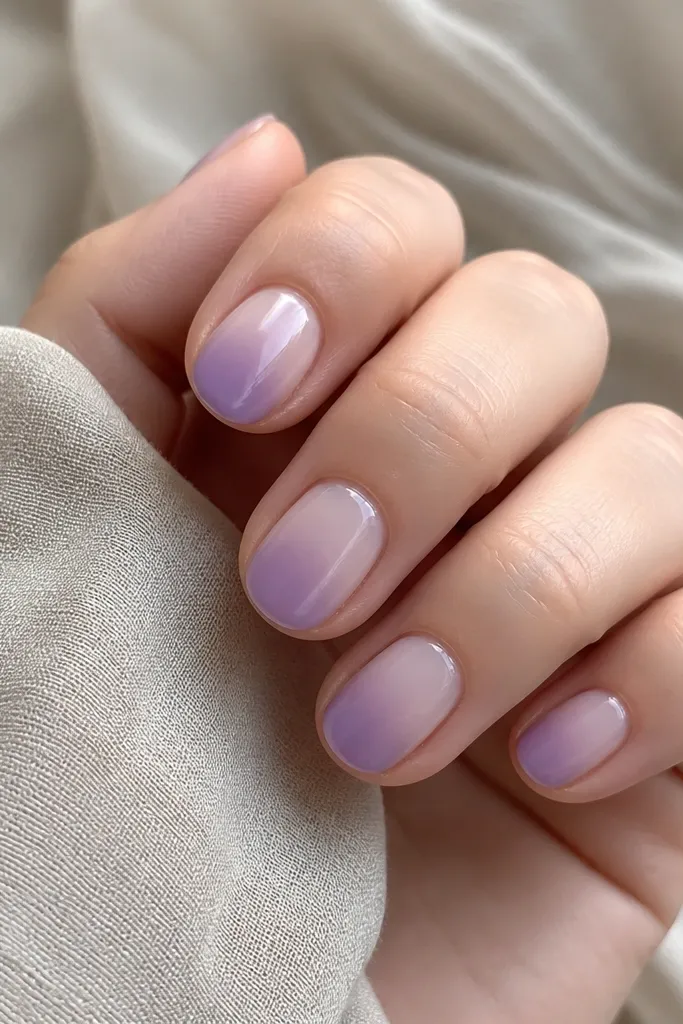
A fade helps short oval nails because it creates a gradual shift instead of a hard color block. The key is leaving a clear cuticle edge — a narrow band of your base showing — so the nail doesn’t look like it’s wearing a cap. I use a soft lavender that isn’t neon; it has a hint of gray so it looks refined. This design flatters hands with cooler undertones, but it still works on warm skin because the lavender is muted. It also makes your nails look longer because the color intensity starts lower and grows upward.
Start with a sheer base in one to two coats and cure. Sponge or airbrush lavender gel at the tip area only, then blend upward with a makeup sponge in light taps. Leave a clear band about 1.5mm near the cuticle so the fade doesn’t hit the skin. Build the lavender gradually — don’t try to get full opacity in one pass. Finish with a glossy top coat and cap the free edge.
Wipe the sponge lightly on a paper towel before tapping to prevent a harsh edge.
Don’t blend all the way to the cuticle; it turns into a flat solid color on short nails.
12. Nude Base + Tiny Gold Foil Corners
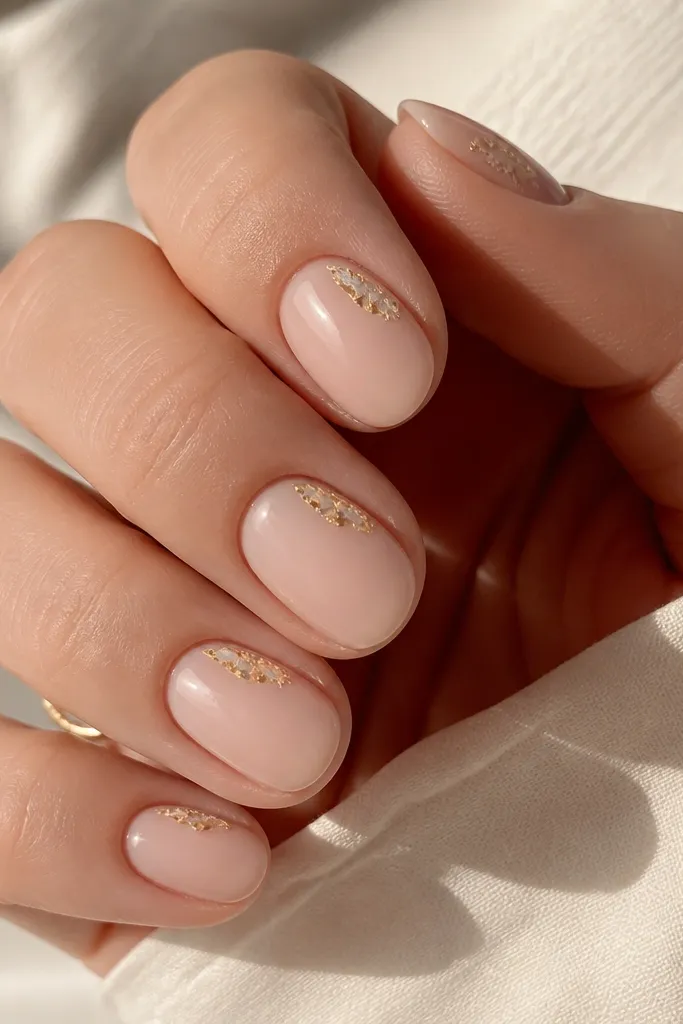
Foil corners are a trick for making short nails look “framed” instead of decorated. The nude base keeps it wearable, and the foil is placed only near the tip corners so it catches light when you move your hands. I use gold foil that’s irregular and thin, not chunky glitter, because chunky pieces look heavy on short ovals. This works on most skin tones — the nude can be pink-beige or neutral beige depending on your undertone. It also pairs well with jewelry because it echoes gold metal without needing a full accent nail.
Apply a nude base in two coats and cure smooth. Use a small amount of nail glue or foil transfer gel right near each tip corner — just a tiny dot of adhesive. Press thin gold foil pieces into the adhesive and tap off excess so the foil stays delicate. Seal with a layer of top coat that’s slightly thicker, then cure and repeat if you need extra coverage over the foil texture.
Editor's noteKeep foil placement symmetrical: both corners should sit at the same height on every nail.
Skip thisDon’t place foil in the center — it makes the nail look cluttered.
13. Classic Blush French with Extra Thin Line
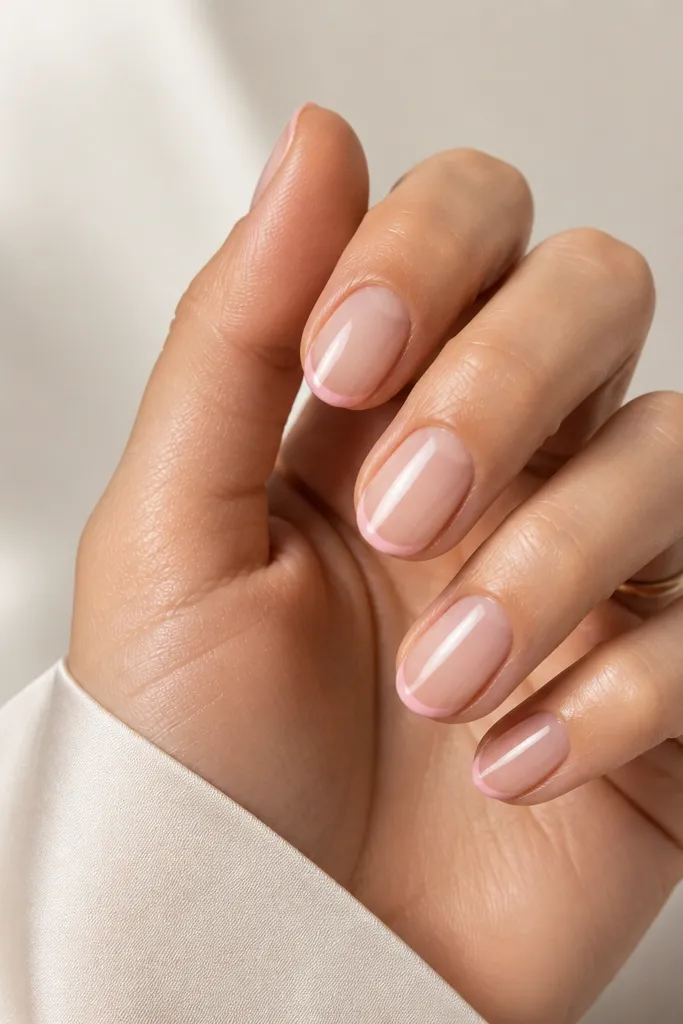
This is the softest “French” look that still reads polished on short oval nails. Instead of using stark white, I use a blush-pink that matches the base so the line looks like a natural gradient. The line is extra thin — about 1mm — which keeps the nail from looking shorter. This flatters hands with short nail beds because the thin line adds structure without adding bulk. It also works for work, weddings, and everyday because it’s subtle but intentional.
Apply a sheer blush base in two coats and cure to a glassy shine. Use a French guide or freehand with a striping brush to paint an ultra-thin line at the tip, keeping it centered. Keep the line slightly curved to match your oval shape, and stop it about 0.5mm before the sidewalls. Let it self-level, cure fully, then apply top coat in two layers for a smooth surface over the line.
Editor's noteIf your line looks uneven, use a tiny brush with acetone-free remover to correct before cure.
Skip thisDon’t thicken the French to “cover mistakes” — it will make the nails look shorter.
14. Black Micro Dot Grid on Sheer Nude
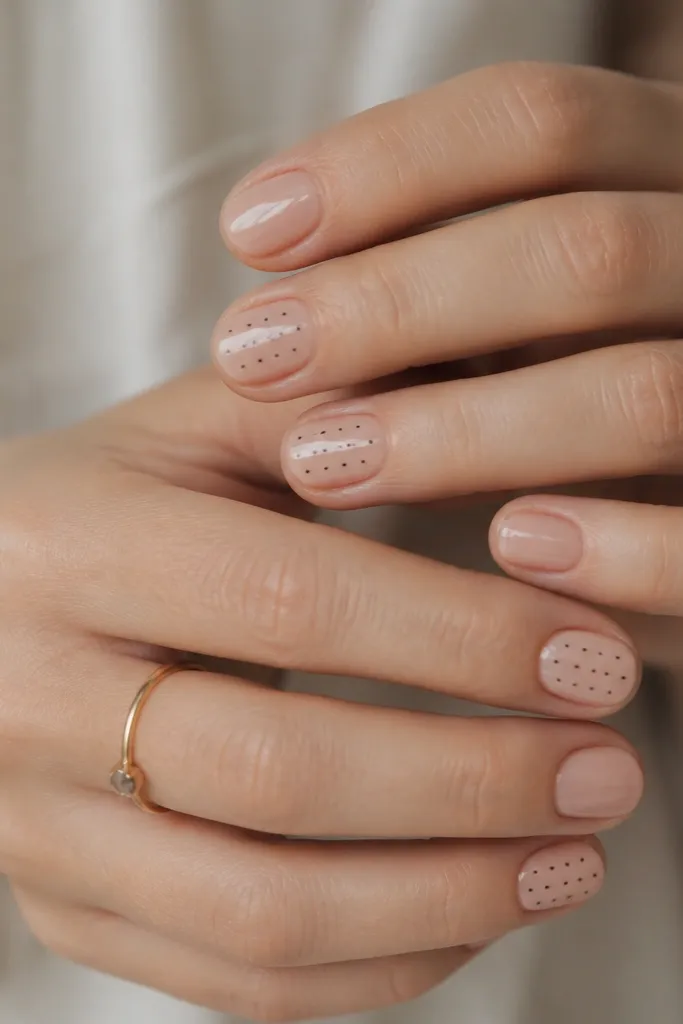
A micro dot grid gives pattern without taking over the nail. I keep it black on a sheer nude base so it looks crisp but still soft because the dots are small and spaced. On short oval nails, you need less pattern area — I place the grid in the center band, not across the whole nail. This design looks great on medium to deep skin because black pops cleanly, but it also works on fair skin if your nude base is not too pale. It’s a good choice if you want something graphic but still wearable.
Start with a sheer nude base, two thin coats, and cure. Choose one or two accent nails and mark a center band about 3mm wide. Use a dotting tool to place tiny black dots in a grid pattern with even spacing, keeping the grid away from the sidewalls by about 1mm. Cure, then top coat twice so the dots stay sealed and don’t snag on clothing.
Editor's noteUse a dotting tool with a smaller tip than you think — micro dots look intentional on short nails.
Skip thisDon’t cover the entire nail with dots; short ovals need breathing room.
15. Soft Pearl French Ombré Tip
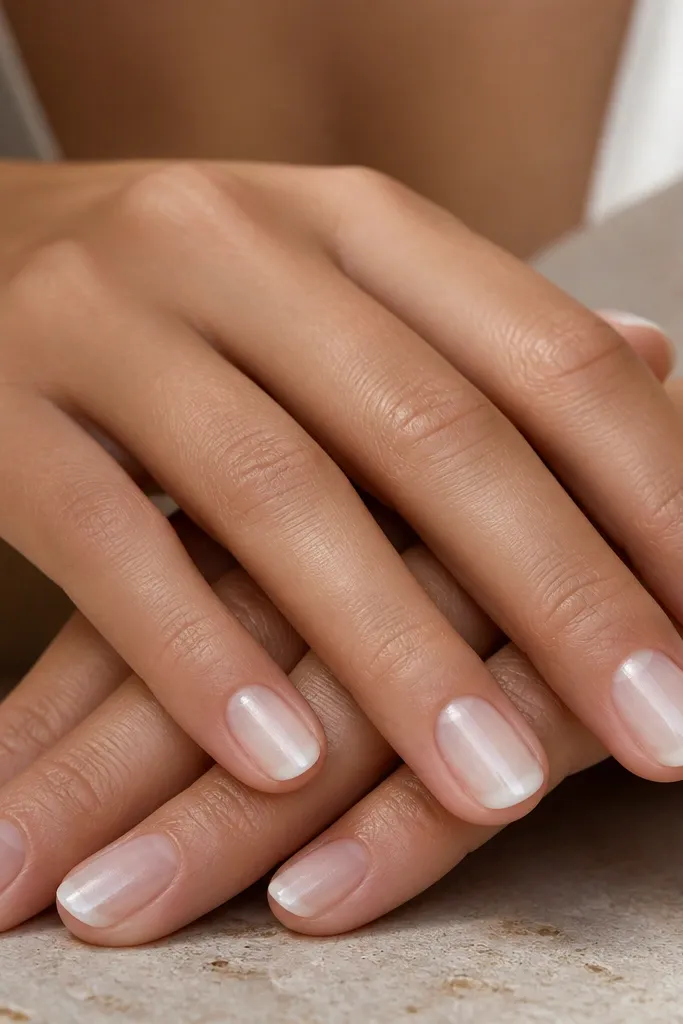
This one is my “special event but still natural” set. The pearl ombré tip gives you a French shape without a hard line, and the fade makes short oval nails look smooth rather than outlined. I use a pearl that leans champagne, so it flatters warm undertones and doesn’t look chalky. The gradient also makes fingers look more elongated because the strongest color sits at the free edge and softens as it moves inward. It’s gorgeous on both fair and deeper skin tones when the base is sheer and clean.
Apply a sheer base in two coats and cure. With a small sponge, dab pearl gel at the very tip edge, then blend upward using light taps until you get a soft gradient. Keep the pearl concentrated within about 2-3mm from the tip — that’s what makes it look like a tip ombré instead of full nail color. Cure and then apply a glossy top coat to smooth the gradient. If you see any patchiness, add a second pearl layer only at the tip edge.
Editor's noteBlend with taps, not swipes. Swiping creates streaks on short ovals.
Skip thisDon’t make the gradient start too high or it turns into a pale cap.



