
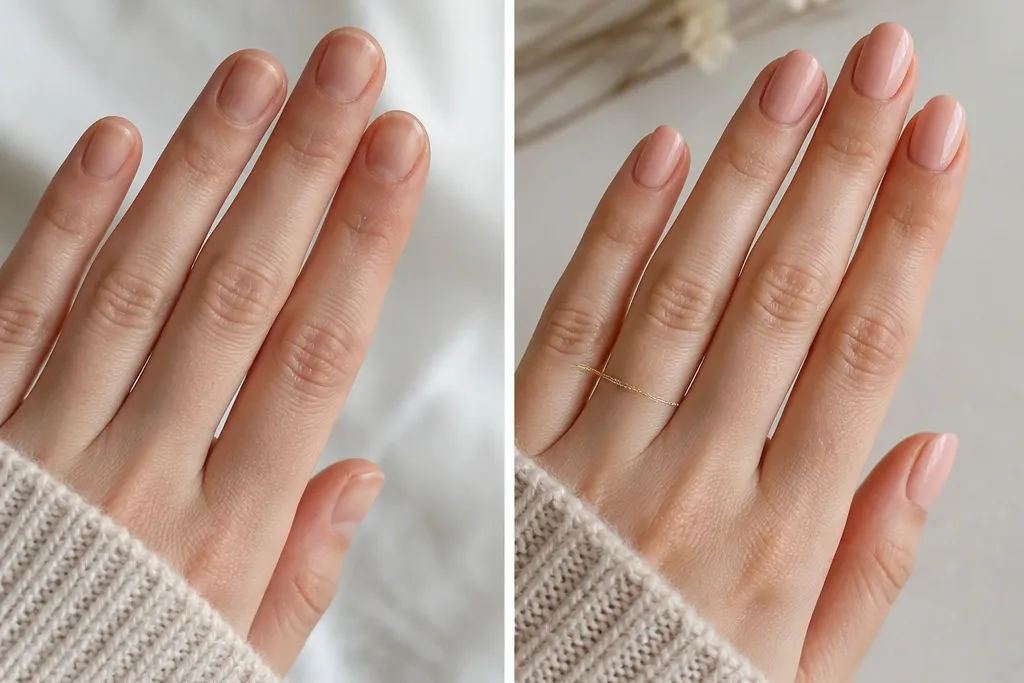
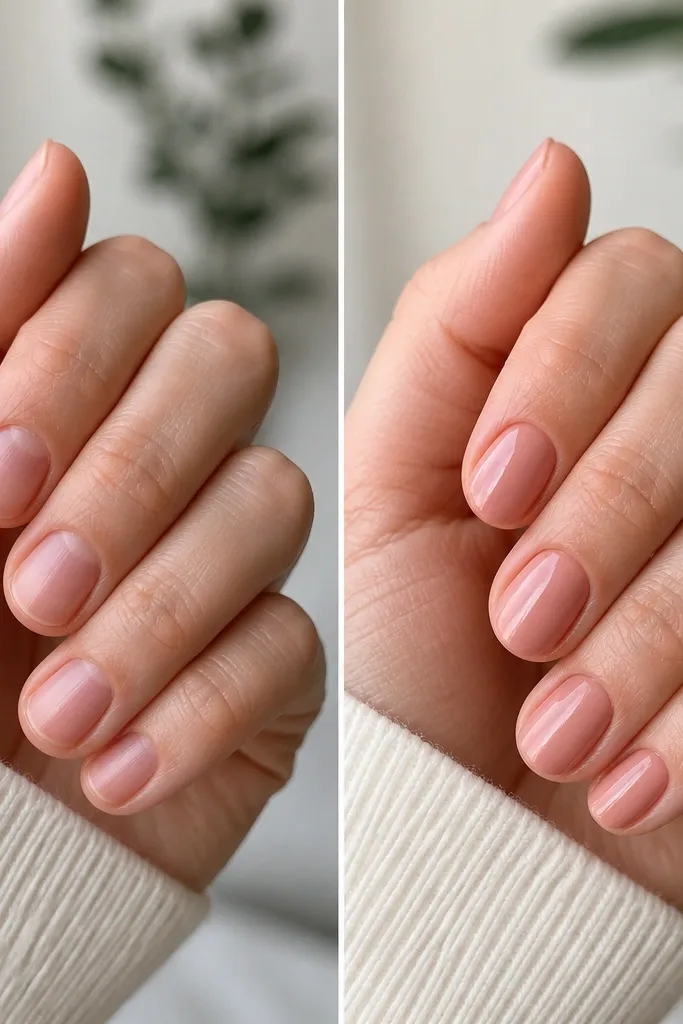
1. Milky French with sheer rose base
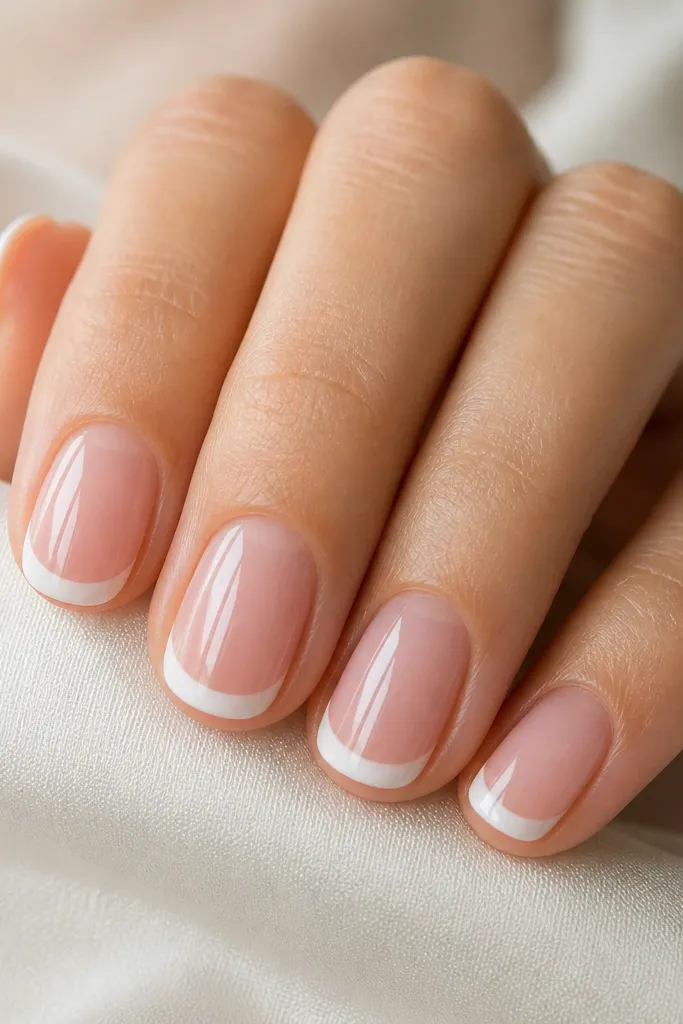
This is the French tip that looks like you paid for a salon set even when your nails are short. The sheer rose base warms your skin, and the milky white tip stays bright without looking stark. On light to medium skin tones it reads clean and “fresh manicure,” and on deeper skin tones it still looks balanced because the base isn’t too pale. I like this for work days and photos because the milky white blends slightly into the nail bed, so growth lines don’t scream.
Start by pushing back cuticles and buffing off shine, then apply a thin layer of rubber base or builder. Cure, then paint a sheer rose pink in two thin coats, curing between coats. For the French tip, use milky white gel and place the smile line first — keep it low and follow the oval curve. Fill the tip area evenly, then cap the free edge with a thin white layer before top coat.
If your smile line shakes, place a French guide lightly, paint the tip, then peel the guide while the gel is still tacky.
Don’t use opaque snow-white over a super pale base — it can look like a sticker and make short nails look wider than they are.
2. Classic French with optic white micro-tip
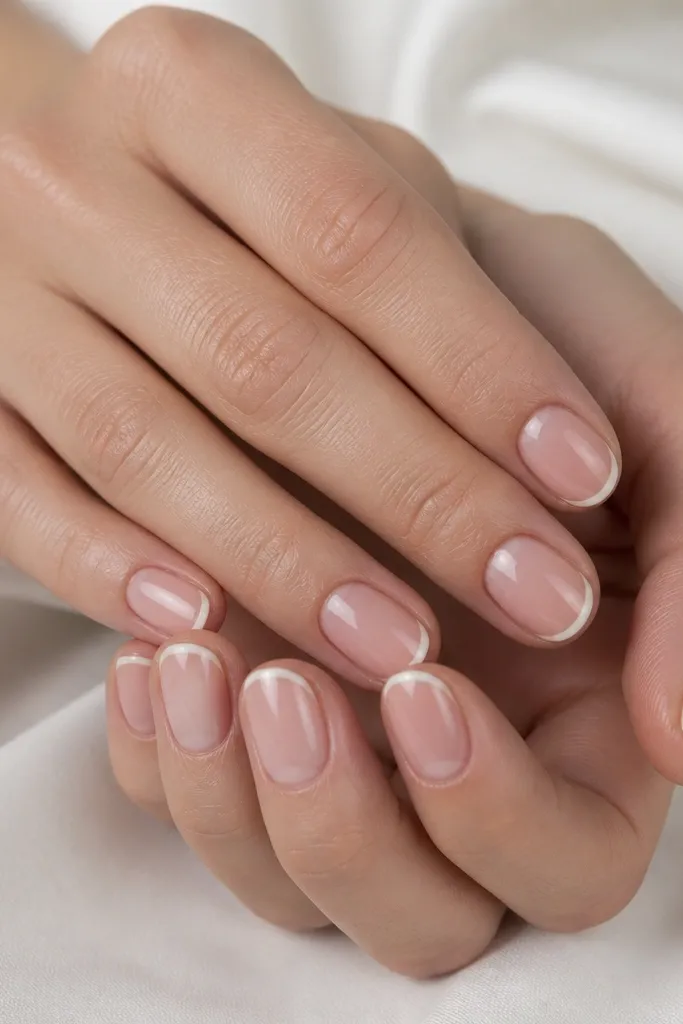
This one is for when you want the transformation to look sharp and “intentional” rather than soft. The optic white is crisp, and the micro-tip keeps the nail from looking stubby. On fair skin, it looks bright and clean; on tan to deep skin, it creates contrast without turning into heavy nail art. I also love it if you wear long sleeves or have short nails that show at work — the thin tip reads neat instead of busy.
Apply a nude pink jelly base in two thin layers, curing each time. Then take a gel liner brush and draw a thin arc where your tip should start — keep the arc centered and slightly higher in the middle. Fill just the tip area with optic white, staying narrow so the oval shape stays the star. Finish by sealing the edge and adding a glossy top coat in one smooth swipe.
Use a liner brush with a pointed tip, not a flat art brush — the micro-tip needs precision.
Avoid thick French tips on short ovals; they make the nail look wider and shorter in photos.
3. French ombre fade at the tip edge
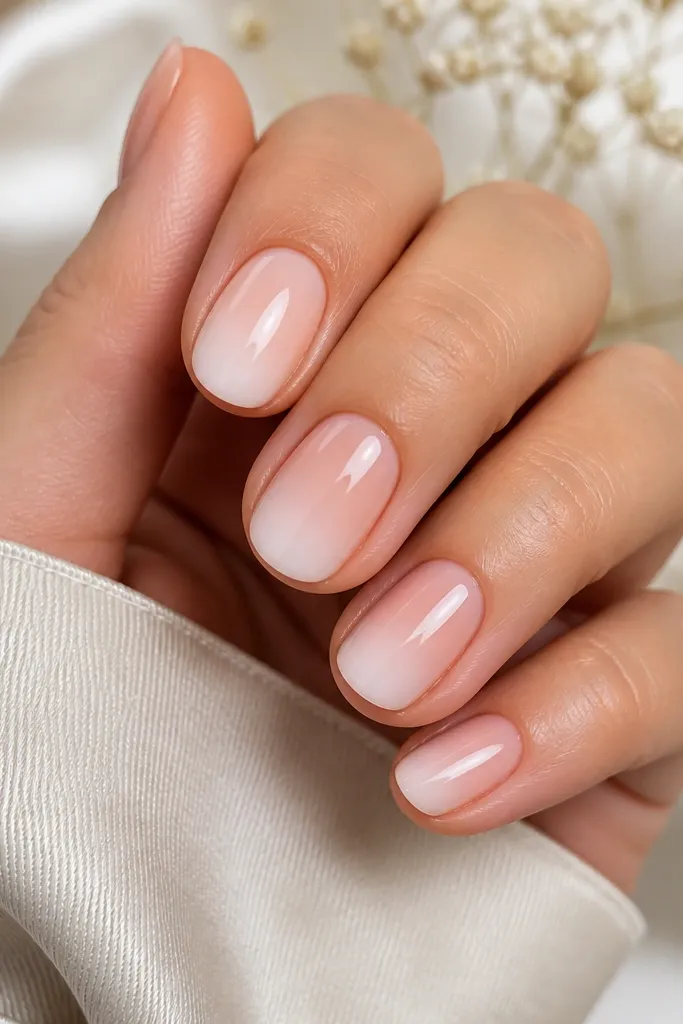
Start with a nude base that matches your undertone: pink-leaning nude for cool undertones, peach-leaning nude for warm undertones. After two coats and curing, mix a white gel with a tiny drop of clear or base gel to create a lighter translucent white. Paint the tip area from the edge inward with the opaque white first, then soften the inner edge with the translucent mix using a sponge or a small makeup brush. Top coat seals the gradient so it stays smooth.
When you want the before and after to look more “designer” without adding length, a fade French does it. The gradient makes the tip look like it melts into the nail, so short nails don’t get that harsh cut-off feeling. It flatters almost every skin tone because the fade uses your nude base as the middle color. I wear this when my hands look drier or when I want something pretty that still looks natural.
Skip thisDon’t drag the brush across the already-cured white; it will create streaks and muddy the fade.
Editor's noteDo the ombre with thin layers — three light passes look better than one thick one.
4. Reverse French with nude tip border
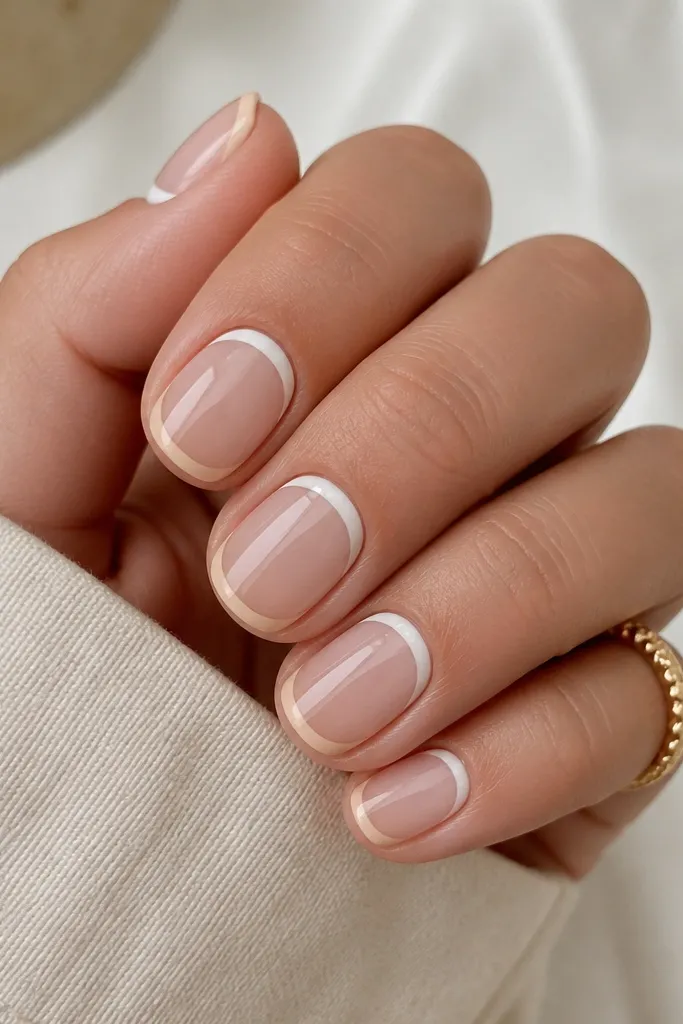
Apply a sheer pink base in two thin coats, then cure. Use white gel to draw a clean curve near the cuticle — keep it small and centered, leaving a little space from the cuticle line so it doesn’t flood. Then outline the lower part of the tip with a nude gel or nude liner to create the reverse border. Cure, clean the edges with a small brush and alcohol, then add top coat.
Reverse French is a cheat code for making short oval nails look longer because your eye goes to the top curve near the cuticle instead of only the tip. The sheer pink base keeps it airy, and the nude border frames the shape so it doesn’t look messy. I love this on hands with shorter nail beds because it visually “pulls” the design upward. It also looks great if you like minimal nail art but still want a noticeable set.
Skip thisSkipping edge cleaning is the fast way to make reverse French look smudged.
Editor's noteLeave a tiny negative space at the cuticle so the reverse curve stays crisp instead of growing out into a blob.
5. French tip with gold foil line
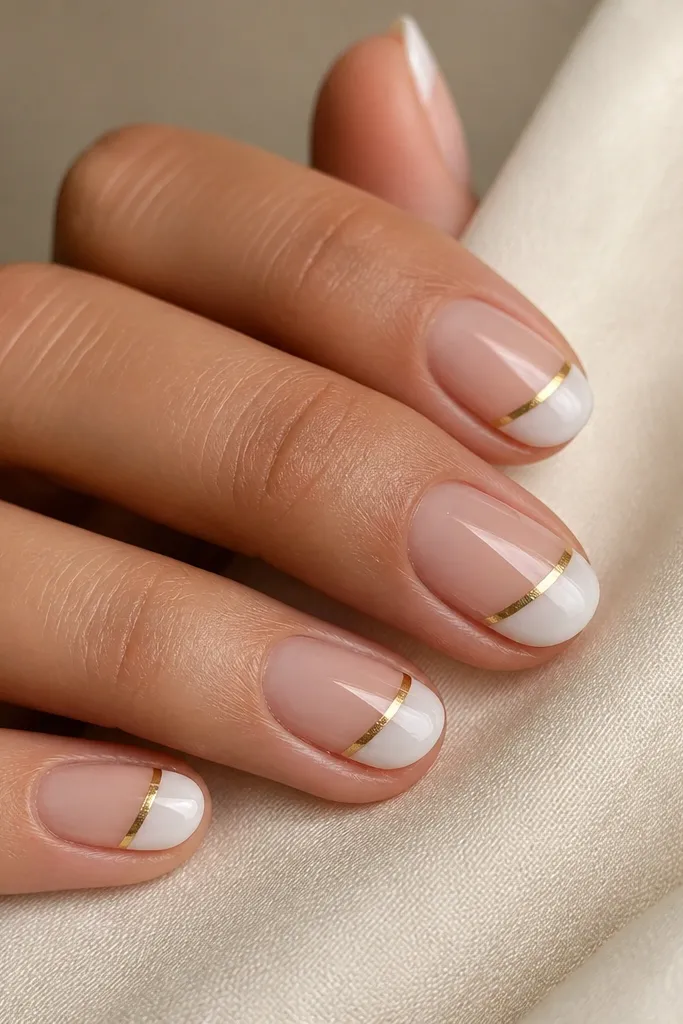
Paint a sheer nude base and cure. Apply milky white French tips in your usual thin-to-medium width. Right before curing the top layer, press a small piece of gold foil onto the smile line using tacky gel or foil glue — keep it narrow, about 0.5-1 mm wide. Seal with top coat, and cap the free edge so the foil doesn’t lift.
Gold foil turns a basic French into a “special occasion” set without adding extra steps to your whole nail. The gold sits right on the smile line, so it frames the short oval shape and makes the tip look more defined. It works especially well on medium and deep skin tones because the contrast looks intentional and clean. I do this when I want something that still looks classy with rings and a watch.
Skip thisDon’t cover foil with thick gel — it dulls the shine and can make the gold look cloudy.
Editor's noteTrim the foil with scissors first so you’re placing a precise strip, not fighting big pieces.
6. French with tiny 3-dot corner accent
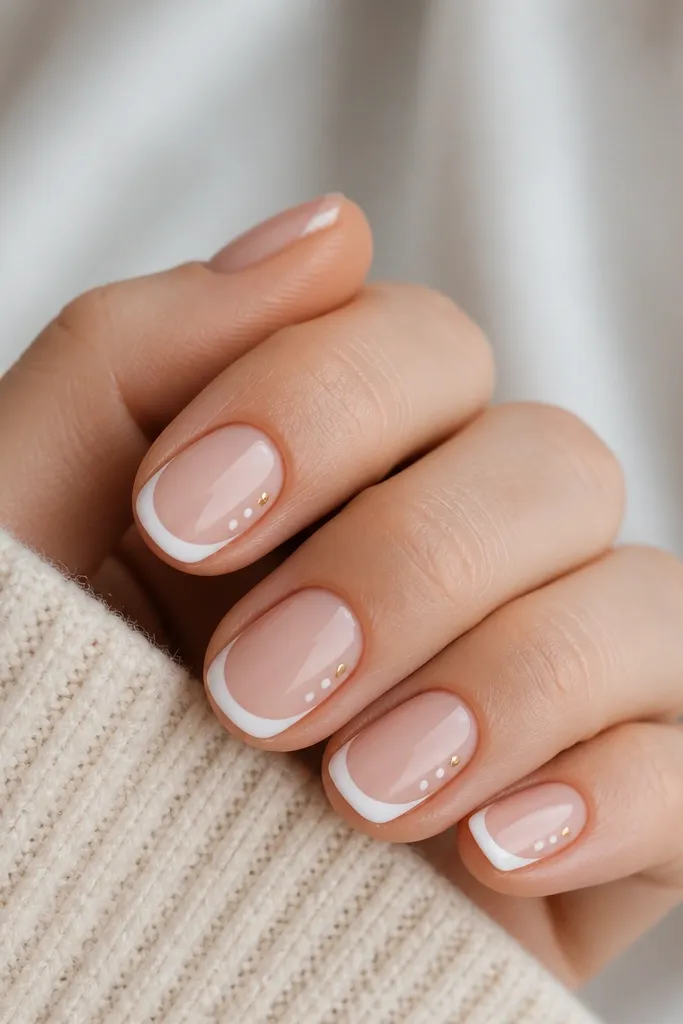
This design is small but it changes the whole vibe. The white French keeps it classic, and the three-dot corner accent adds a playful detail without crowding short nails. I like it on short ovals because the dot cluster sits where your eye naturally looks — at the outer edge — which gives the nail more “design direction.” It’s perfect for spring outfits and short nail wearers who still want compliments.
Start with a nude base and cure. Paint a thin French tip in milky white, keeping the smile line low. Use a dotting tool to place three tiny dots near the outer corner of the tip area, about a third of the way in from the side wall. Color plan: two dots in white, one dot in gold or champagne for a single highlight. Finish with glossy top coat over the whole nail.
If your dots spread, let the French tip cure fully, then dot — tacky gel under the dots can smear.
Don’t put dots in the center of the nail; on short ovals it makes the nail look shorter.
7. Black micro French on nude beige
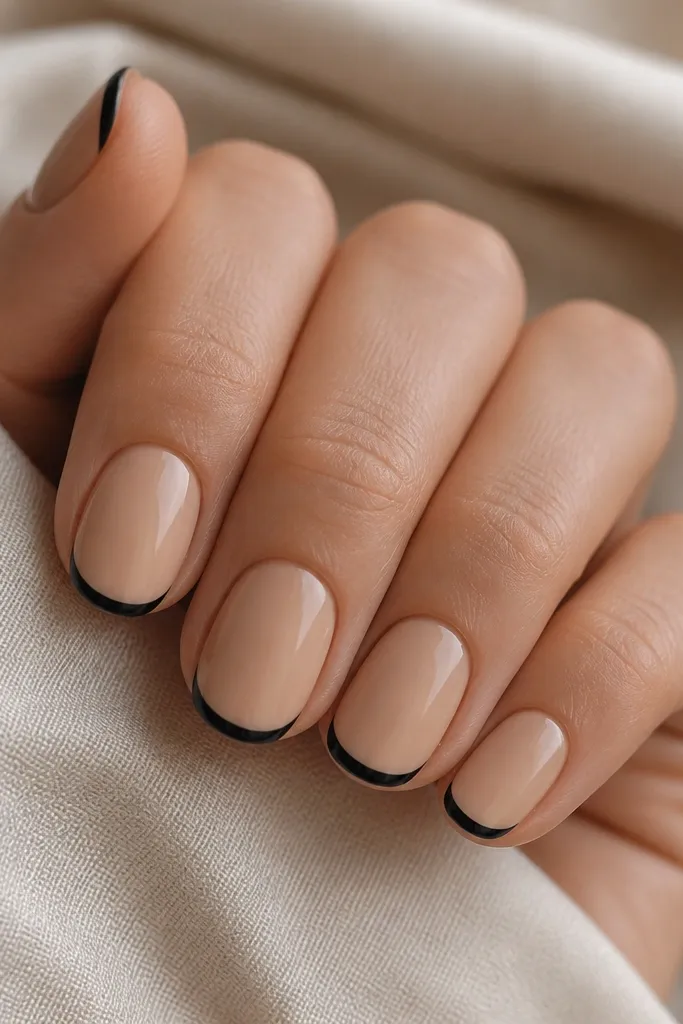
Black French tips look bold, but on short oval nails they can still look refined when the tip is thin. The nude beige base makes it wearable instead of goth-overload. I like this on medium to deep skin tones because the contrast makes the oval shape pop. If you wear black eyeliner or gold jewelry, this set matches without trying too hard.
Apply nude beige in two thin coats, curing each. Use a liner brush and black gel to draw a very narrow French arc. Keep the tip width consistent across nails so they look like one set, not different hands. Seal with either a satin top coat for a soft look or glossy if you want sharper reflections. Finally, cap the free edge to prevent tip chipping.
For a crisp smile line, rest your pinky on the table so your wrist doesn’t float.
Avoid thick black tips; they make short nails look heavy and blocky.
8. French with pale blue scallop edge
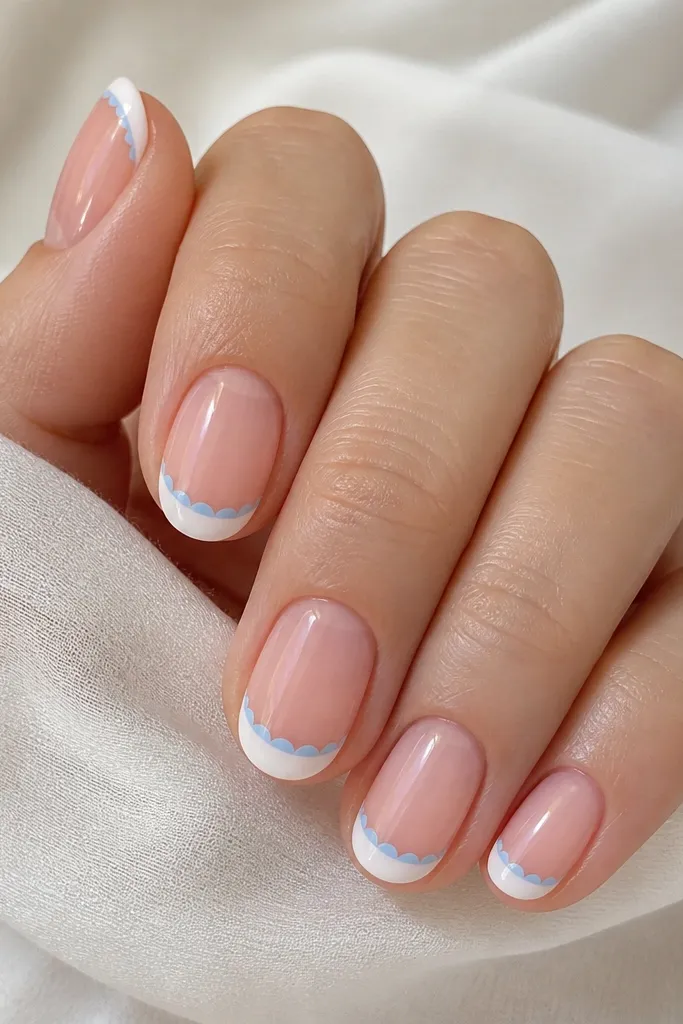
Paint the sheer pink base and cure. Apply milky white French tips, then cure. With a fine detail brush, add pale blue half-moon scallops along the outer edge of the tip — keep each scallop small, about the width of a grain of rice. Only do the outer edge, not the whole tip, so the nail stays balanced. Seal with glossy top coat and cap the tip edge lightly.
Scallops add movement, and pale blue keeps it fresh instead of childish. The sheer pink base makes the set airy, while the milky white tip gives you a clean canvas for the blue edge. This looks great on cool undertones and fair skin, but it also works on warm tones if your blue is soft (think powder blue, not neon). I wear this when I want something light and pretty that still looks designed.
Skip thisDon’t add scallops across the entire tip; short ovals get visually crowded fast.
Editor's noteDo scallops in one direction so the curve stays consistent across nails.
9. Sheer nude French with micro rhinestone line
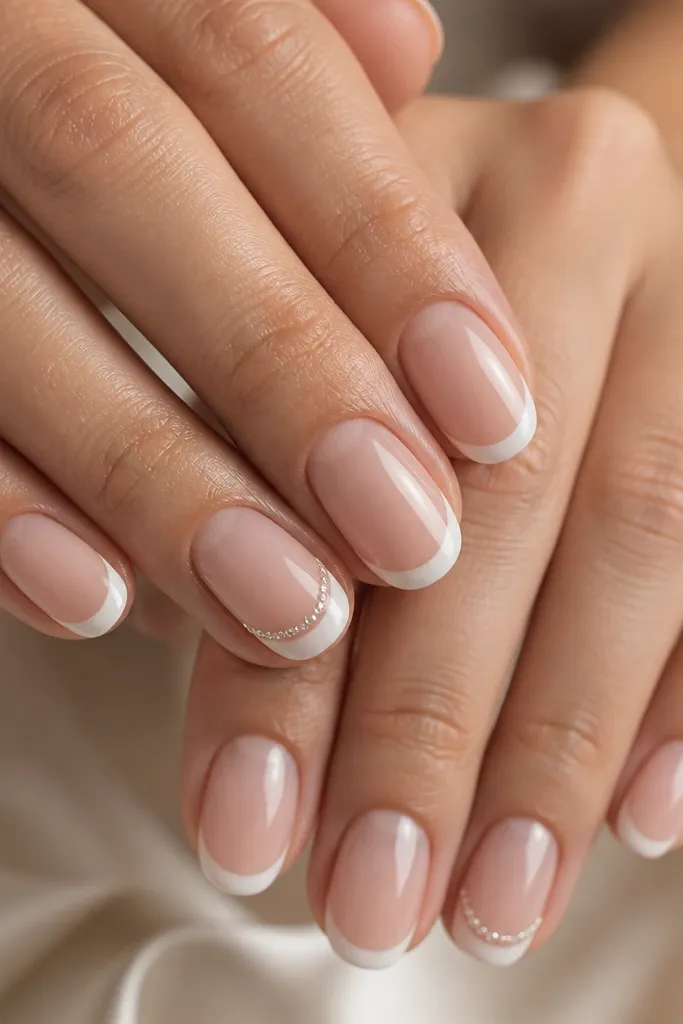
Rhinestones can look classy on short nails if you keep them tiny and place them in one line. This set stays elegant because the base is sheer and the French tip is thin. The rhinestones are small enough to catch light when you move your hands, not when you stare straight at them. I love it for weddings, holiday parties, and dinners where you want sparkle without long nails.
Apply a sheer nude base and cure. Paint thin milky white French tips and cure fully. On the two accent nails, add a strip of clear builder gel on the smile line area, then place micro rhinestones with tweezers — spacing should be even, and each stone should sit flat. Cure, then top coat over stones carefully in one smooth layer so they don’t snag on fabric. Cap the free edge with top coat to prevent lifting.
Use a small amount of gel under rhinestones; too much makes them swim and look uneven.
Avoid big stones on short ovals; they overpower the nail and look bulky.
10. Rose French with thin diagonal gold line
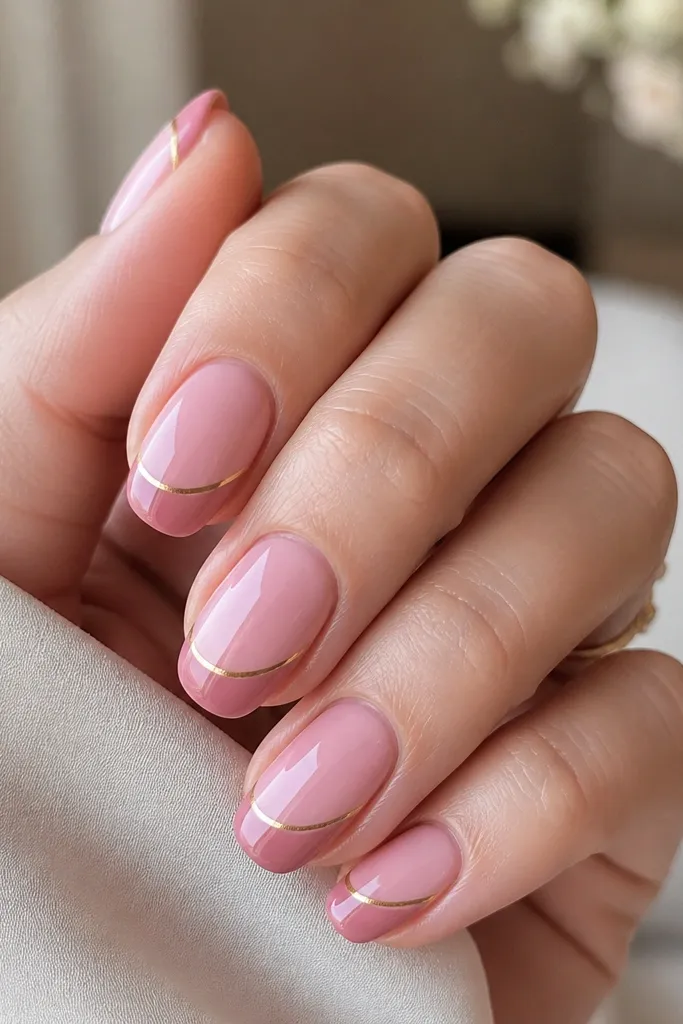
Start with a rose base close to your natural nail color, cure. Paint the French tips in a slightly deeper rose, keeping them medium-thin so the diagonal line has room. Use gold striping gel or a fine gold liner to draw one diagonal line per nail, starting at the outer tip corner and ending near the center of the tip. Keep the line thickness under 0.5 mm so it stays delicate. Top coat and cure, then wipe the tacky layer if needed.
Diagonal lines give short nails a longer, more “drawn out” look. The rose French is gentle and flattering, while the thin gold line adds structure and makes the design feel modern. This works really well if you wear gold rings because your jewelry and nail lines echo each other. I also like it on medium skin tones because the rose shades blend nicely and don’t look chalky.
Skip thisDon’t add diagonal lines to every nail with thick strokes; it turns into clutter on short ovals.
Editor's noteUse striping gel if you want the line to stay perfectly even — regular gel can flood the brush.
11. Two-tone French with blush + white split
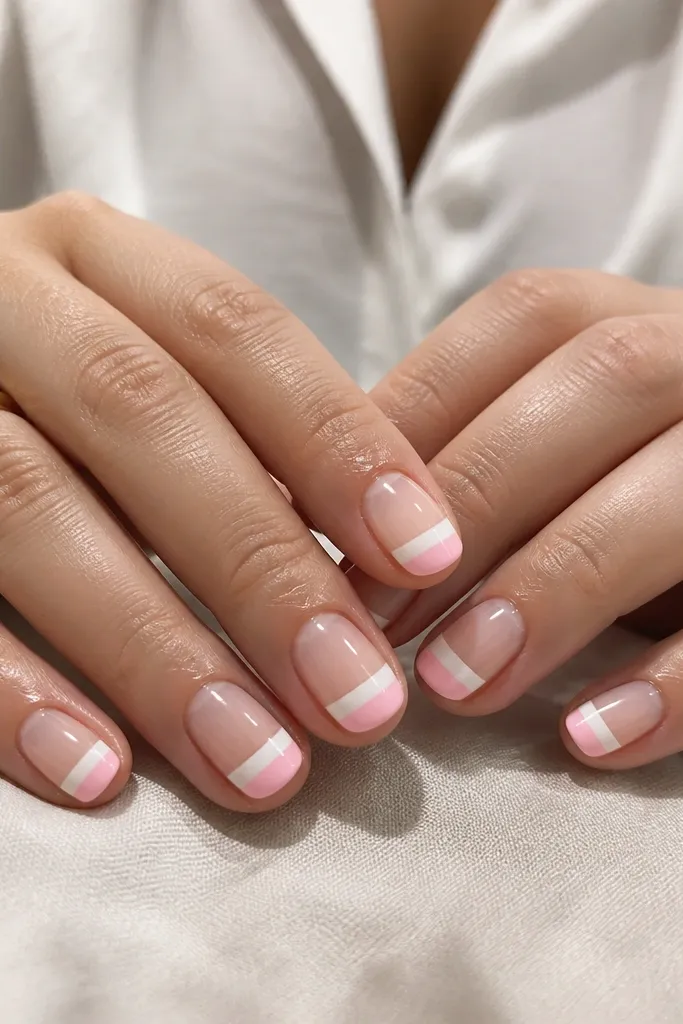
A split-tone tip looks styled because it creates a graphic block, but the colors are soft enough for everyday. The blush portion flatters warm undertones, and the milky white keeps it bright without harshness. On short oval nails, the clean separation line makes the tip look intentional instead of accidental. I recommend this when you want something different from the usual arc French but still want the “before and after” clean look.
Apply your clear pink or sheer nude base and cure. Paint the full tip area with milky white first, staying within the tip boundary, then cure. For the split, use a thin brush to draw a straight line across the tip — aim for a line about halfway down the tip area. Fill the lower half with blush pink gel and cure again. Seal with top coat, then lightly cap the free edge.
Let the first white layer cure fully before you split the colors — it prevents bleeding.
Avoid a wobbly split line; it makes the design look like it was done in a hurry.
12. French with nude ombre to the tip
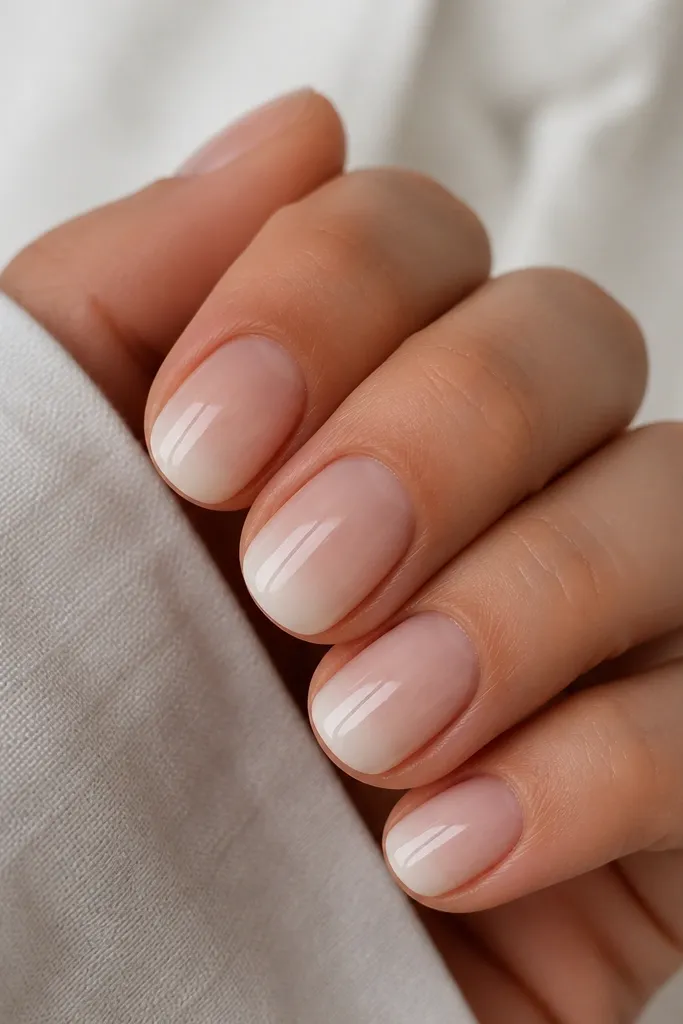
This is for people who hate hard lines. The nude ombre tip makes short oval nails look smooth and stretched because there’s no stark boundary. It’s flattering on every skin tone because the gradient stays close to your natural nail color family. I use this when my nails are a little dry or uneven, because the fade visually smooths the surface.
Apply a sheer base and cure. Take a nude gel that’s one shade darker than your base and paint it from the mid-nail toward the tip area, leaving the center of the nail lighter. Use white gel lightly at the very edge, then blend backward with a small sponge or a soft brush before curing. You want a smooth transition, not a patchy gradient. Finish with a glossy top coat and cap the free edge.
Blend while the gel is still workable — if it’s too thick, the gradient turns chalky.
Don’t go too white too fast; heavy white on short nails makes the tip look thick.
13. Clear French with glossy jelly tip
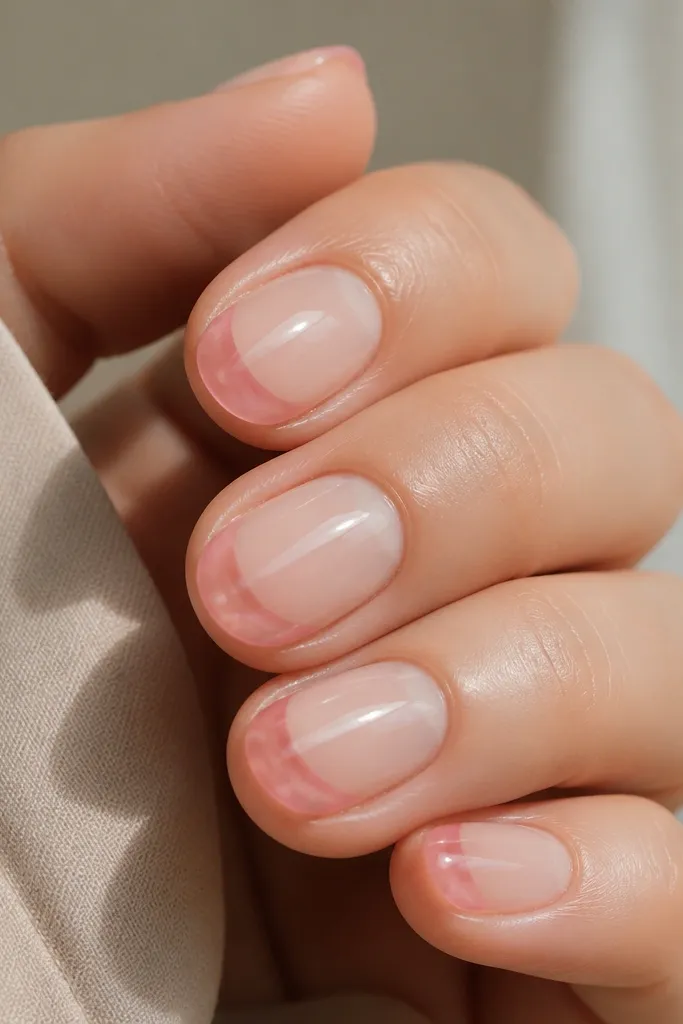
Clear French is the “clean but different” choice. The translucent jelly tip looks like it’s floating above the nail, which makes the nail bed look fuller without adding length. It’s flattering for hands that look dry because the base doesn’t cling to texture the way opaque colors can. I also like it for summer because it looks fresh and light in daylight.
Start with a clear or super sheer pink base, cure. Use a jelly pink gel for the French tip, painting a crisp arc and keeping the tip slightly translucent — build in two thin coats instead of one thick coat. Cure each coat so the jelly stays smooth. Then add a glossy top coat that is slightly thicker than usual to enhance the “wet look.” Seal the free edge so the tip stays intact.
If your jelly is too opaque, mix a tiny drop of clear gel into the jelly before painting.
Don’t skip a proper seal at the edge; jelly tips lift faster on short nails.
14. French tips with negative space crescent
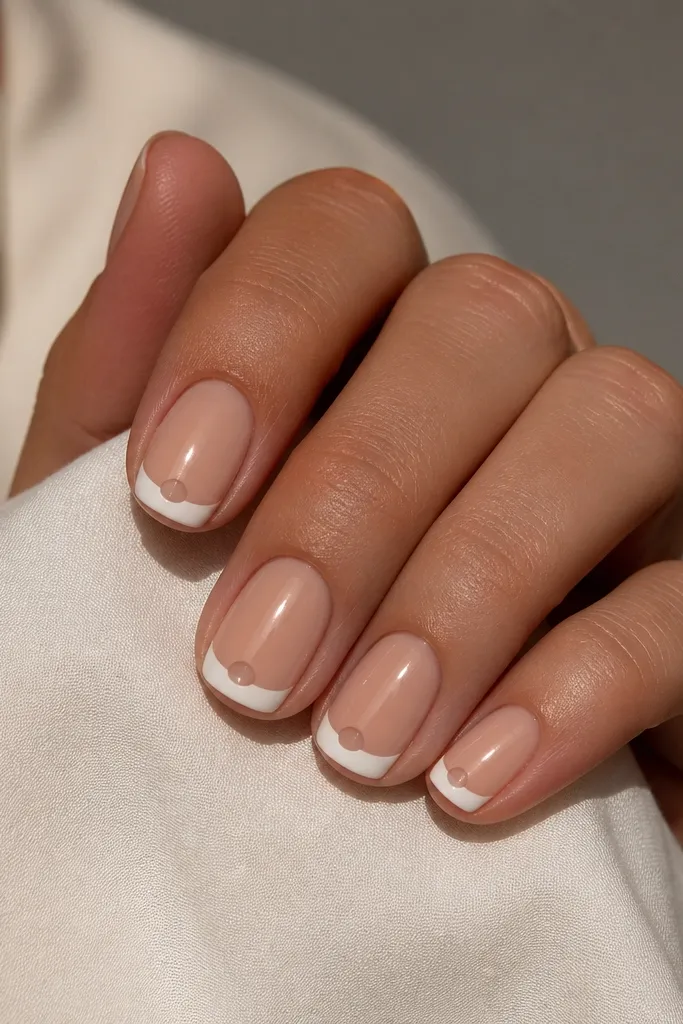
Negative space makes short nails look more modern and less “painted on.” The crescent cut-out breaks up the tip area so your nail doesn’t look blocky. This is a great option if you’re growing out damage or ridges because the design draws attention to shape, not texture. It flatters most skin tones, and the crisp crescent looks especially good if you like clean, architectural nail art.
Apply a nude base and cure. Paint the French tip in white, but leave a small centered crescent area unpainted by placing a tiny piece of nail guide or using a striping tape as a mask. Remove the guide carefully after the white layer is in place, then cure. Clean the edges with a brush dipped in alcohol to keep the crescent crisp. Finish with a glossy top coat over everything.
Use thin striping tape for the crescent mask — it gives you a cleaner curve than freehand.
Avoid a crescent that’s too big; on short ovals it steals too much of the nail shape.
15. French with micro chrome at the tip edge
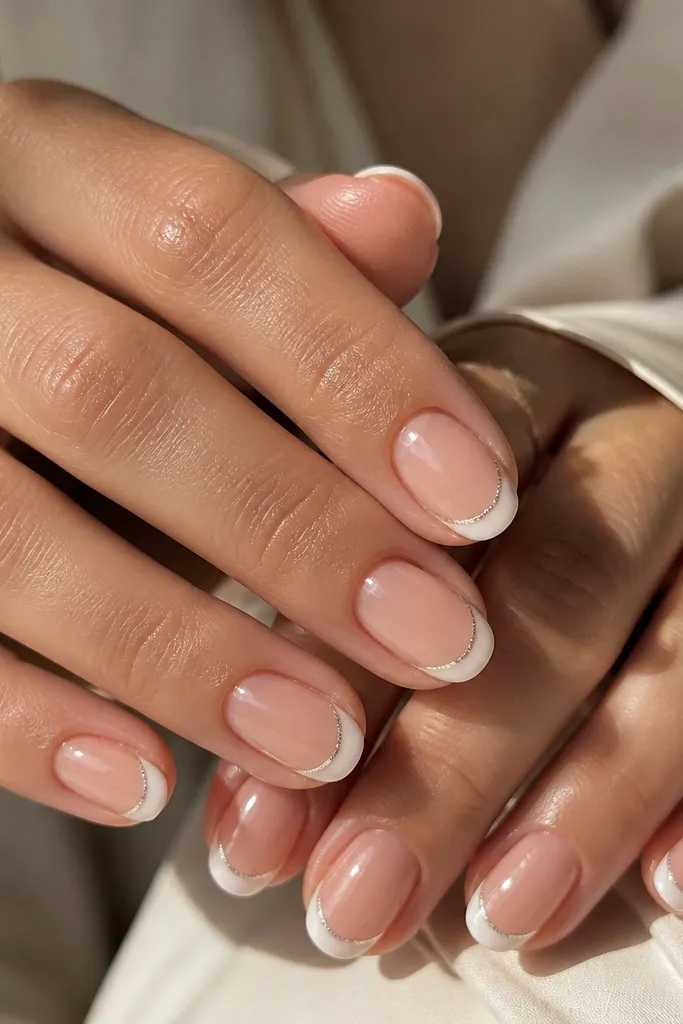
Paint a sheer nude base and cure. Apply milky white French tips and cure. Add a thin layer of gel at the outer edge of the white tip only, then tap micro chrome powder along that edge — keep it as a line, not a full coat. Press gently with a sponge applicator so it’s even. Seal with glossy top coat and wipe any excess chrome powder before curing.
Micro chrome makes the French tip feel expensive without covering the whole nail. The chrome line at the tip edge catches light when you move, which makes short oval nails look more polished in motion. I like it on medium to deep skin tones because the metallic highlight looks crisp against the white. It also works for day-to-night because the sparkle is subtle up close and stronger in sunlight.
Skip thisDon’t put chrome under the white; it can tint the white and look uneven.
Editor's noteUse a light hand with chrome — too much makes the tip look dusty instead of shiny.



