
1. Cherry Gloss with Micro Cuticle Line
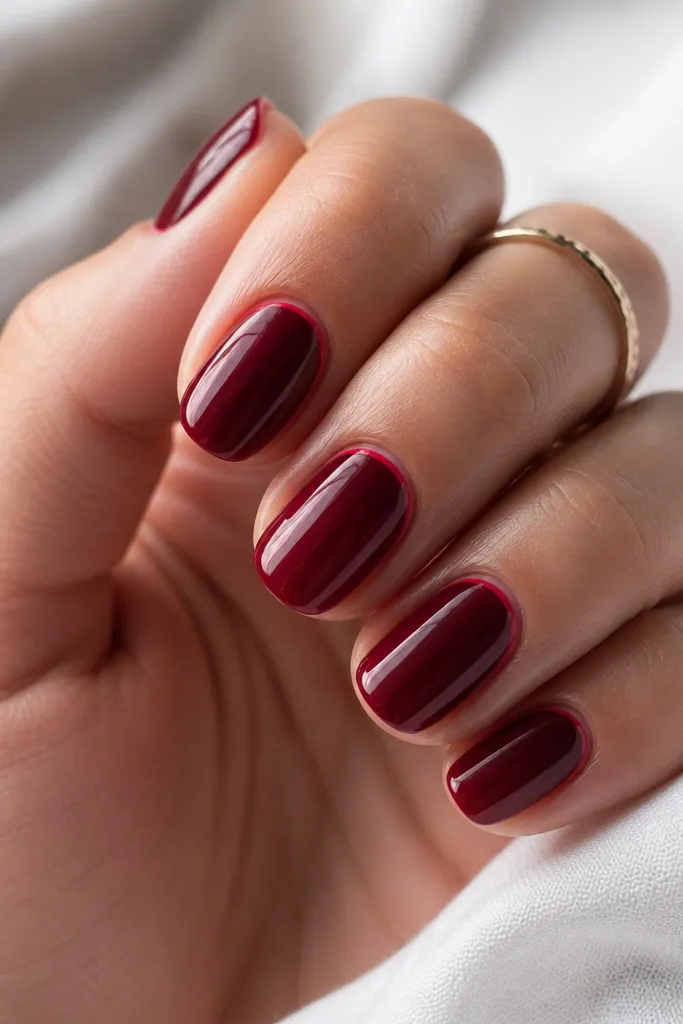
This look is my go-to when I want short oval nails to look longer without adding length. The deep cherry red reads bold against fair to medium skin tones, and it also looks clean on deeper skin because the shade stays opaque. The micro cuticle line creates a “frame” that visually lifts the nail bed, especially when the line is just one shade lighter and stays extremely thin. I like it for workdays, date nights, and any time you want red that looks intentional rather than loud. The gloss matters too — the shine makes the oval curve look smooth, not flat.
Start by pushing back cuticles and buffing the nail lightly so the surface feels smooth, not paper-dry. Paint one thin crème cherry coat, then wait until it’s set (about 2-3 minutes for gel tack, longer for regular polish) before adding a second thin coat focused on the center. For the micro cuticle line, use a fine detail brush with a slightly lighter cherry or a diluted red — drag it along the cuticle curve, leaving a hairline gap from the skin. Finish by capping the free edge with the top coat and sealing the sides with one careful pass of the brush.
After the final coat, dip a cotton swab in remover and clean the sidewall edge once — it makes the shape look salon-perfect.
Skipping a thin first coat and going straight thick — it makes short oval nails look wider and messy at the sides.
2. Classic Red Crème with Negative-Space Half-Moon
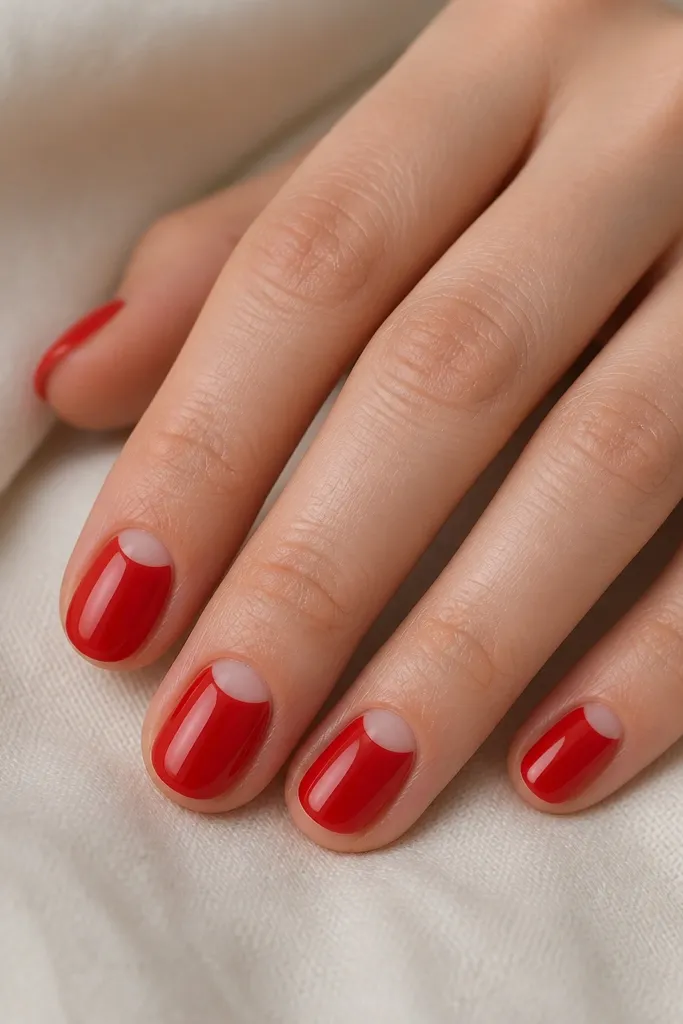
If you want red that feels modern and looks neat in photos, this negative-space half-moon is the one. The classic crème red stays fully opaque, so it doesn’t show streaks, and the bare half-moon gives your nails breathing room. On light skin, it brightens the nail bed; on deeper skin, it keeps the red from looking heavy. I also love how it flatters short oval shapes because the arc draws the eye inward and makes the nail look evenly shaped. This is best when your cuticle line is fairly even — if it’s jagged, the half-moon will highlight it.
First, prep the nails and apply a base coat that dries down smooth. Paint a thin red coat starting from the middle and moving outward, stopping where you want the half-moon to begin. Use a small half-moon stencil or a strip of tape shaped into a gentle arc — press it lightly so the edge is crisp, then paint two thin red coats over the exposed area. Peel the stencil after the second coat is just set (not fully cured), then clean any micro smudges with a fine brush and remover. Seal with a glossy top coat and cap the tip.
If you’re using regular polish, wait for the red to be fully dry before removing the stencil so the line doesn’t smear.
Painting the half-moon too close to the cuticle skin — it makes the arc look accidental instead of intentional.
3. Red Jelly with White Speckle Dots
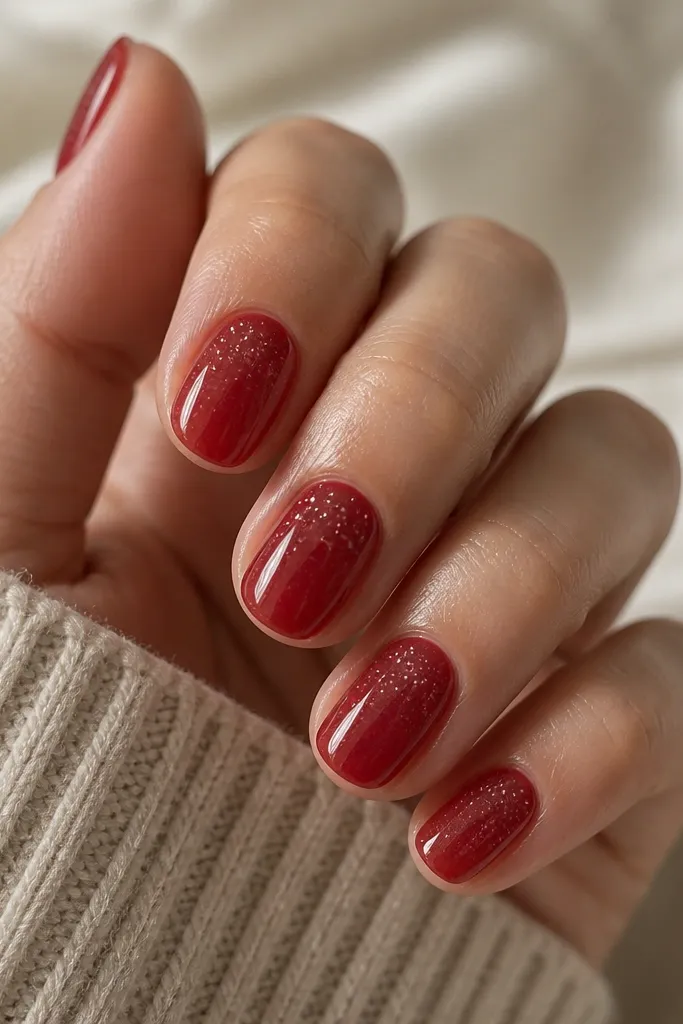
Jelly red turns short oval nails into that glossy, “fresh manicure” look without needing extra length. Because jelly is semi-sheer, it looks best when your nail bed is smooth and your base coat is even. The white speckle dots add texture without taking away from the oval shape — they also hide tiny imperfections in the nail surface. This set looks amazing on medium and deep skin because the jelly glow makes the nail look lit from within. For fair skin, it reads playful and fresh instead of harsh.
Start with a smoothing base coat and apply one thin jelly red coat, then cure fully if you’re using gel. For opacity, add a second jelly coat only where the nail looks lighter — keep it thin so it still looks glassy. To add speckles, use a dotting tool or the back of a small brush: tap white polish sparingly near the center, then lightly scatter a few toward the tip. Let it dry completely, then top coat with a high-shine layer and cap the free edge. Keep dot size tiny — large dots make short nails feel crowded.
Mix white polish with a drop of top coat if it’s too opaque — the speckles should look like little highlights, not stickers.
Using jelly over rough, ridged nails — the translucency shows every groove.
4. Velvet-Effect Wine Red with Matte Top Half
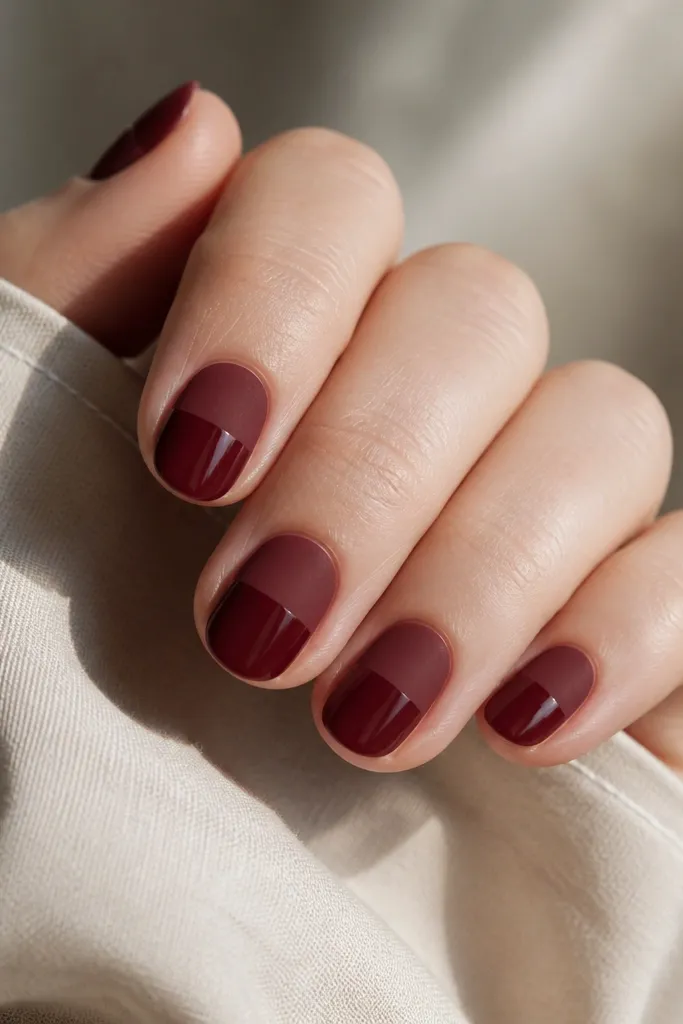
This is the red manicure I wear when I want “bold” without adding glitter or length. Wine red has enough depth to look expensive, and the split finish gives your short oval nails dimension. The matte half makes the nail look softer and wider in a flattering way, while the glossy half keeps it crisp and reflective. On fair skin it looks luxe and moody; on deeper skin it looks rich and clean. The horizontal line also makes the oval shape easier to read from a distance.
Paint two thin coats of wine red crème and cure fully or let it dry until it’s hard. Apply a glossy top coat to the entire nail first, then wait for it to set so the matte step doesn’t grab unevenly. Use a strip of tape placed horizontally across the middle of each nail — press gently so you don’t lift the polish. Brush a matte top coat only on the exposed lower half or upper half (pick one direction and keep it consistent), then remove tape while the matte is still slightly workable. Finish with one extra thin glossy touch only on the glossy side if any edges look dull.
Do the tape line after the base red is fully cured/dry, not while the red is still soft — it prevents tearing.
Trying to matte over a wet top coat — it creates streaks and a fuzzy edge.
5. Red Chrome Shimmer over Solid Base
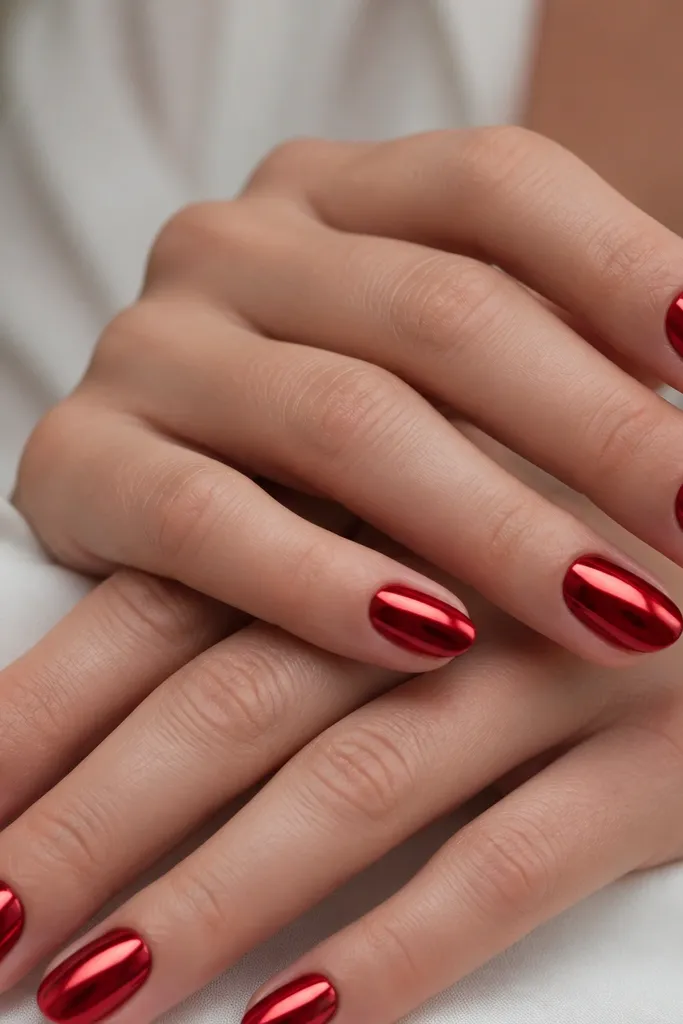
Chrome makes short oval nails look extra polished because it grabs light and emphasizes the curve. The trick is using it over a solid red base so you get a true red mirror, not pinkish glitter patches. This look works on all skin tones, but it especially flatters medium and deep tones because the reflections pop. If your nails are slightly uneven, chrome can hide some flaws, but it will still show deep ridges. Keep your oval smooth and your cuticle line clean.
Start with a smooth base and apply two thin coats of a deep red crème so the nail is fully opaque. Cure/dry completely. Apply a chrome adhesive (or the brand’s chrome base) and wait until it turns tacky, not wet. Rub red chrome powder/chrome flakes in small circles or short strokes, then wipe off excess with a dry lint-free pad. Seal with a chrome-safe top coat or a gel top coat designed not to dull the mirror effect. Cap the free edge carefully so chrome doesn’t lift at the tip.
If the chrome looks dusty, buff once lightly with a soft pad — too much pressure dulls the shine.
Putting chrome directly on a sheer base — it turns patchy and looks cheap.
6. Red Ombre Fade into Nude Oval
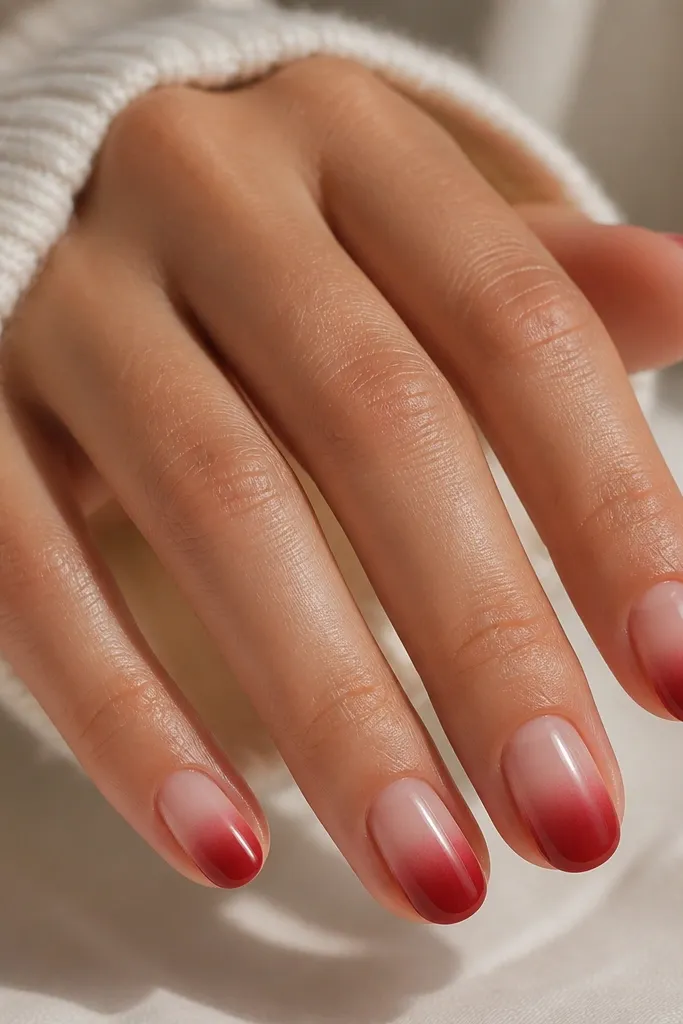
Ombre is the fastest way to make short oval nails look longer because the fade creates a vertical line. The fade into nude-pink keeps the manicure wearable and clean, and it prevents red from crowding the cuticle area. I like this on fair, light-medium, and medium skin tones because the nude base blends with your natural nail color. On deeper skin, pick a nude that leans warm (peachy) so the transition doesn’t go ashy. The glossy top coat makes the fade look like one smooth gradient instead of two separate colors.
Prep and base coat, then apply a nude-pink as your first layer (one thin coat, cure/dry). Sponge on deep red only at the free edge using a makeup sponge or ombre tool — dab and rotate to build a smooth gradient. Add a second sponge pass lightly to deepen the tip without widening the nail. Use a clean brush dipped in remover to tidy the sides where red creeps too far. Seal with a thick glossy top coat and cap the tip firmly.
Blend the sponge off the nail edge first — dab once on a paper towel, then apply to the nail so the gradient starts soft.
Blending the ombre too wide at the sides — short oval nails look like they’re spreading.
7. Red Stripes with Gold Foil Accent Line
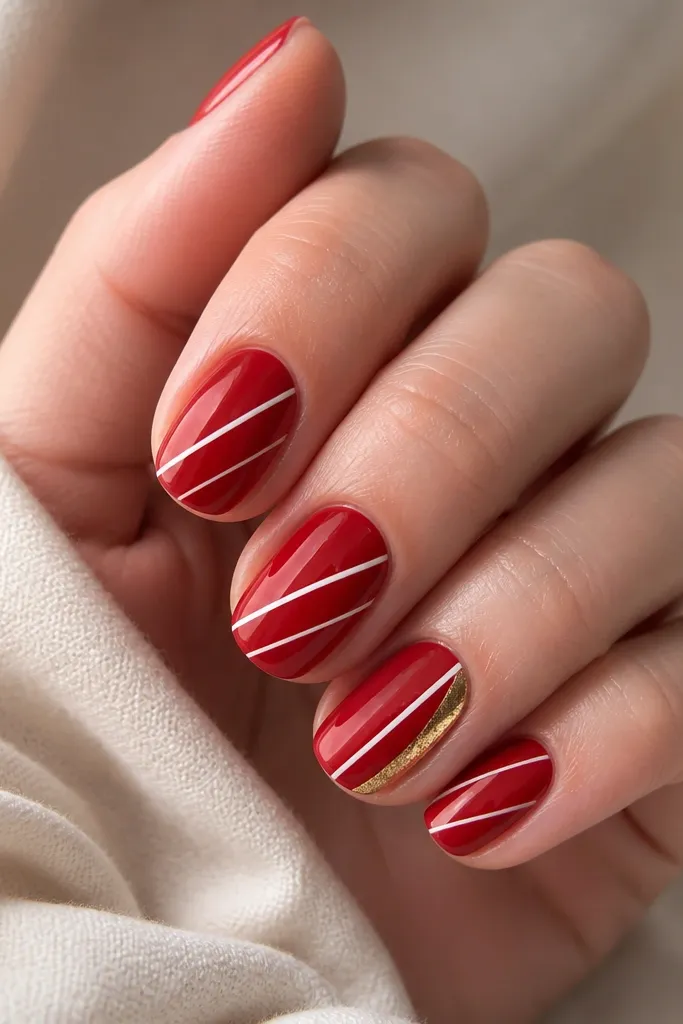
This is the red manicure I reach for when I want something bold but still office-friendly. Thin white stripes add crisp contrast, and gold foil brings warmth so the whole set doesn’t look flat. On cool undertones, the white stripes brighten the red. On warm undertones, the gold foil makes the red look richer. It also flatters short oval nails because the diagonal stripe guides the eye across the nail without making it look longer than it is. Keep the foil minimal so it looks like an accent, not a sticker.
Paint two thin coats of glossy red crème and cure/dry fully. Add white stripes using nail striping tape or a striping brush: place one diagonal stripe per nail, then press and remove tape if you used it. For the gold foil accent, apply a small swipe of foil gel or tacky base near the cuticle along the side — about 2-3 mm long. Press gold foil gently with tweezers or a foil applicator, then brush away excess. Top coat lightly over stripes and carefully over the foil so it doesn’t smear; cap the free edge.
Use a thin brush to paint a micro line of top coat along the stripe edges — it locks the design flat.
Using thick striping paste — it raises on short nails and catches on hair.
8. Matte Red with Glossy Red Dot Cluster
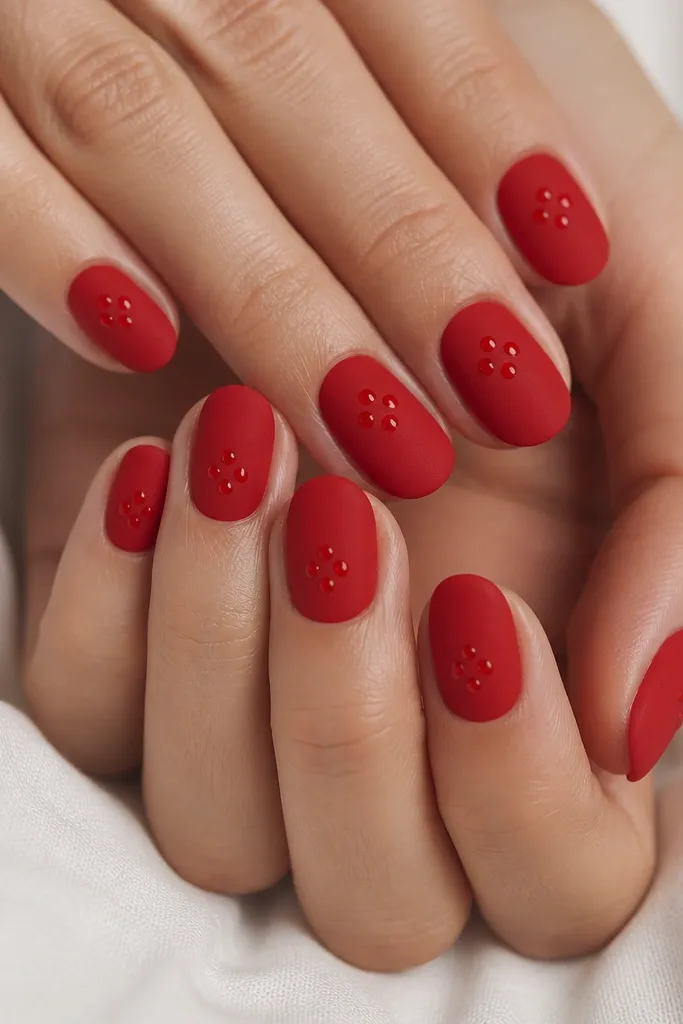
Paint matte red using two thin coats of a red crème, then cure/dry fully. Apply matte top coat across the entire nail. For the glossy dots, use a gel top coat or glossy gel in small dots with a dotting tool — place 3-5 tiny dots near the center, leaving space around them. Cure the glossy dots separately if your gel requires it, then do not reapply matte top coat over the dots. Cap the free edge with matte top coat only so the tip stays consistent.
Matte red looks expensive on short oval nails, and the glossy dot cluster gives it a playful focal point. The matte finish hides tiny surface bumps, which is helpful if your nails aren’t perfectly smooth yet. The glossy dots read like little beads and add dimension without making the nail look busy. This works great for medium and deep skin tones because matte red looks smooth and even, not chalky. For fair skin, it still looks bold, but the dot shine keeps it from going too flat.
Skip thisTrying to make glossy dots with regular top coat — they spread and lose the bead shape.
Editor's noteMake the dots slightly taller than you think — once cured, they should catch light like tiny highlights.
9. Retro Red Tips with Thin Black Outline
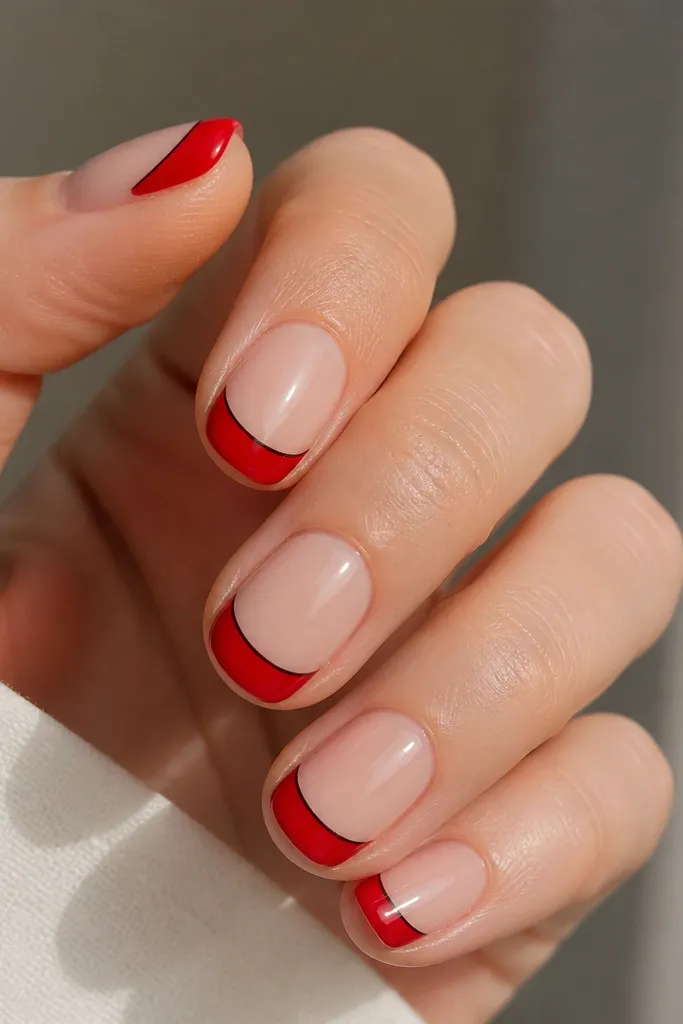
This design makes short oval nails look crisp and intentional, like a modern French tip but with attitude. The black outline sharpens the smile curve, so even short tips look clean instead of blurry. It works on all skin tones because the contrast is strong, and the nude base keeps it from feeling heavy. I love this for parties and nights out because the black line reads graphic in photos. It also flatters shorter nail beds because the nude base adds breathing room.
Start with a nude base coat that matches your natural nail color or a rosy nude. After it’s dry/cured, paint the red tips with a steady hand — keep the red about 1-2 mm from the sidewalls so it stays tidy. Use a fine striping brush or a liner pen with black polish to outline the red smile curve. Make the outline thin and consistent; if it looks wobbly, wipe the brush and correct immediately before it dries. Finish with a glossy top coat and cap the free edge so the tip stays sealed.
Use the nail’s natural curve as your guide — start the black outline at the side edge first, then connect across the center.
Overfilling the tip area — if red touches the sidewalls, the outline looks messy.
10. Red Floral Mini Watercolor on One Accent Nail
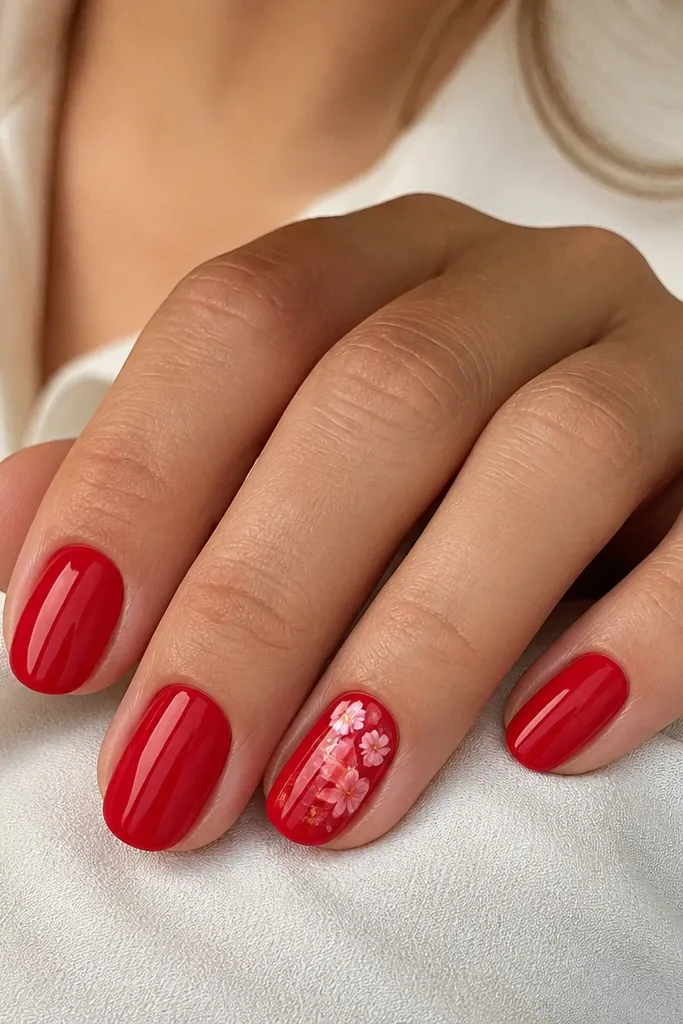
Paint all nails except one in glossy red crème with two thin coats. Choose one accent nail and keep its base the same red so the floral blends. For watercolor petals, use a thin brush with diluted lighter red/pink and let the pigment bleed slightly — start with 3-4 small petals near the center of the nail. Add a tiny dot center and a faint shadow line with slightly darker red to give the petals shape. Let it dry fully, then top coat carefully over the design without flooding — one smooth coat is enough, then cap the tip.
If you like red but get bored with plain, this is the sweet spot. Keeping it mostly solid red makes your hands look polished, and the watercolor floral on one accent nail adds personality without turning the set into a full-on pattern. The lighter pink and rose-red petals look flattering on fair to medium skin, and on deeper skin they add a soft, romantic contrast. Short oval nails handle watercolor well because the petals stay small and don’t overwhelm the shape. The watercolor look also hides tiny brush marks better than crisp line art.
Skip thisPlacing flowers too close to the sidewalls — it makes the nail look wider and the design feels cramped.
Editor's notePractice the petal size on a spare nail tip or paper first — watercolor looks best when petals are tiny on short oval.



