1. Milky Blush Almond with One-Stripe French Tip
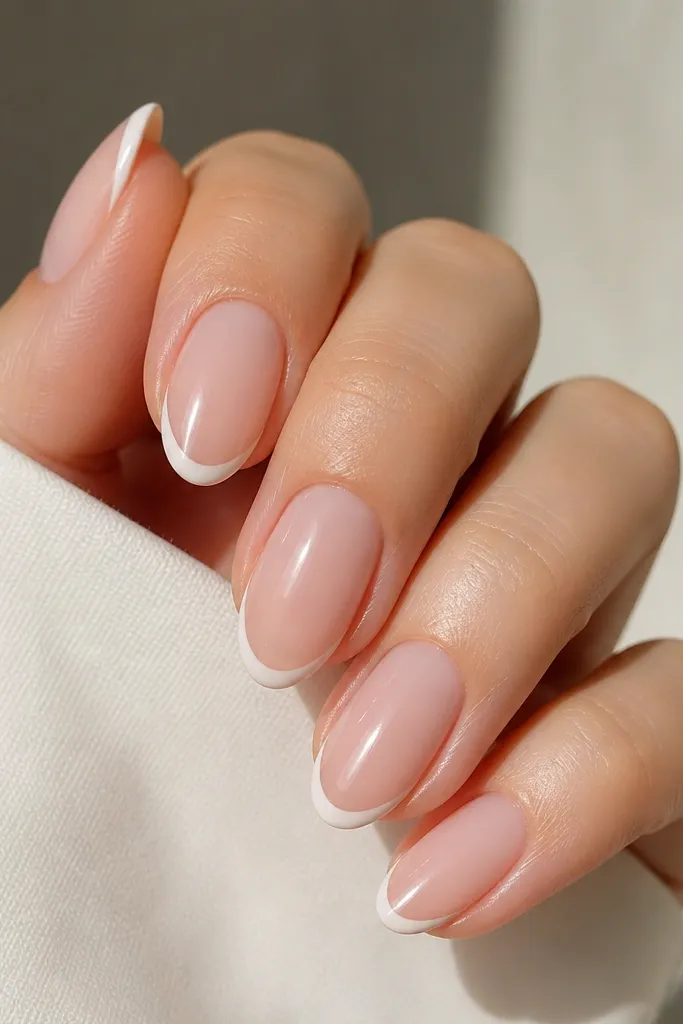
This is the light pink almond look I reach for when I want “pretty” without adding a bunch of decoration. The milky base is sheer enough to flatter almost any skin tone because it doesn’t compete with your finger color. The single white stripe on the tip keeps the almond shape crisp and makes your nails look longer, especially if your nail beds are shorter. It works for everyday wear, job interviews, and weddings because it looks neat even in close-up.
Start by prepping and pushing back cuticles, then file your almond taper evenly so the tip is narrow. Apply a thin gel base coat, cure, then sponge or brush on 2 coats of milky blush until it looks like soft opacity (not streaky). For the French, use a striping brush and draw one thin white line along the free edge — don’t fill the whole tip, just outline it. Clean up the sides with a flat brush dipped in alcohol, then seal with a glossy topcoat.
If your French line ever looks wobbly, tape a guide strip on the side of the nail for the first attempt, then remove it before curing.
Avoid thick French tips — they widen the almond and can look bulky fast.
2. Sheer Pink Almond with Micro Hearts at the Cuticle
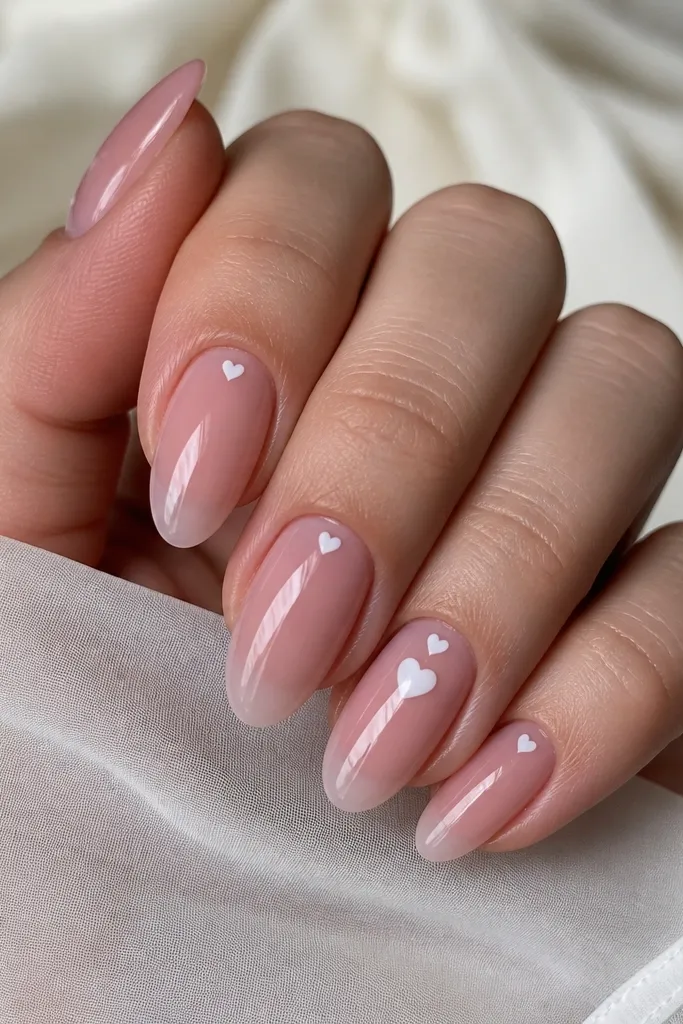
Micro hearts at the cuticle make light pink feel playful without turning into cartoon nails. The sheer base flatters because your natural nail plate shows through slightly, which looks especially good on fair and medium skin. The hearts at the base elongate the visual line of the nail and draw attention to the shape of your cuticles. I like this for date nights, spring events, and anytime you want a sweet detail that still looks grown-up.
Apply a sheer pink builder gel or jelly polish in 2 thin layers, curing fully between coats so it stays glassy. Use a dotting tool to place tiny white heart centers — keep them small enough that each heart fits within about 1/8 of the nail width. Then use a fine liner brush to add two curved sides for the heart, one nail at a time. Seal with 2 coats of topcoat to lock the raised edges flat.
Editor's noteUse a white gel that stays opaque in one pass; watery white makes hearts look gray on sheer bases.
Skip thisDon’t scatter hearts across the entire nail — it turns the design into clutter.
3. Pink Almond with Glassy Nude Marble Swirl
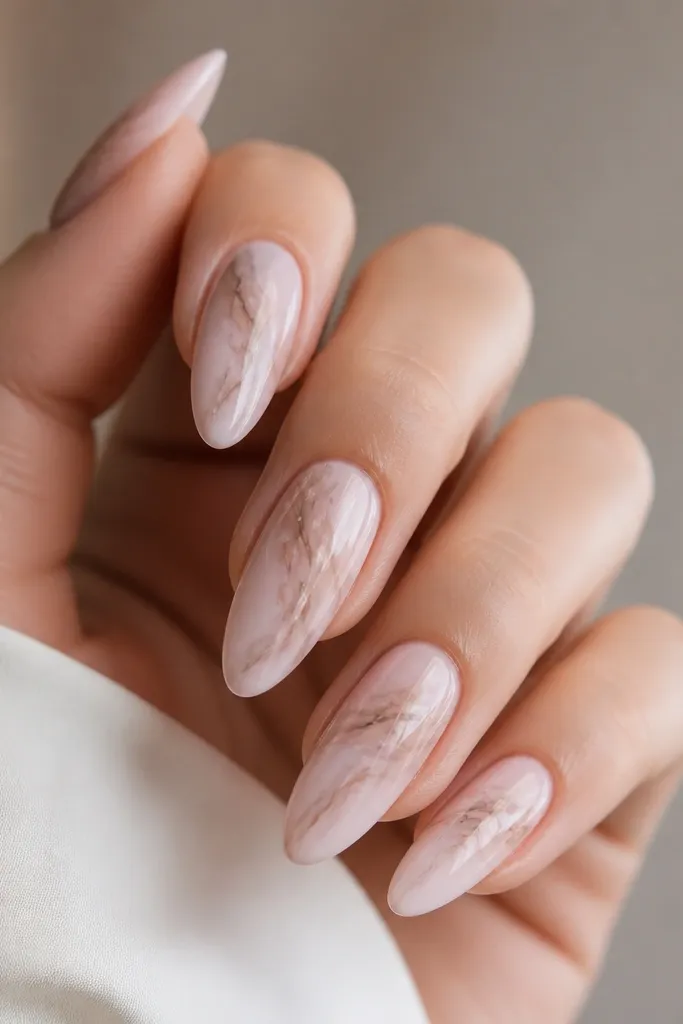
Marble works because it adds movement while the light pink keeps it wearable. The nude beige and warm gray lines look good on both cool and warm undertones because they’re neutral, not neon. This design makes your nails look expensive because the marble lines are thin and layered under a glass topcoat. I wear this when I want something more interesting than a French tip but still office-friendly.
Start with a pale pink jelly base — 2 coats for a see-through but even look. Mix or pick a beige nude and a warm gray for the marble; keep the lines hair-thin. Use a dot and liner brush to place 3-4 short swirls per nail, then drag them slightly with a toothpick to soften edges. Cure each nail, then finish with a glossy topcoat. For extra glass effect, add a thin second topcoat after the first cures.
Editor's noteDo marble on a slightly tacky layer so the lines blend just a touch, not smear into blobs.
Skip thisSkip thick marble patches — they hide the almond taper and look flat in photos.
4. Light Pink Almond with Neutral Glitter Fade
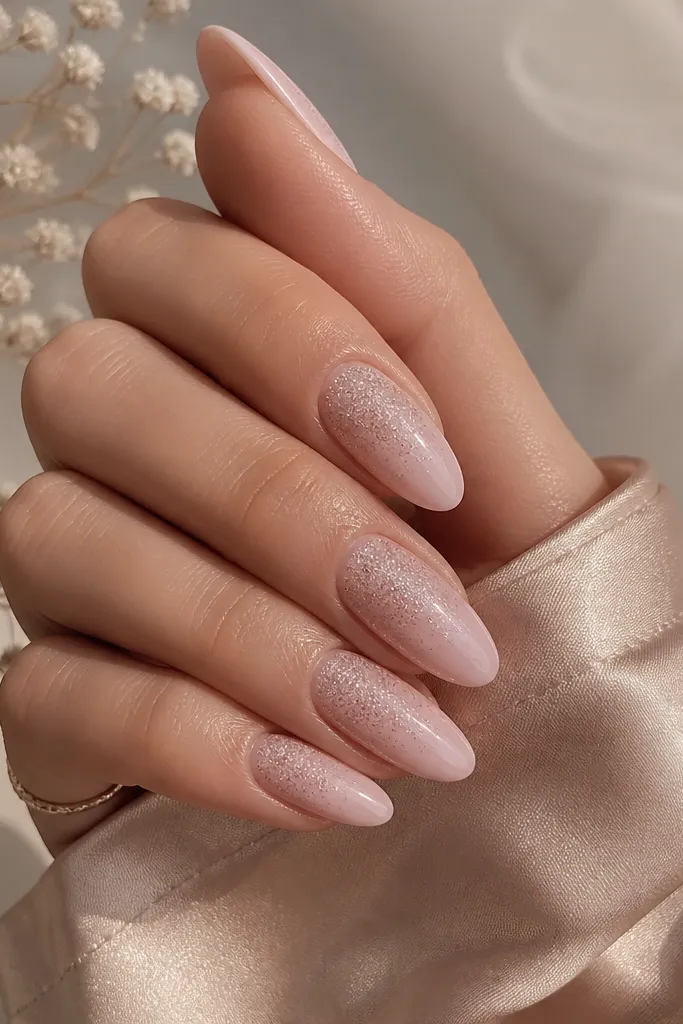
A glitter fade gives you sparkle without the “party” vibe of full-coverage glitter. The neutral champagne tone looks flattering because it blends with light pink instead of overpowering it. This design is great for holidays and also works for everyday because the cuticle area stays clean. I’ve worn it with casual jeans and with a satin dress — it always reads polished.
Apply a light pink base in 2 even coats, then cure. For the fade, use a small makeup sponge or a fan brush to dab neutral fine glitter starting around the mid-nail and moving upward in a soft arc. Keep the glitter density higher near the center and lighter near the cuticle. Once you like the fade, press gently with a sponge so it sticks, cure, then seal with a thick glossy topcoat to smooth the texture.
Editor's noteIf glitter catches on fabric, add one extra thin topcoat and cure longer (about 60 seconds) for a flatter finish.
Skip thisAvoid chunky glitter — it makes almond tips feel rough and can snag.
5. Baby Pink Almond with Thin Rose-Gold Outline
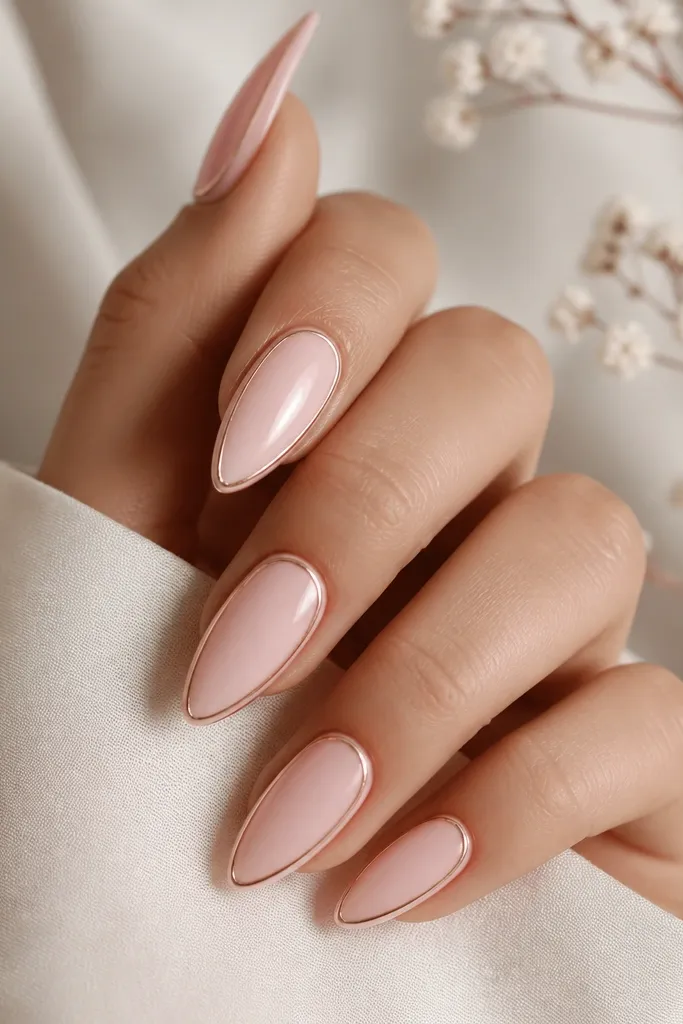
This is the minimalist “jewelry” nail that still looks special. The rose-gold outline adds warmth and makes light pink look more intentional, especially on medium to deep skin tones where blush can look a little flat. Because the line follows the sidewalls, it emphasizes the almond taper and makes your nails look slimmer. It’s perfect for work, brunch, and any time you want a clean set with one smart detail.
Paint 2 coats of baby pink gel, cure, then wipe tack residue with alcohol only if your system needs it. Use striping tape or a fine detail brush to draw a thin line along each sidewall from mid-nail to the tip. Keep the line about 0.5 mm away from the edge so it doesn’t look thick. Cure, then topcoat with a glossy finish — if you use tape, burnish the edges lightly before curing so the line sits flat.
Editor's noteIf your outline looks too bright, use a slightly darker rose-gold foil gel so it reads delicate instead of metallic sticker.
Skip thisDon’t outline the entire nail — full frames make light pink look smaller and heavier.
6. Soft Pink Almond with Negative Space Half-Moon
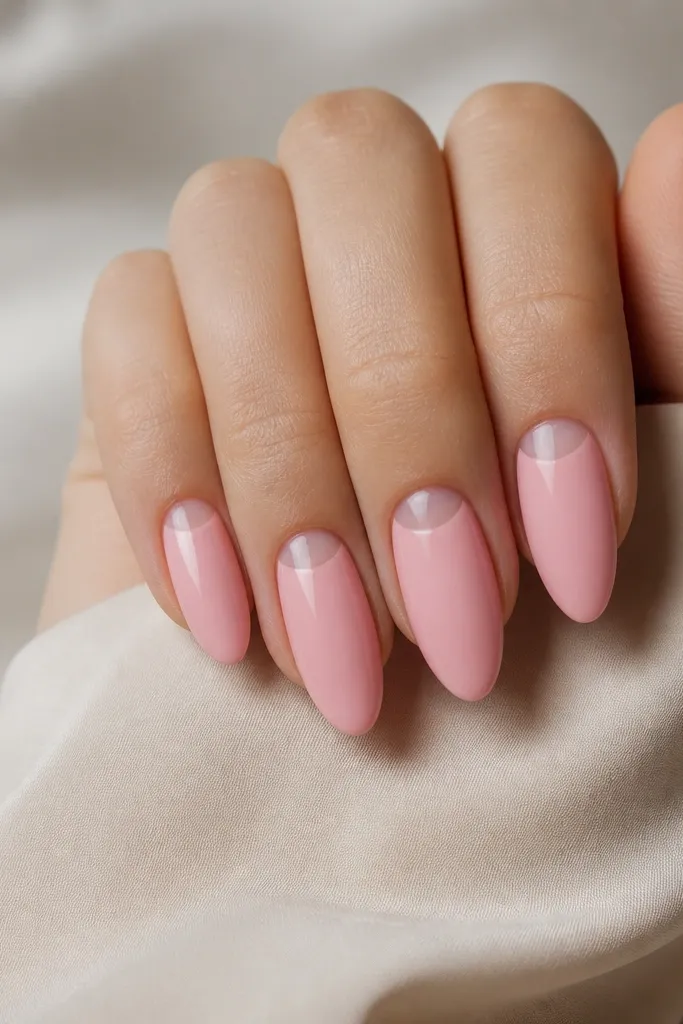
Negative space half-moons are a smart way to keep light pink from feeling too “painted-on.” The clear crescent makes the nail bed look longer and gives your fingers a lighter, airy look. I’ve found it’s especially flattering if your cuticles grow fast because the design disguises the regrowth line. It also works with short almond lengths because you’re adding structure at the cuticle instead of relying on long free edge.
Apply a sheer base layer first, cure. Then place a small half-moon stencil or use a curved brush to mask the crescent area — you want a clean curve about 1/6 of the nail width. Paint light pink over the rest of the nail in 2 thin coats, cure each time. Remove the stencil carefully, then seal with a glossy topcoat that covers the edges of the crescent so it doesn’t lift.
Editor's noteUse gel, not regular polish, for negative space designs so the edges stay crisp after curing.
Skip thisAvoid messy crescent edges — cloudy masking makes the whole set look rushed.
7. Blush Pink Almond with Tiny Pearl Dots on the Side
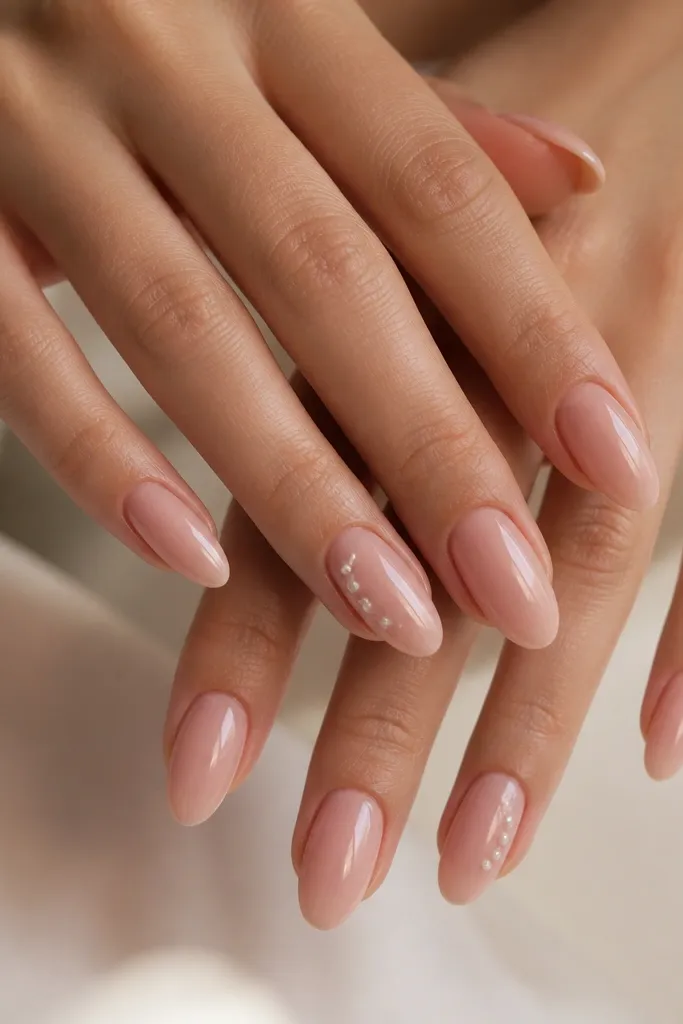
Pearl dots on the side look like jewelry on your fingers, and the placement matters. When pearls sit slightly off-center, they catch light as you move and make the almond shape look longer. Light blush under pearls keeps the vibe soft, which suits fair skin and also looks classy on deeper skin where pearls can go “too heavy” if you use a darker base. I wear this to dinners and events because it feels dressed-up without a lot of art.
Start with 2 coats of blush pink gel, cure, then wipe the tack if needed for your topcoat system. Add a thin line of clear builder gel or nail glue on the sidewall where you want the pearls — less is more. Place 2-4 tiny pearl dots with tweezers, then cure. Finish by applying topcoat carefully around the pearls, building it only enough to smooth the surface so your fingers don’t snag on fabric.
Editor's noteIf pearls feel too raised, cap each pearl with a small drop of gel and cure — it smooths the edge.
Skip thisAvoid placing pearls too close to the cuticle — they can look like they’re floating or lifting.
8. Rose Milk Almond with Watercolor Pink Tips
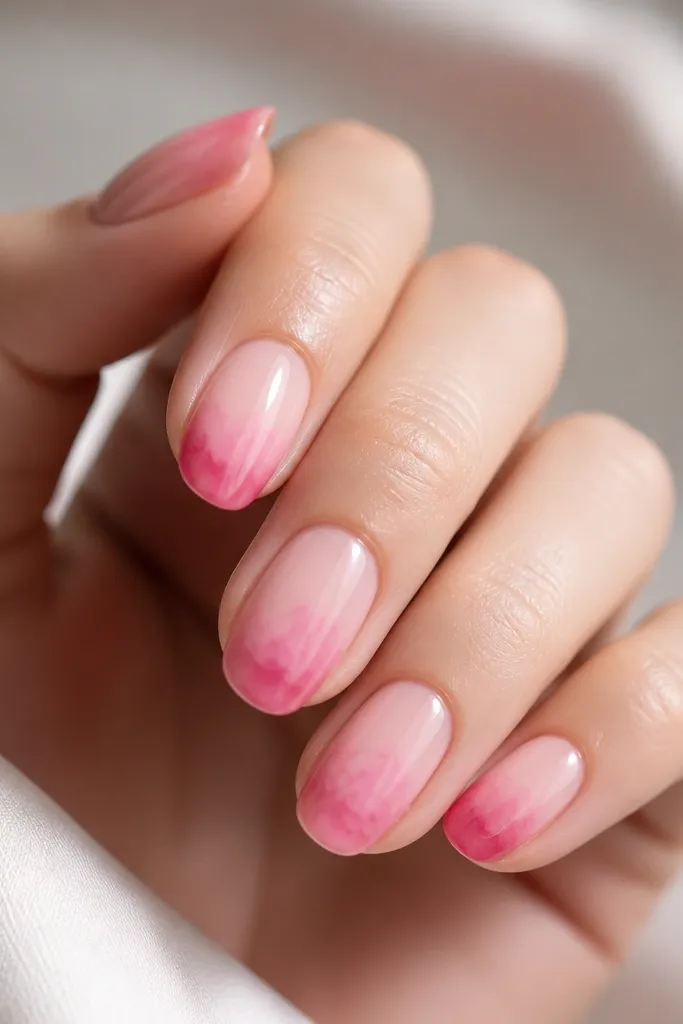
Watercolor tips look delicate because they mimic how blush spreads in natural light. The rose milk base keeps the design believable, while the deeper pink at the tip gives you contrast that still looks soft. This is flattering on short almond nails because the pigment stays at the top and makes the free edge feel intentional. I like it for spring and summer because it looks fresh even when your hands are dry.
Paint rose milk base in 2 thin coats and cure. For watercolor tips, use a small makeup brush to dab a deeper pink gel or watercolor pigment right onto the free edge — keep it messy at first, then wipe the brush on a paper towel to soften. Layer 2-3 dabs until you like the fade, then cure. Clean up sidewalls with a clean brush, and seal with glossy topcoat to blend the watercolor edges.
Editor's noteLet the first watercolor layer cure before adding more pigment so you don’t muddy the fade.
Skip thisDon’t bring the watercolor too far down the nail — it turns into a solid pink block.
9. Pink Almond with Micro French + Nude Dot Accent
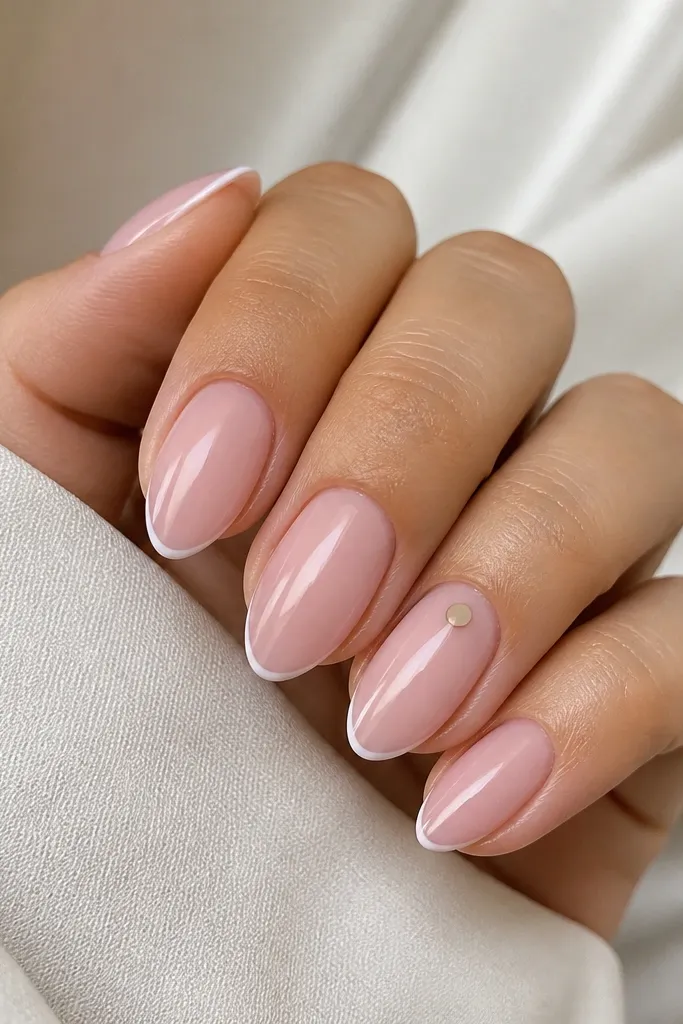
Micro French keeps the look sharp, and the single nude dot adds a hint of trend without turning into a pattern. The nude dot works because it matches your nail bed tone, so it looks like a highlight rather than an extra color. This design is great for people who love pink but hate loud nail art. It also photographs cleanly because the art is small and centered.
Apply pale pink gel in 2 coats, cure. Draw a micro French line with a striping brush — keep it under 1 mm thick and centered along the free edge. For the accent nail, place one nude-beige dot using a dotting tool about 2-3 mm below the cuticle line. Cure, then topcoat all nails with a glossy layer, paying attention to the tiny dot so it stays smooth.
Editor's noteIf you’re doing this at home, practice the micro line on a nail tip first — your wrist learns fast.
Skip thisAvoid uneven micro French — if one side is thicker, the almond looks crooked.
10. Baby Pink Almond with Matte Top and Glossy Center Strip
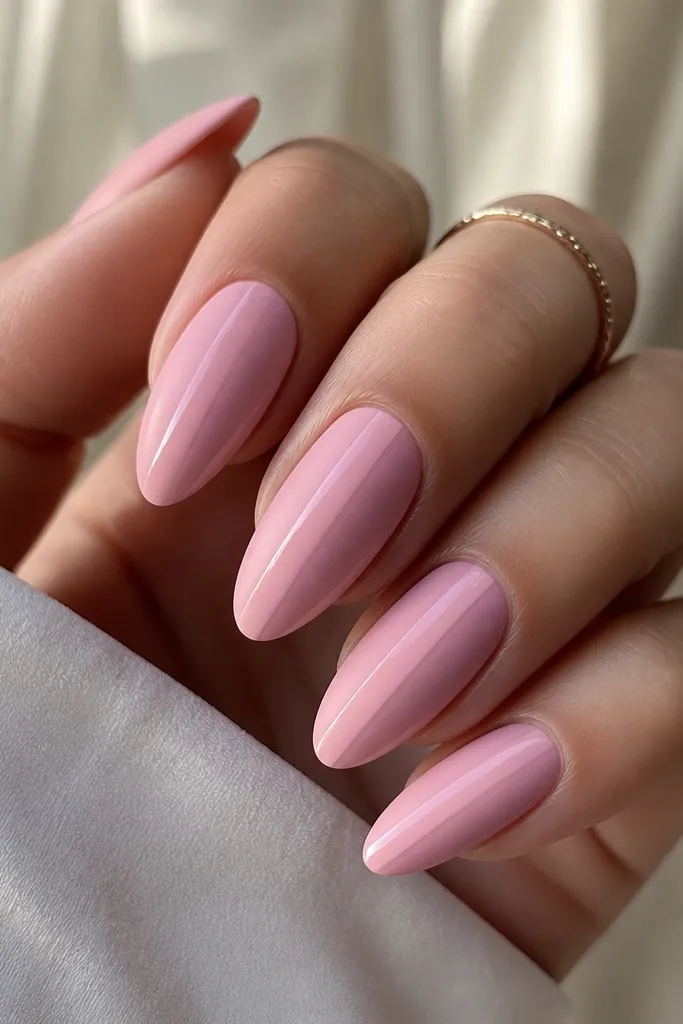
This finish combo looks modern and clean because you’re changing texture, not adding heavy color. The glossy center strip makes nails look longer, while the matte sides hide tiny surface imperfections. It flatters most skin tones because baby pink stays soft against your fingers. I wear this when I want something different from standard glossy sets, especially in photos under indoor lighting.
Start with 2 coats of baby pink gel, cure, and let it level. Apply topcoat and cure — then wipe if your matte top needs prep. Paint a thin glossy strip down the center using a striping brush, keeping it about 1 mm wide. Cure again, then apply matte topcoat over the whole nail except the strip area — you’ll need to paint around it carefully. Cure fully and check edges with a gentle wipe.
Editor's noteUse matte top only after the glossy strip sets, or you’ll smear the texture boundary.
Skip thisDon’t make the glossy strip too wide — it turns into a weird stripe instead of a lengthening line.
11. Light Pink Almond with Tiny Crystal Line at the Tip
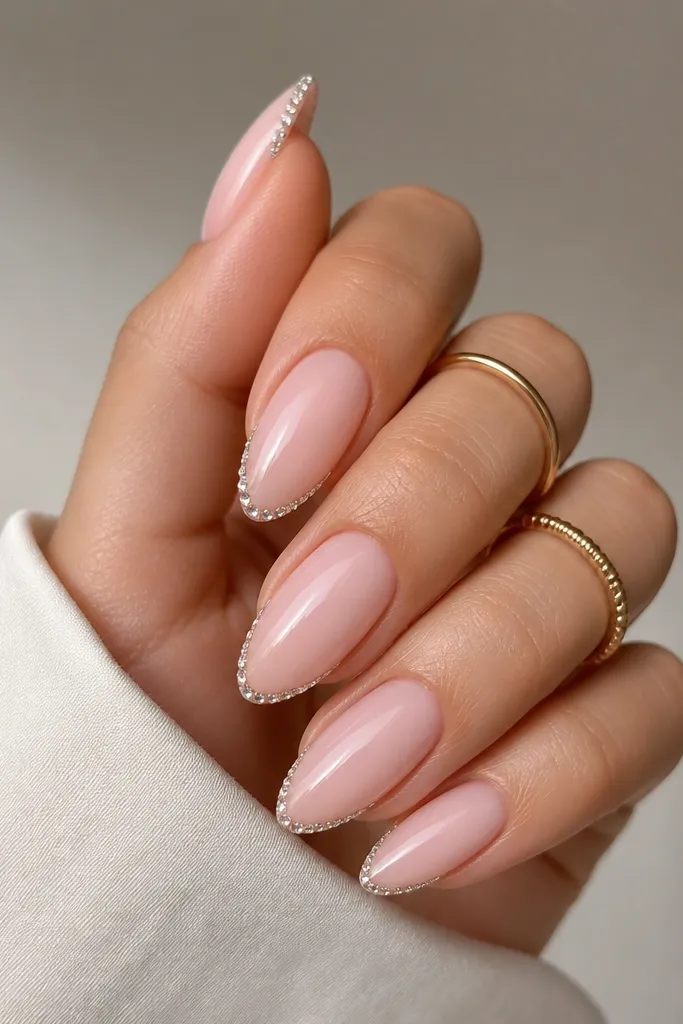
A crystal line at the tip is delicate sparkle that stays elegant because it follows the almond curve. The light pink base keeps the rhinestones from looking harsh, and the tip placement flatters because it emphasizes your free edge shape. This is ideal for weddings, birthdays, and any event where you want “something extra” without a full rhinestone manicure. It also looks good on both short and medium almond lengths.
Paint 2 coats of light pink gel, cure, then wipe tack residue if your crystal adhesive needs a clean surface. Apply a thin bead of clear crystal gel or gel adhesive along the tip edge — just enough to hold stones. Place tiny clear crystals with tweezers in a straight line, nudging each one into place. Cure, then cap everything with a thin layer of topcoat so there’s no sharp edge. If your crystals are raised, add a second topcoat only after the first cures.
Editor's noteChoose crystals with flat backs so you don’t end up with a lumpy topcoat.
Skip thisAvoid big stones — they overpower light pink and make the almond look chunky.
12. Pink Almond with Blush Ombre from Cuticle to Tip
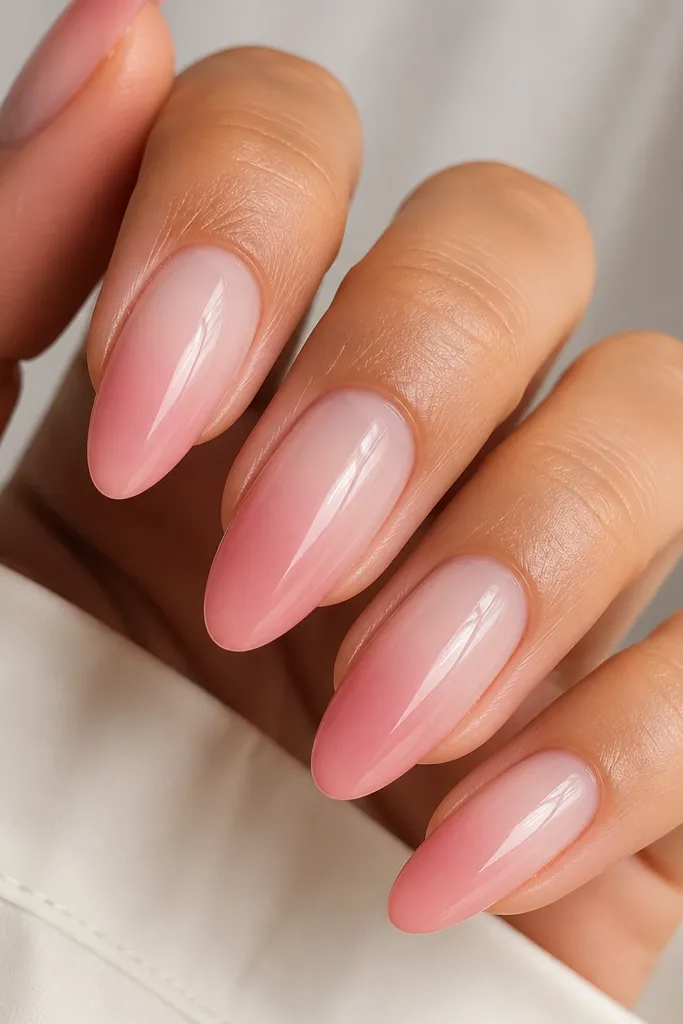
A cuticle-to-tip blush ombre is the easiest way to make almond nails look longer and more natural. The clear-milky cuticle area gives your nail bed a soft glow, and the deeper pink at the tip adds structure. This design flatters nearly everyone because it mimics how nails look when they’re healthy and hydrated. I love it when my hands look a little dry because it makes the whole manicure feel softer.
Apply a sheer nude base or clear builder gel, cure. Then sponge on a light pink gel in 2 layers, starting at the cuticle and blending upward toward the tip. Use a makeup sponge to keep the gradient soft; avoid brushing back and forth, which can create streaks. Once you like the depth, cure and seal with glossy topcoat. For extra smoothness, do one more thin topcoat after the first settles.
If you see a hard line after curing, lightly buff the transition spot with a very fine file and re-topcoat.
Avoid going too dark at the tip — it stops reading “light pink” and starts reading “ombre dressy.”
13. Milky Pink Almond with One Side Pearl Bow Accent
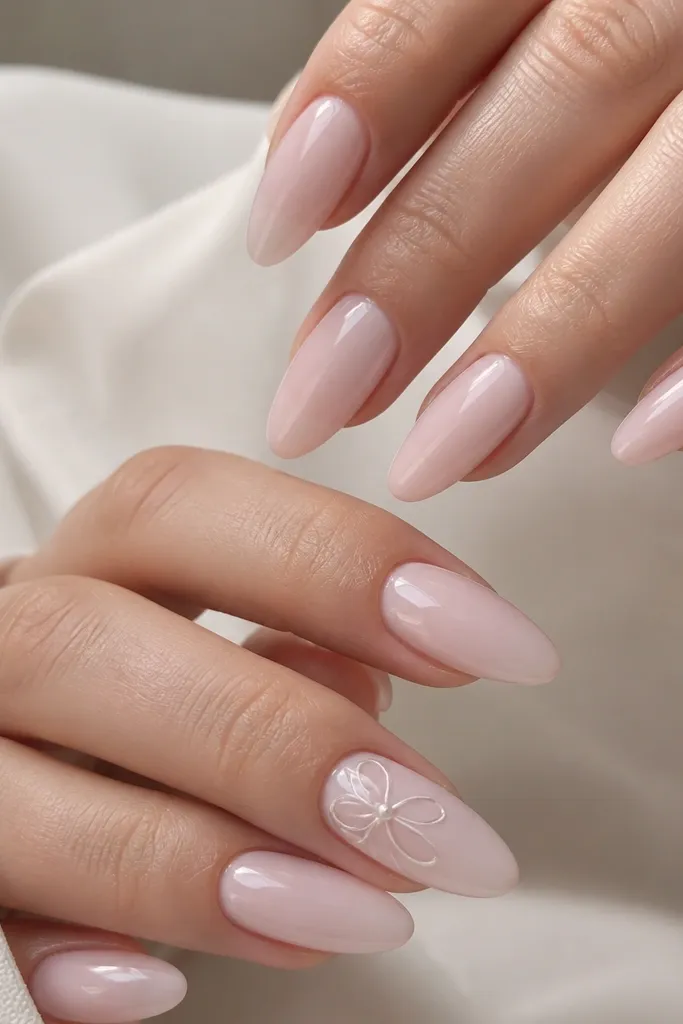
This is one of my favorite “special but not loud” designs because it uses a tiny bow shape that reads cute without covering the whole nail. The milky pink base keeps everything airy and makes the bow look crisp. The side placement is flattering because it follows the almond curve and doesn’t shrink the nail visually. I wear this for birthdays and baby showers where you want something sweet but still classy.
Paint milky pink gel in 2 coats and cure, leaving the surface smooth. On the accent nail, map the bow placement by drawing two small curved loops with a white gel liner brush. Add two tiny pearl dots at the center where the loops meet, then cure. Cap the bow with a thin topcoat so it stays smooth and doesn’t catch. Finish the rest of the nails with glossy topcoat to match the shine level.
Editor's noteUse gel liner for the bow instead of nail art paint — it stays clean and less streaky on milky bases.
Skip thisAvoid big bows — a wide bow makes almond nails look shorter.
14. Pink Almond with Tiny Dried-Flower Confetti in Clear Overlay
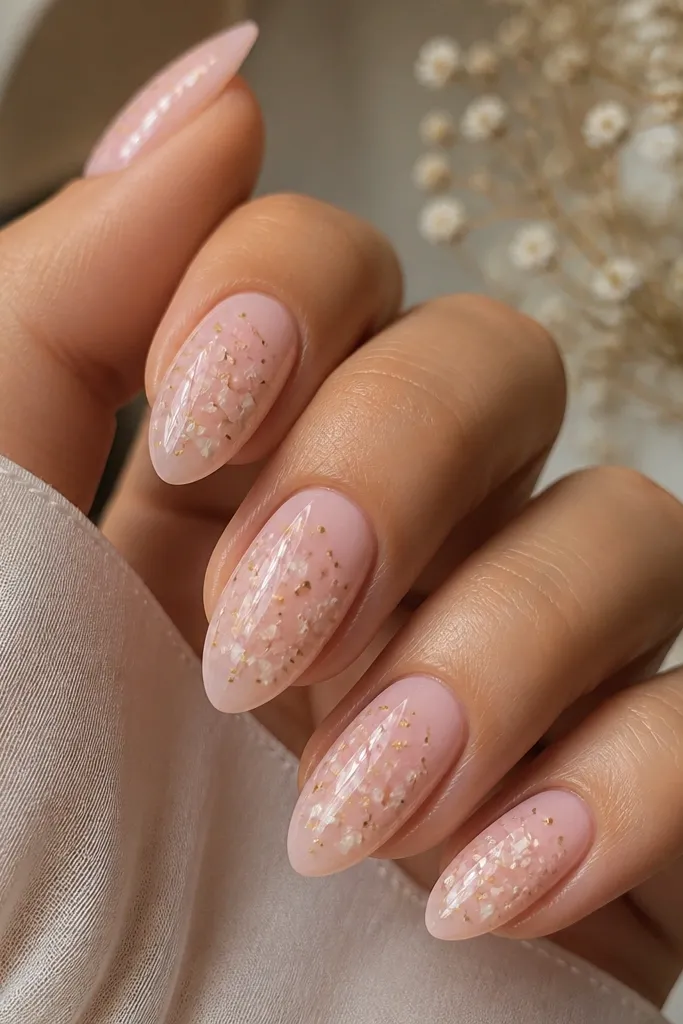
Confetti-dried flower art looks expensive when it’s tiny and suspended, not plastered on top. Light pink underneath gives the petals a soft, romantic tone without turning them yellow or harsh. This design is flattering for fair to medium skin because the pale petals blend with your nail bed, and it still looks good on deeper skin because the clear overlay creates contrast. I love it for spring weekends and photos where you want something textured but delicate.
Build a light pink base in 2 coats, cure. Apply a clear gel layer, then place tiny dried flower pieces with tweezers so they’re mostly in the center of each nail. Add 1-2 micro gold dots if you want extra sparkle, then cure. Cap with clear gel to fully encapsulate the flowers so they feel smooth under your fingers. Finish with a glossy topcoat and cure fully.
Editor's noteKeep pieces smaller than a rice grain; anything bigger starts to look like you glued craft confetti on your nails.
Skip thisAvoid skipping the encapsulation layer — dry petals snag and lift.
15. Light Pink Almond with Thin Rose Linework and Blurred Background
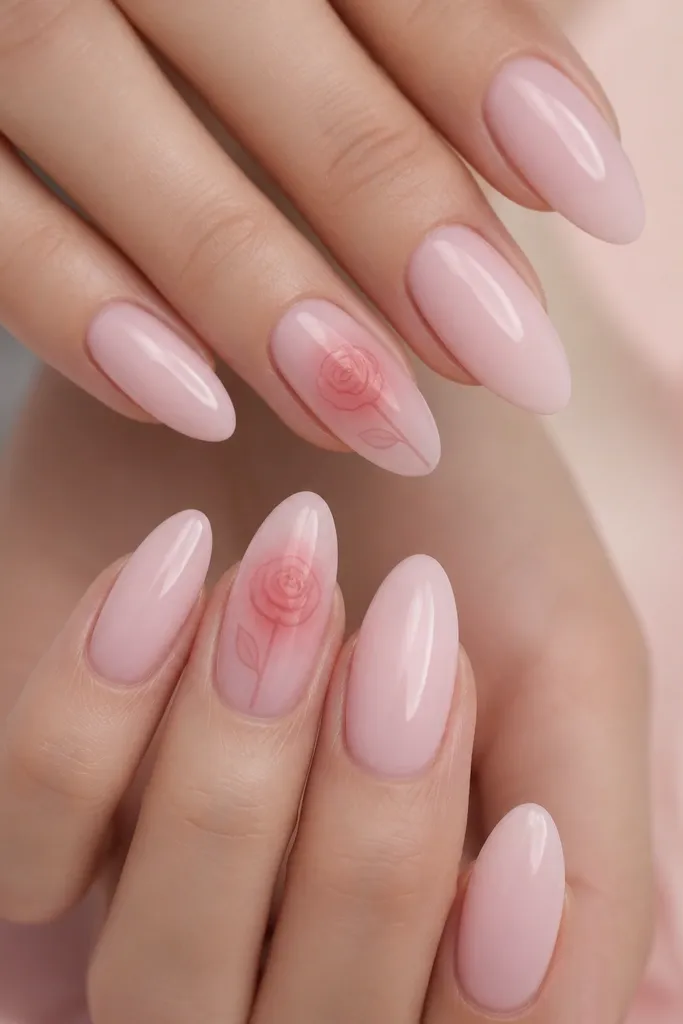
Thin linework looks modern when the background stays soft and translucent. Using rose-colored lines instead of harsh black keeps the design in the “light pink” family and makes it wearable. The blurred haze behind the drawing adds depth without turning into a full graphic. I like this for everyday because the art is controlled — you see it when you look close, and it looks clean from a distance.
Apply sheer blush in 2 thin coats, cure, and keep the surface smooth. On accent nails, add a very light haze of deeper pink gel in the center using a sponge, then cure. Draw the rose outline with a thin liner brush using a rose-brown or dusty rose gel — keep lines 0.5-1 mm thick. Let the art cure, then seal with glossy topcoat over the whole nail so it blends into the background.
Editor's noteIf your lines get thick, wipe your brush on a lint-free pad before each nail and reload with a tiny amount of gel.
Skip thisAvoid black outlines — they make light pink designs look harsh and older.