1. Jet Gloss Black French Arc
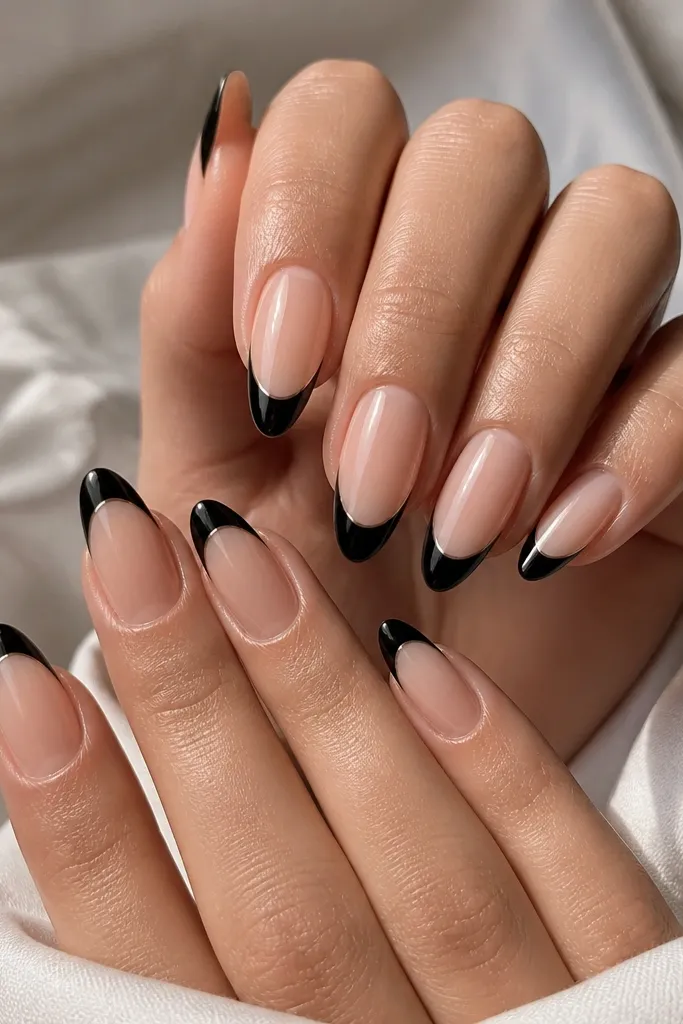
This is the black extension design I reach for when I want sleek without bulky decoration. The nude base gives your nail bed space to look longer, and the black French arc draws the eye upward along the almond shape. I like it on light to medium skin tones because the nude reads clean and the black stays crisp. If you have wide nail beds, keep the arc thinner — it elongates instead of covering. The glossy finish matters here; it makes the arc look like a salon line instead of a painted edge.
Start by building your extension and shaping to a true almond, not a pointy teardrop. Apply a sheer nude base (I use something close to your cuticle color) and cure fully. Next, paint the French arc with gel black, keeping the curve parallel to your smile line — leave a hairline gap so the nude line shows. Cure, then clean up the edges with a small brush dipped in gel cleanser. Finish with a thick, self-leveling glossy top coat and cure again so the arc looks like glass.
Use a French guide strip for the first nail, then freehand the rest to match the same arc height across all ten.
Avoid a thick black arc that touches the sides — it makes the nail look shorter and can look messy at the cuticle.
2. Matte Black Cuticle Halo
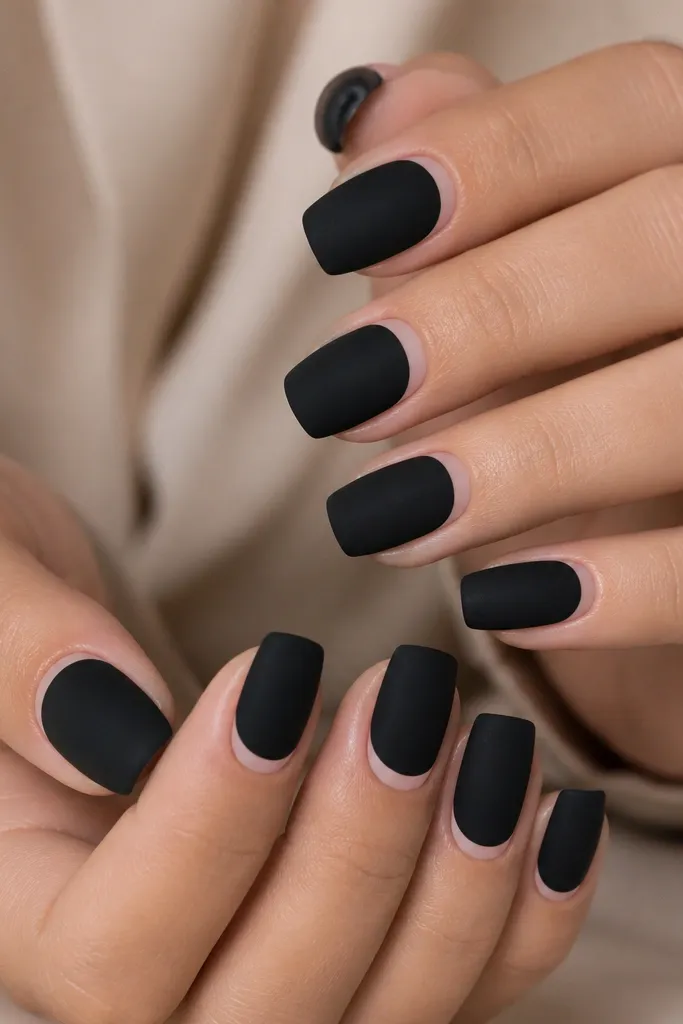
Matte black with a cuticle halo looks edgy but still clean, and it’s forgiving if your prep isn’t perfect. The negative-space ring makes your nail bed look wider and longer at the same time, which flatters hands that run a bit narrow. I’ve worn this on both cool and warm undertones and it always looks intentional because the halo breaks up the darkness. It also works great if you type a lot, since there’s no raised art to catch on things. The matte top coat gives it that velvety finish that hides micro-scratches better than high-gloss.
Start with a sheer base or builder gel that matches your natural nail bed, then place a full coverage matte black on top. Cure, then wipe for tackiness control before applying the matte top coat. For the halo, use a thin liner brush to outline a curved band near the cuticle, then pull a small amount of black away to create the negative-space ring. Clean the edges with a silicone tool or a brush with cleanser so the halo looks smooth. Finish by sealing with matte top coat over everything except the negative-space ring, which should stay uncoated so it stays clear.
Editor's noteIf you hate precision, do the halo on two nails first, then use them as your “height reference” for the rest.
Skip thisDon’t let the halo touch the sidewalls — a tiny gap keeps it looking crisp, not crowded.
3. Black Marble Vein Tips
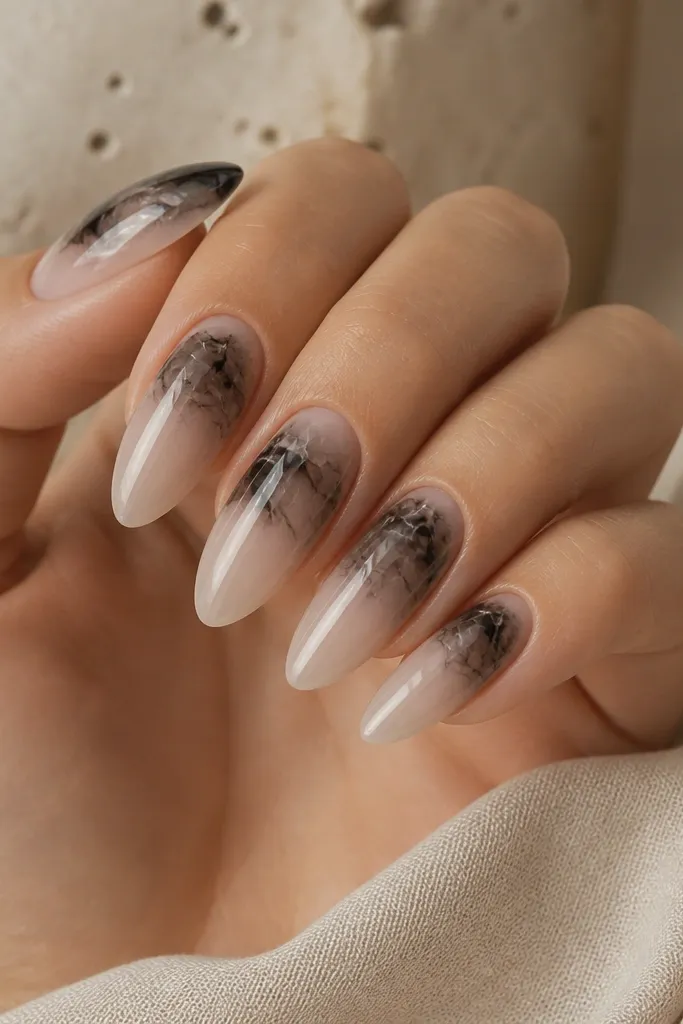
Marble tips give you motion without needing a full nail painting marathon. The sheer base keeps it wearable, and the marble veins at the tip create depth that reads expensive in photos. I like this on medium skin tones because the nude base warms up the black, so it doesn’t look harsh. If your nails are shorter, you can scale it down by keeping the marble area to just the top quarter. Gloss is key here — it makes the marble look like it’s under glass rather than sitting on top.
Build and shape your almond extensions, then apply a sheer nude base and cure. Dot black gel at the tips and drag it with a micro liner brush to create vein lines, leaving negative space between veins. Add tiny wisps of gray or white gel between the black lines so it reads like stone, not just scribbles. Cure, then gently buff any raised spots so the tip stays smooth. Seal with a high-gloss top coat and cure again for that “marble under resin” look.
Editor's noteUse a damp brush to soften one edge of each vein — marble always looks more natural with slightly blurred transitions.
Skip thisDon’t fill the whole tip solid black — it turns into a blob instead of marble.
4. Smoky Black Ombre to Clear
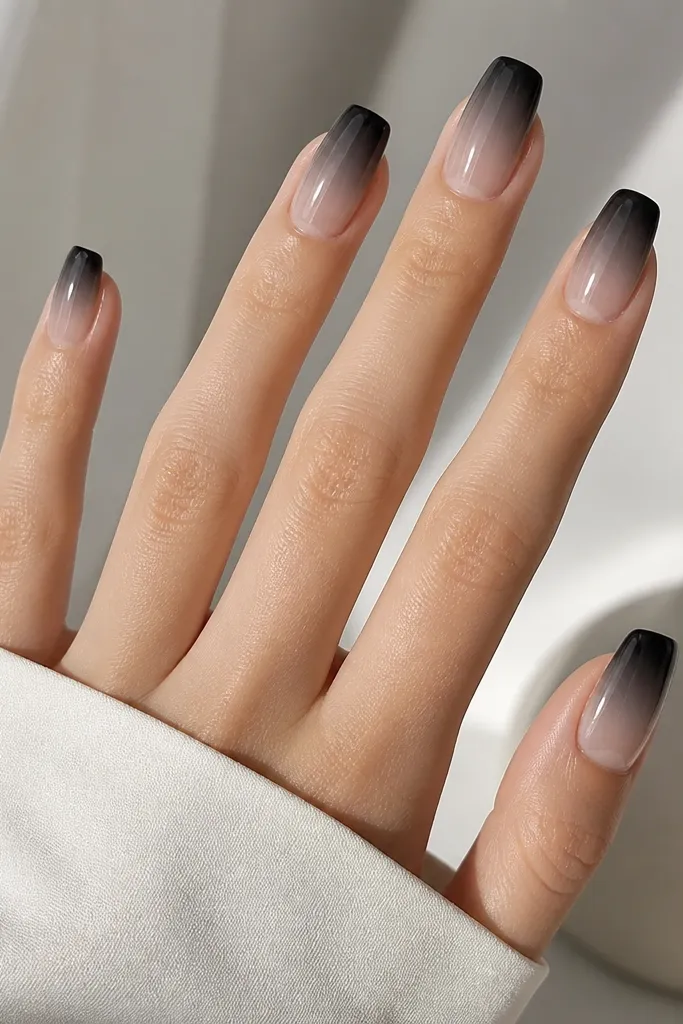
This ombre is the “sleek and edgy” version of black that still feels light on the hand. The smoky fade pulls attention to the center of your nail, which makes your fingers look longer and your nail bed look cleaner. I love it for winter because it looks like charcoal smoke, not heavy ink. It also looks good on hands with short nail beds since the fade avoids a blunt line at the cuticle. The glossy finish keeps the gradient smooth and reflective.
Start by applying a clear or sheer base to keep the center airy. Sponge black gel or black powder gel onto the tips, then blend upward with a clean makeup sponge or ombre brush — stop before you reach the mid-nail. Wipe the sponge lightly between nails so the gradient stays consistent. Cure, then add a thin clear gel layer over the gradient to level the surface. Seal with glossy top coat and cure again.
Editor's noteBlend in short taps, not swipes — swiping can create streaks that show up under lights.
Skip thisSkip the solid black at the top if you want a sleek look — a heavy block makes ombre look cheap.
5. Black Chrome Half-Moon Accent
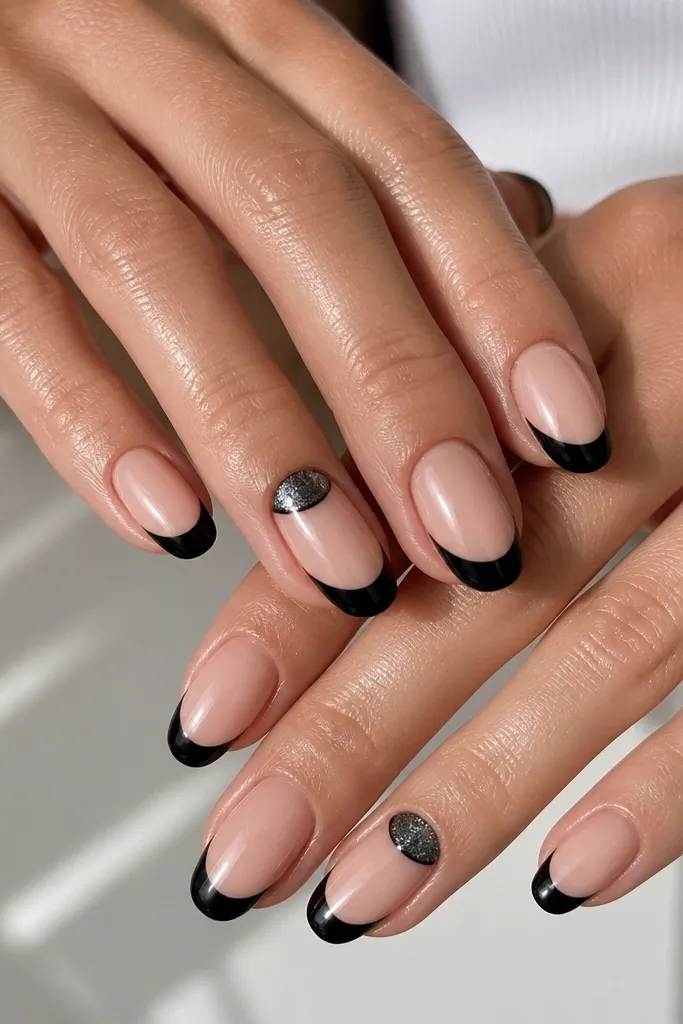
The half-moon chrome accent makes black extensions look sharp without covering every nail in chrome. I like it when you want “edgy” but still work-appropriate, because most nails stay simple and the accent catches light. This is especially flattering on hands with a small cuticle area — the half-moon shape visually frames the nail bed. The black chrome reads deeper than regular silver chrome, so it doesn’t look too bright against warm or cool skin tones. Keep the chrome confined to the half-moon so it doesn’t steal attention from the whole set.
Apply a nude base and cure, then paint glossy black tips on all ten nails with a clean curve. Pick two nails for the accent and wipe the cuticle area clean so chrome sticks. Apply a thin layer of black gel in a half-moon shape near the cuticle, cure lightly if your system needs it, then rub black chrome powder into the tacky area. Seal the chrome with a thin top coat that’s safe for chrome so it doesn’t dull. Cure and finish with regular glossy top coat on the rest of the nails.
Press the chrome in from the center outward so it lays flat and doesn’t look patchy.
Don’t over-seal chrome with a thick layer — it can mute the shine and make the half-moon look smoky.
6. Tiny Black Rhinestone Cluster at Sidewall
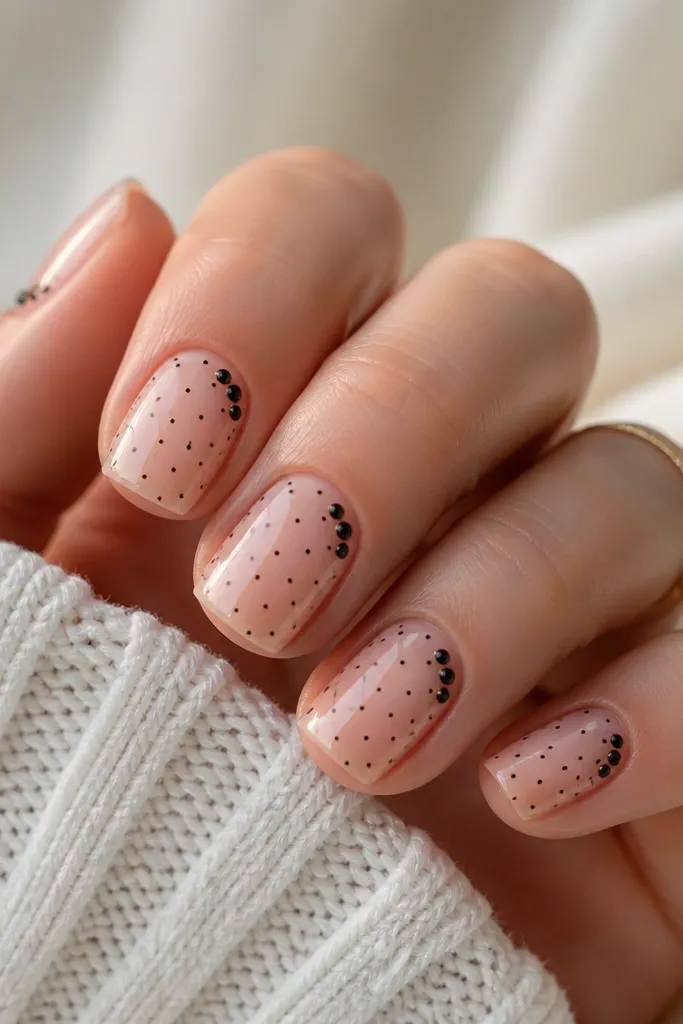
Sidewall clusters look extra because they catch light when your hands move, not when they’re perfectly still. Tiny black stones make the set feel edgy instead of bridal, and the sheer blush base keeps it from looking heavy. I’ve worn this to dinners and it still looks right in daylight because the stones are small and spaced. If your nails are naturally wider, a side cluster can visually narrow the nail by pulling attention to one edge. The key is restraint: small stones, one cluster, and glossy black dots to connect the theme.
Start with extensions shaped to a squoval that matches your natural width. Apply a sheer blush base and cure, then paint a thin set of glossy black micro dots near the sidewall on each nail. For the rhinestones, place a guide point first with a dot of gel at one side near the cuticle, then add 3-4 tiny stones in a slight diagonal curve. Cure, then top coat carefully around the stones so you don’t flood them with gel. Finally, seal the whole nail with glossy top coat, keeping the surface smooth where stones sit.
Use black rhinestones with a flat back and keep them under 1 mm — bigger stones make it look bulky fast.
Don’t glue stones straight on top of matte — they pop off. Use glossy gel base for better grip.
7. Black Outline Stars on Sheer Nude
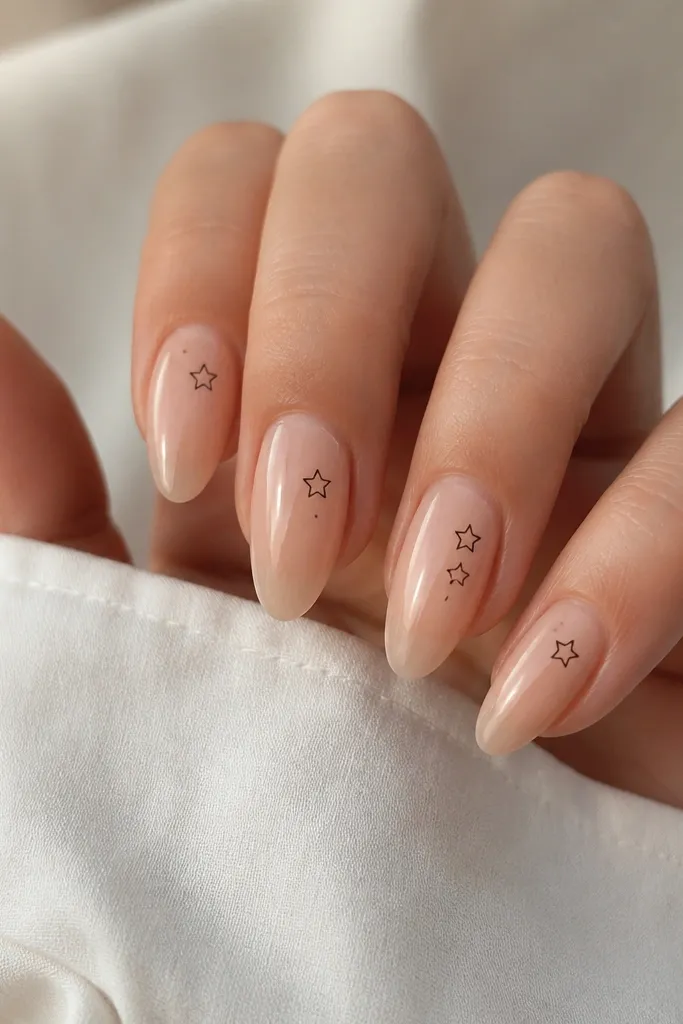
Outline stars are my go-to when I want edgy but not goth. The black lines are thin enough to look graphic, and the sheer nude base keeps it airy. This works on almost any skin tone because you’re mostly showing your natural nail look, just with a sharp design element. On longer almond nails, stars near the upper third elongate the nail bed visually. It’s also a good option if you get bored with full black coverage and want your extensions to still look like nails, not paint.
Build and shape your almond extensions, then apply a sheer nude base and cure. With a fine liner brush, draw one small outline star on each nail near the upper third — keep them all the same size so it looks designed. Add a couple of tiny black dots around the stars for balance, then cure. Clean up any stray lines with a brush and cleanser. Seal with a glossy top coat, making sure the brush doesn’t drag through the thin lines.
Practice one star on a nail tip first — the line thickness changes how “cute” or “edgy” it reads.
Skip filled-in stars. Solid black star shapes make the set feel heavier and less sleek.
8. Black Velvet Matte with Micro Silver Specks
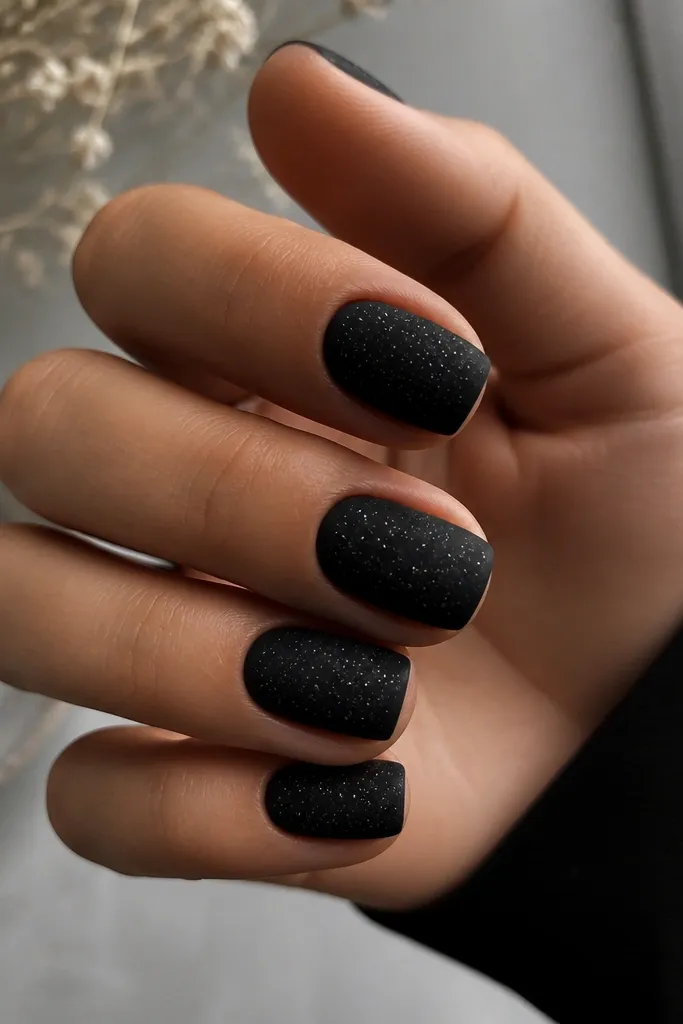
Velvet matte black with micro silver specks looks like night sky on your nails. The matte finish hides small dents and makes the specks look more like texture than decoration. I like this for fall and winter because it feels cold and clean, not party-sparkly. It also flatters hands with dry cuticles because the matte black draws attention away from skin texture. Keep the specks tiny; when they’re micro, the set reads expensive instead of random glitter.
Apply full coverage matte black gel and cure, then wipe and apply matte top coat. For the specks, tap a silver ultra-fine pigment or silver gel glitter using a stiff makeup sponge or small brush — barely load it so you get scattered dots, not clumps. Place more specks on two or three nails and keep the rest lighter for contrast. Cure if your product requires it, then re-check the matte finish. Finish with matte top coat again only if your specks dull after curing.
Use a light touch with the pigment. You want dusting, not sparkle chunks.
Don’t use chunky glitter — it breaks the velvet look and makes the nails feel rough.
9. Black Glossy Scallop Tip with Nude Base
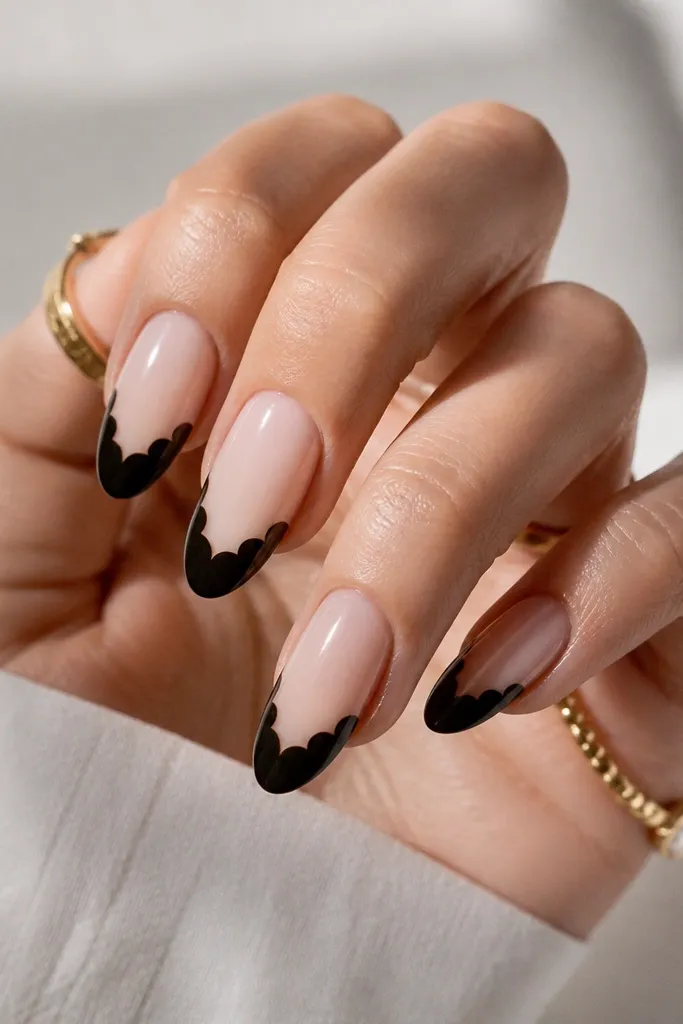
Scallop tips look playful but still edgy when the color stays black. The scallops create movement and texture, so even plain outfits look styled. I like this on almond nails because the scalloped edge follows the curve of the tip instead of looking like a sticker. On deeper skin tones, the nude base helps the scallops pop without turning the set too dark. Keep the nude sheer, not milky, so the contrast stays clean and modern. Glossy top coat makes the scallops look crisp, like they’re printed under clear gel.
Start with a nude sheer base and cure, then mark the tip zone where scallops will start — about the top one-third. Paint a black base across the tip lightly, then use a dotting tool or small liner to pull scallop arcs from side to center. Make each scallop consistent in size and spacing so the edge looks intentional. Cure, then add a thin top coat layer to smooth any tiny ridges between scallops. Finish with glossy top coat for a glassy finish that makes the pattern look sharp.
Use a dotting tool instead of a brush for scallops — dots give you uniform curves.
Don’t make scallops too large. Big scallops can turn the tip into a thick, bulky band.
10. Black Negative-Space Lightning Bolt
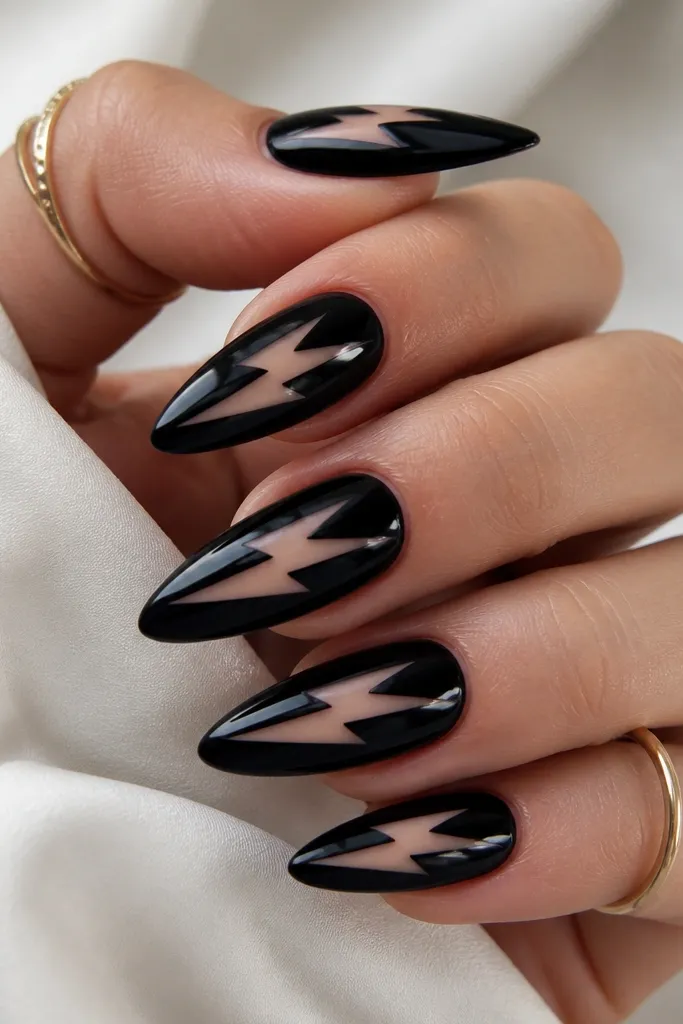
This design is pure attitude because the bolt feels sharp and fast. The negative space keeps it from looking like a solid black block, so it still feels sleek on camera. I’ve done it on both short and long extensions, but it looks best on almond because the bolt follows the nail’s natural taper. It flatters hands with small nail beds because the bolt gives the eye a shape to follow instead of a flat color surface. Glossy black plus crisp negative space makes the bolt look like it’s cut out of glass.
Build your almond extensions and cover with glossy black gel, curing fully. Apply a thin layer of clear or nude gel in the area where you want the lightning bolt to show, then cure lightly if your system needs it. Use a fine liner brush to outline the bolt edges, then scrape away black gel carefully with a thin tool so nude negative space appears. Clean the edges with a brush dipped in cleanser so the bolt lines look sharp. Seal with glossy top coat, but keep the bolt interior free of black so the cut-out effect stays crisp.
Editor's noteDraw the bolt on paper first with the same nail length — then match the proportions on the nail so it doesn’t look stretched.
Skip thisDon’t use thick black outlining around the bolt — it makes the design look like a blob instead of a lightning cut.