1. Micro-French on Squoval Tips
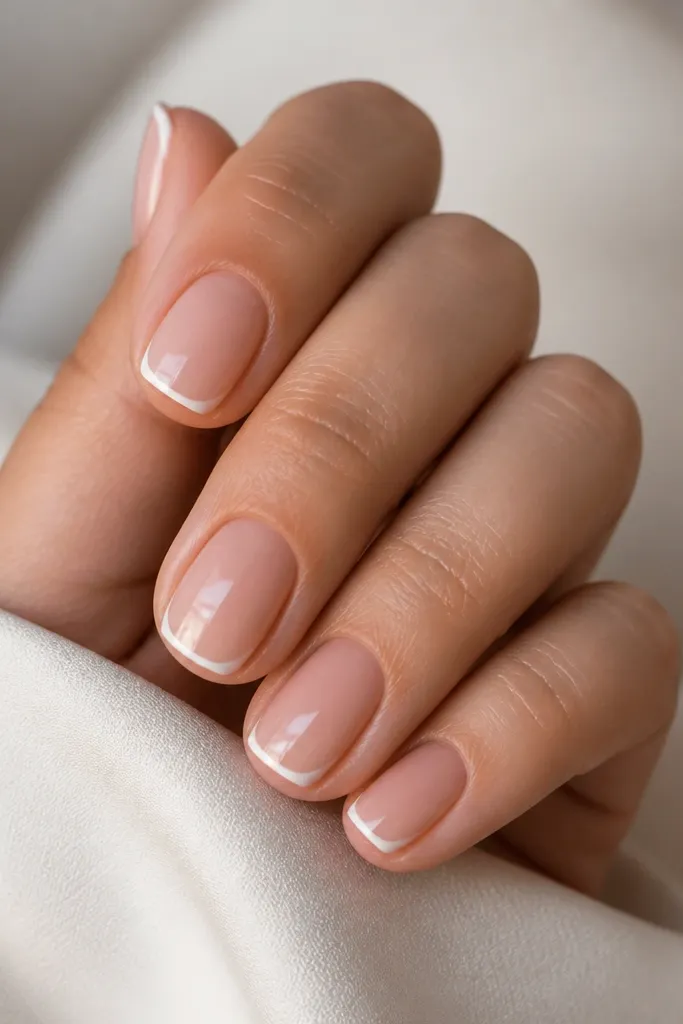
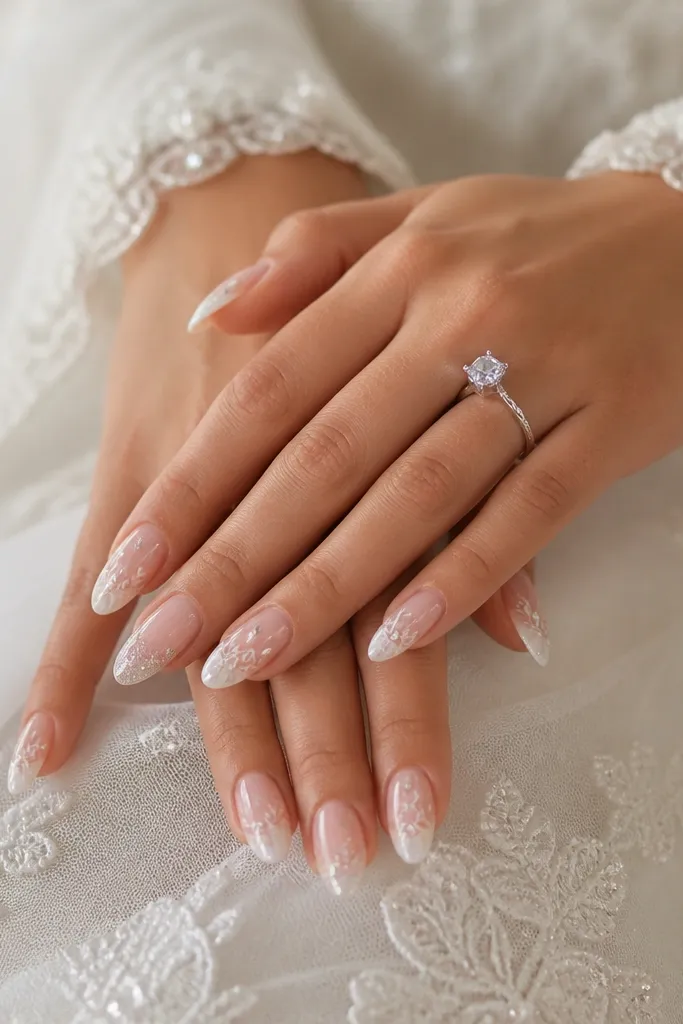
This is the design I reach for when someone’s nail beds feel small. The sheer nude base keeps the center of the nail looking longer, while the micro-French line only takes up a sliver of the free edge. I use squoval because it doesn’t flare at the sides like a soft square can. White should be opaque enough to look clean, but thin enough to stay delicate. This flatters most skin tones because nude is close to your natural color — I match it to the inside of your wrist or the base of your thumb for the most believable blend.
Start by applying a sheer nude gel builder or tint and curing it fully. File your squoval shape so the free edge is about 2 mm past the natural tip, then wipe dust with a lint-free pad. Paint the French line using a fine detail brush — keep it under 1 mm thick and leave a tiny gap from the sidewalls. Fill only the tip edge with white, then cap the end lightly with clear gel. Finish with a glossy top coat and cure, then clean the cuticle with a gel-safe brush dipped in alcohol.
Editor's noteIf the French line looks uneven, rotate the nail under the lamp and re-brush from the center outward — it straightens fast.
Skip thisDon’t make the French line wide — wide tips swallow small nail beds and make fingers look shorter.
2. Half-Moon Nude with Clear Cuticle Arc
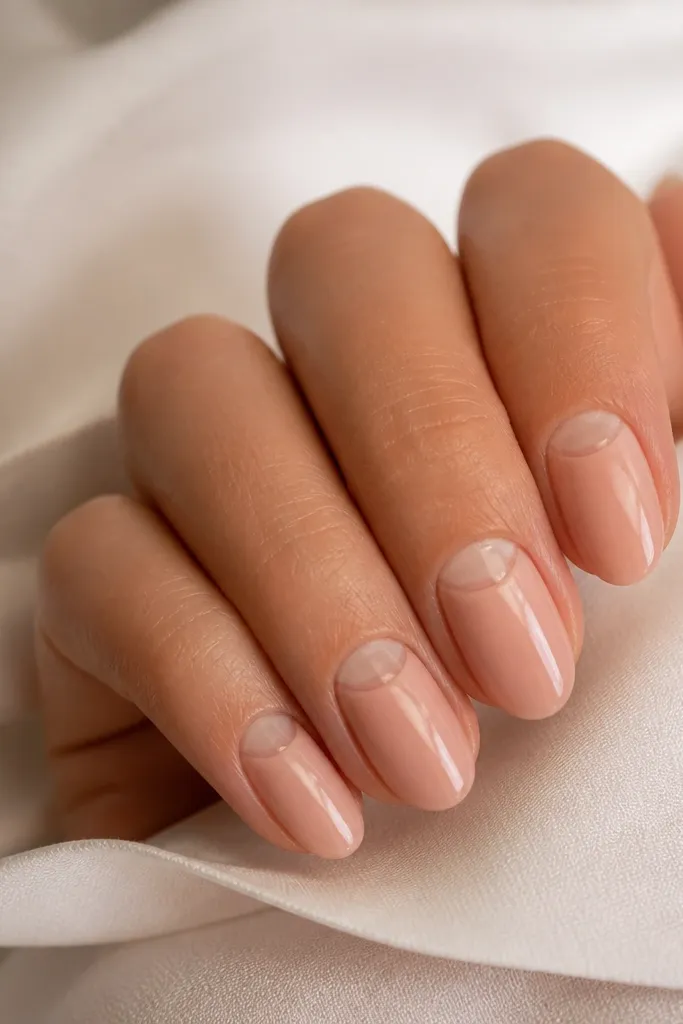
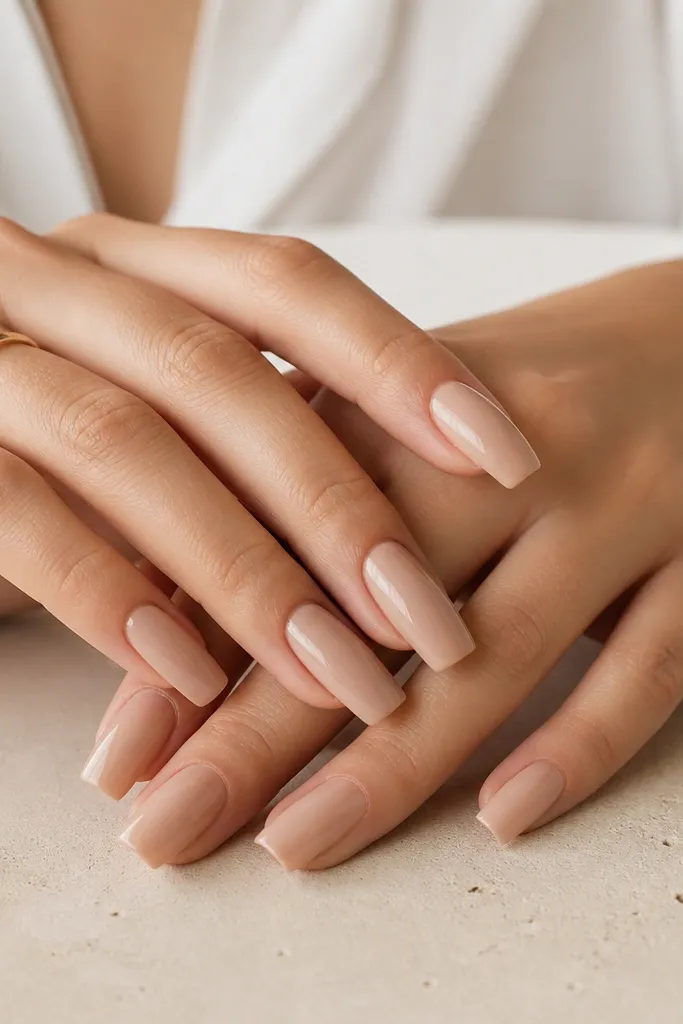
This design uses negative space in a way that makes small nails look intentional. The clear cuticle arc tricks the eye into seeing a longer nail because it creates a “break” near the base without adding width. I like almond here because the curve of the half-moon follows the natural growth line and looks smoother than on a wide square. For skin tones, I pick nude pinks with a hint of warmth for light to medium warm undertones, and slightly cooler rosy-nudes for neutral to cool undertones. It’s also forgiving if your cuticles are a little dry because the arc sits right above the skin line.
Apply a nude base that matches your skin tone and cure. Use a small rounded brush or a half-moon stencil to outline a crescent directly under the cuticle — the clear area should be about 20-30% of the nail’s width. Leave that crescent empty, then paint around it with nude gel, keeping the edges crisp. Cure, then top coat over everything, including the clear arc area so it stays smooth and shiny. If you want extra polish, add a thin clear gel “cap” over the tip to prevent chipping.
Editor's noteTrace the half-moon twice lightly instead of forcing one thick outline — crisp negative space looks expensive.
Skip thisDon’t extend the half-moon too far down the nail — if it covers half the nail, it shortens the look.
3. Diagonal Nude Stripe with One Color Corner
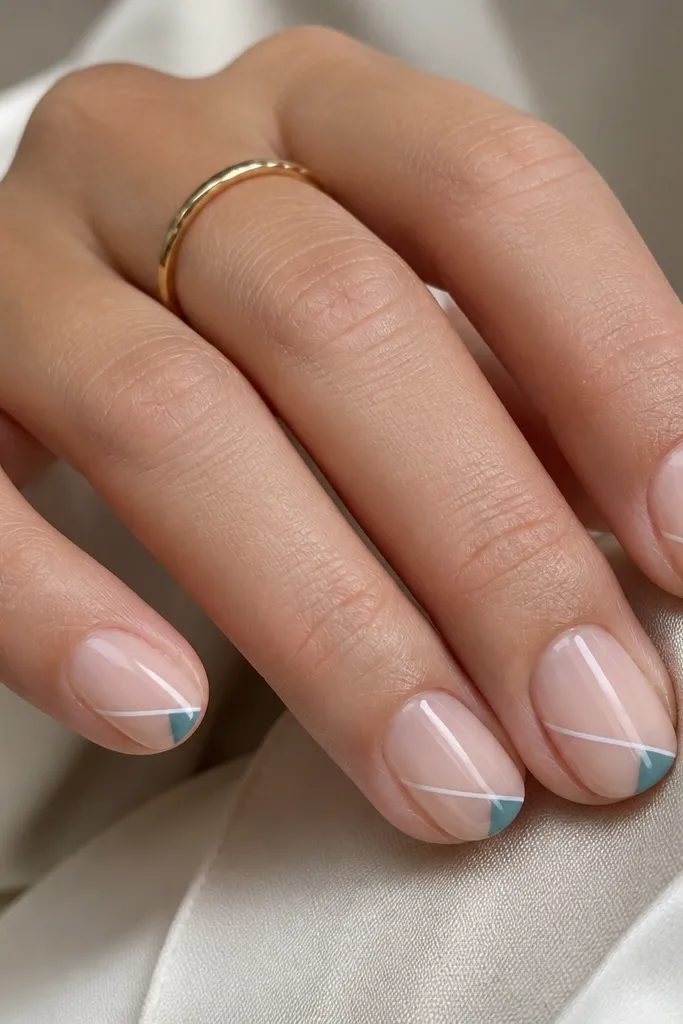
This is my go-to when you want art but your nail space is tiny. The diagonal stripe creates a length line, and the single colored corner adds interest without covering the whole nail. I keep the base nude so the diagonal reads clean, not busy. White works as the stripe if you want it bright and crisp; you can swap it for a pale beige if you want it softer. This flatters shorter nails because it doesn’t widen the tip — the color triangle is only at one edge.
Paint the nails with a sheer nude base and cure. With a fine brush, draw a diagonal stripe starting about 1 mm below the cuticle and ending near the outer side of the free edge, keeping it under 1 mm thick. Then place a small triangle of color at the opposite corner near the tip — about the size of a pencil eraser dot. Cure each color step so the stripe stays sharp. Finish with glossy top coat; cap the free edge with clear gel for smoothness.
Editor's noteUse painter’s tape to mask the diagonal for the first try, then remove it before curing so the line stays crisp.
Skip thisDon’t add a second accent color — two corners make small nails feel crowded.
4. Centered Dot Constellation on Clear Base
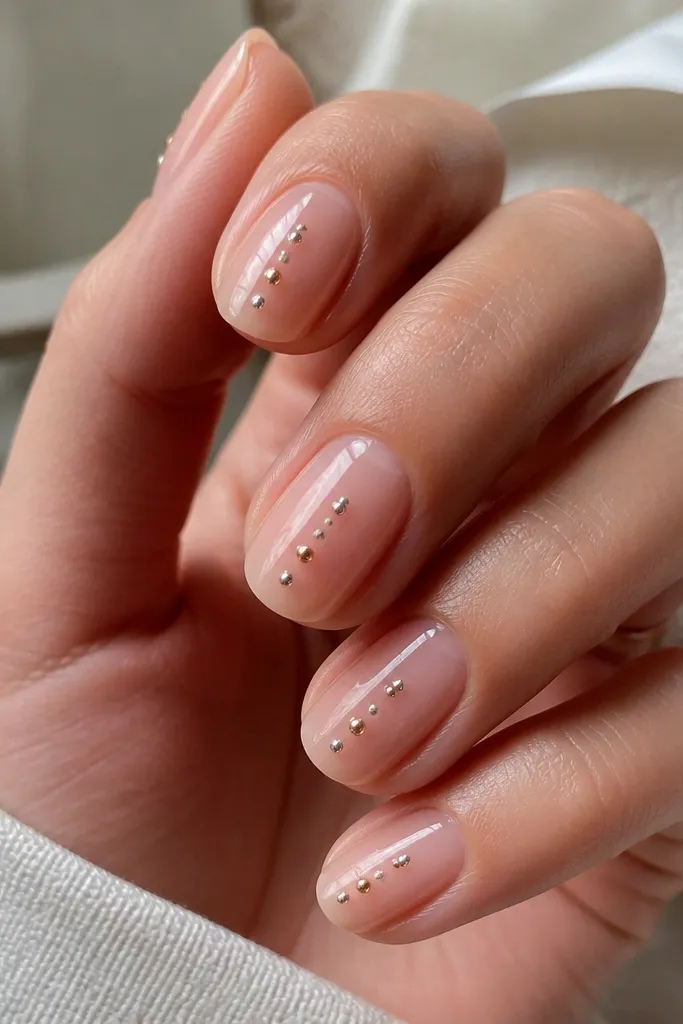
A dot constellation is simple, but it looks detailed because your eye connects the dots. On small nail beds, center placement is everything — it visually stretches the nail and avoids widening the sides. I use a clear or very sheer base so the dots look like they’re floating. Silver-chrome and champagne-chrome are the best combo because they catch light differently without clashing. This design looks great on cool and neutral skin tones, but it also works on warm tones if you lean champagne instead of icy silver.
Start with a clear builder or sheer nude base and cure. Use a dotting tool to place 5-7 tiny dots down the center line, spacing them about 1-2 mm apart from cuticle area to tip. Alternate dot size — one larger dot in the middle and smaller dots around it — so it looks natural. If you want a little extra sparkle, add a micro dot near the free edge and leave the rest bare. Seal with glossy top coat, making sure you don’t flood over the dots — you want them to stay raised just a touch.
If the dots look too perfect, drag a toothpick through one dot’s edge for a tiny “star flare.”
Don’t put dots across the whole nail — side-to-side dots make nails look wider than they are.
5. Two-Tone V French with Negative Base
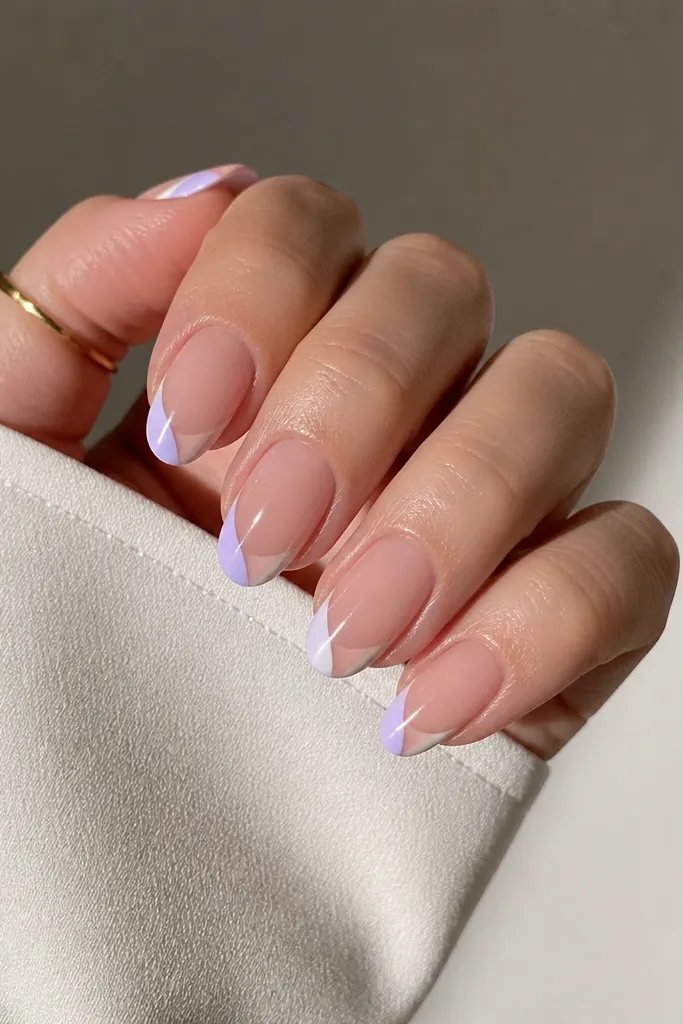
A V French is one of the cleanest ways to add shape without taking up space. The V notch creates natural length because it pulls the eye to the center point, not the full width of the tip. I like this on almond because the tip naturally forms a V, and the sides stay narrow. Use a sheer nude base so the negative space still reads as intentional. White plus lavender is a sweet combo that works for everyday and photos — and it doesn’t fight warm or cool undertones.
Apply a sheer nude base and cure. Paint the V using two fine lines: first draw the center V notch with white on one side and lavender on the other, keeping the lines thin. Keep the tip height around 2 mm so it stays subtle. Connect the V ends to the sidewalls lightly, then add a second pass only if the color looks patchy. Cure, then top coat and cap the free edge so the V stays smooth when you wash your hands.
Editor's noteUse a striping brush loaded lightly; thick paint makes the V look like a blob on small nails.
Skip thisDon’t fill the entire tip — the magic is the notch and thin lines.
6. Tiny Heart Accent on Sheer Pink
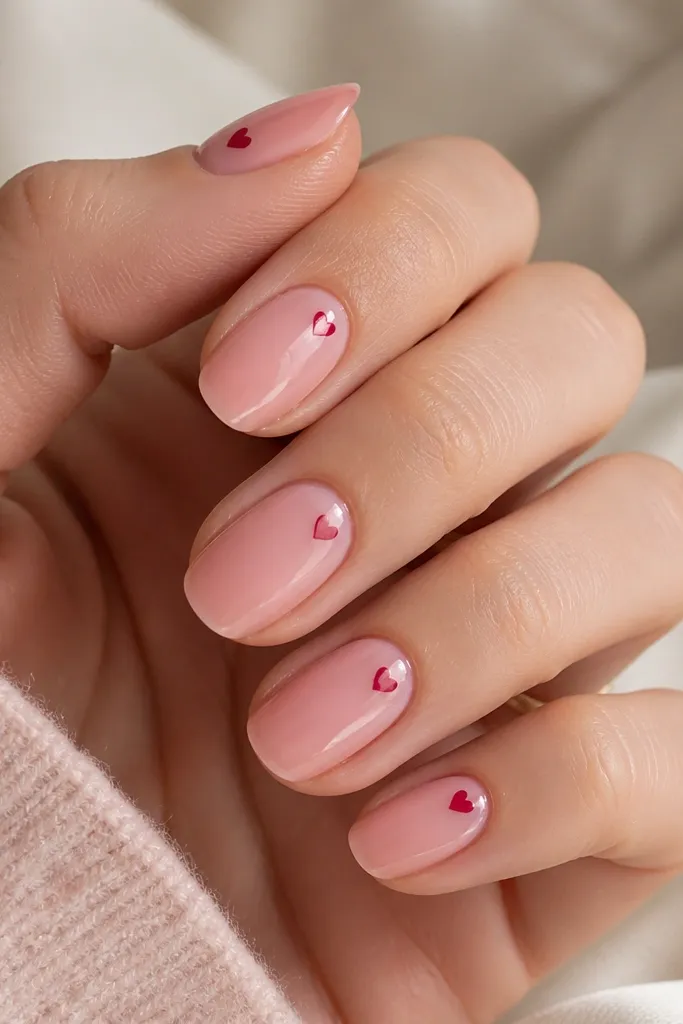
Hearts can look adorable without making nails look busy when you keep them tiny and placed near the center. The sheer pink base gives you a soft, wearable look, and the heart adds a focal point. I place the heart just above the midline so it doesn’t crowd the cuticle. Deep pink or cherry red hearts pop on light skin and still look rich on deeper tones. This one flatters short extensions because the design stays compact and doesn’t spread across the sides.
Start with a sheer pink base that matches your natural nail tone and cure. Use a dotting tool to make two small circles for the heart and then connect them with a thin brush to form the heart point. Place the heart slightly off-center toward the outer edge on two accent nails, and keep it centered on the rest for balance. Let the heart color cure fully, then add top coat carefully around it. If you want it extra smooth, add a tiny clear gel layer over the heart and cure so it doesn’t snag.
Editor's noteFor clean hearts, draw the outline first in thin gel, then fill only after it cures a few seconds.
Skip thisDon’t make the heart bigger than the width of your cuticle line — big hearts turn into blobs.
7. Chrome Center Stripe on Nude Almond
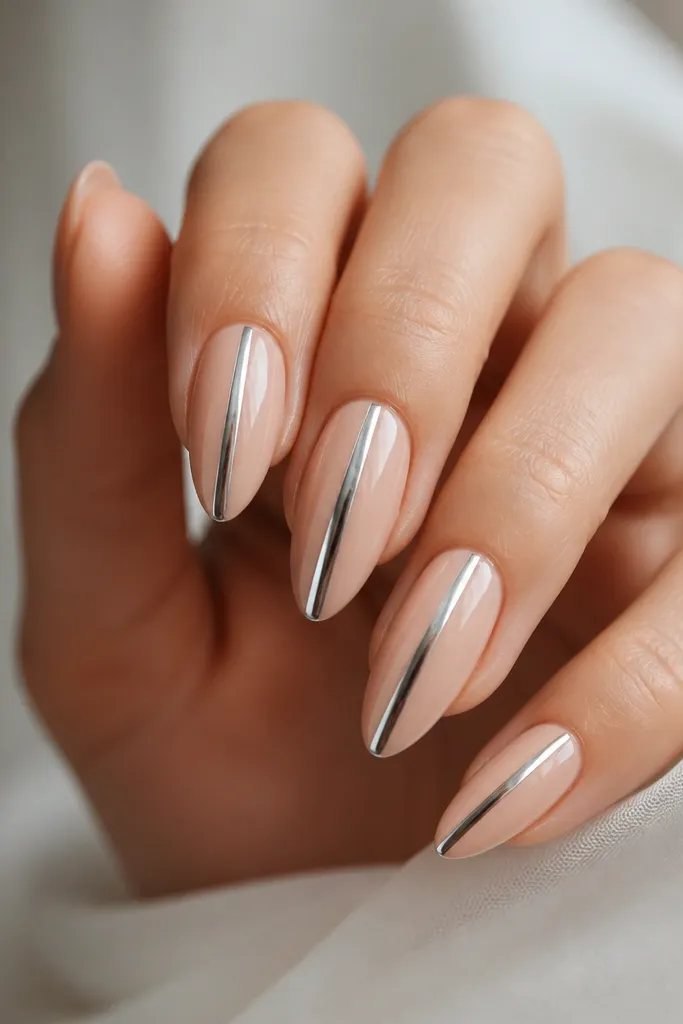
A chrome center stripe is the fastest way to make small nails look longer. The reflective line pulls the eye vertically, and the rest of the nail stays neutral. I like almond here because the center stripe follows the natural taper and looks sharp. Keep the base nude and not fully opaque — a sheer nude makes the chrome feel lighter instead of heavy. Silver chrome works for most skin tones, but if you love warm tones, use gold chrome for a softer glow.
Apply a nude base and cure, then wipe with a lint-free pad. Create a thin line down the center with a striping brush and a chrome gel or clear gel tacky layer. Press chrome powder or rub a chrome mirror pigment onto that line, then buff gently with a soft applicator so edges stay clean. Seal with glossy top coat in a thin layer so the stripe doesn’t dull. Repeat carefully on each nail — keep the stripe width about the thickness of a hair strand.
Do the chrome stripe after your base is fully cured and dust-free; dust ruins mirror edges.
Don’t cover the chrome with thick gel in one coat — it turns the stripe gray.
8. Single-Line Leaf on Nude Base
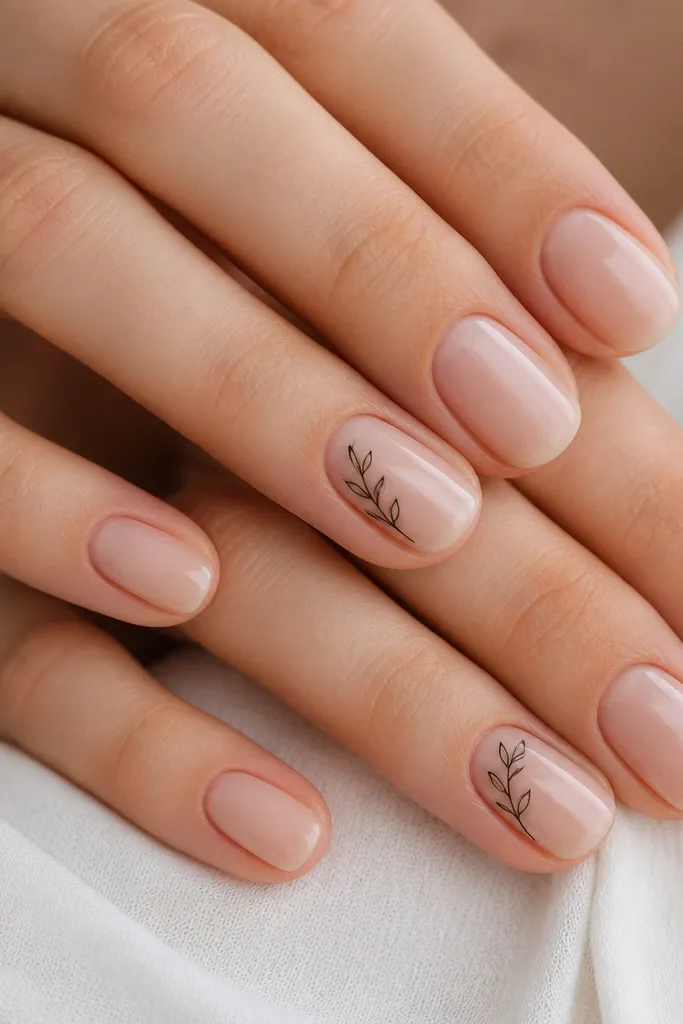
Minimal line art looks best on small nail beds because it adds detail without taking up surface area. A single-line leaf gives you a natural motif that doesn’t feel seasonal in a forced way. I draw it near the cuticle so the leaf sits in the “upper third” of the nail, where your eye expects design. Black ink gel on nude reads clean and classy; if you want softer, use deep olive instead. This works on every skin tone because the nude base is your anchor and the line is the contrast.
Paint nails with a nude base and cure. On accent nails, use a fine liner brush to draw one leaf — start at the stem near the cuticle, then make two curved sides and a center vein with one light stroke. Keep the leaf height about 3-4 mm so it stays small. Cure, then apply top coat carefully along the edges so the line stays crisp. If your line looks bumpy, add a thin clear gel over it and cure again.
Editor's notePractice the leaf on a nail tip first — one good stroke beats three shaky ones.
Skip thisDon’t add extra leaves around it; one motif is the whole point.
9. Polka Dot Tips with Clear Space
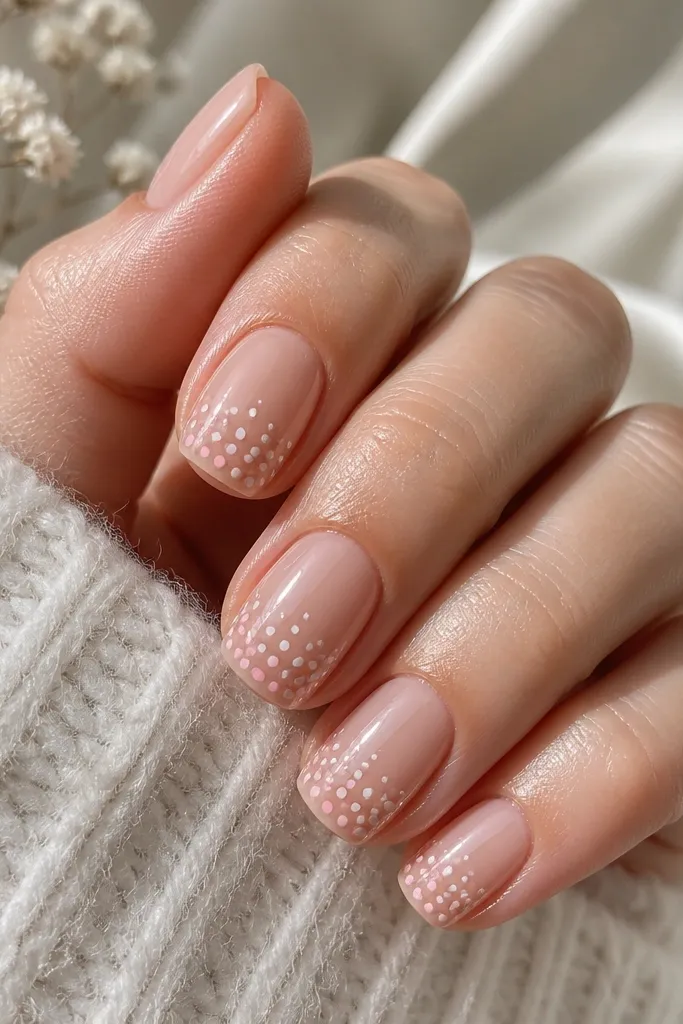
Polka dot tips add playfulness without making nails look wider. By keeping dots only on the top edge and leaving clear space between them, your nail still looks airy. I use a squoval shape so the dots land evenly along the tip curve. Blush and white dots look cute on every skin tone and don’t clash with warm or cool outfits. This design is also forgiving for beginners because small dots hide tiny brush mistakes.
Apply a sheer nude base and cure, then wipe dust. Dip a dotting tool in white gel and tap 4-6 dots across the tip area only, leaving about 1 mm of bare space between dots. Add 2-3 blush dots in between for contrast. Cure, then seal with glossy top coat, using a thin brush to avoid dragging the dots. Cap the free edge with clear gel so the dots don’t peel off with wear.
Editor's noteTap the dot tool straight down — tilted taps make oval dots that look messy on small tips.
Skip thisDon’t fill the tip with dots edge-to-edge — it turns into a solid band.
10. Tiny Plaid Center Panel
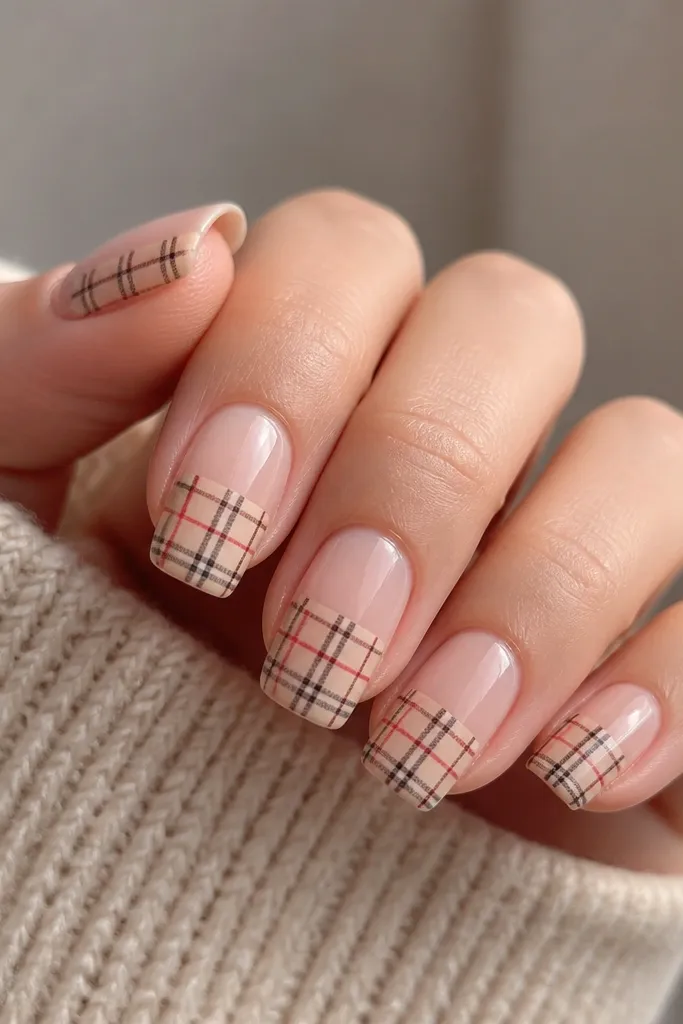
Plaid sounds like it would take up space, but a tiny center panel keeps it neat. The check grid in the upper half gives you cozy detail, while the nude base preserves length. I place the plaid slightly above the midpoint so it looks like a tucked-in accent. Muted red plus cream and black is the easiest plaid combo because it reads warm, not aggressive. This flatters short nails because the pattern sits in one area instead of spreading across the whole nail.
Start with a nude base and cure. Draw a small rectangle guideline in the upper third of the nail, then paint thin vertical lines in black inside it. Add thin horizontal lines to form the grid, then swap one set of lines to muted red for the plaid effect. Keep line thickness under 0.5 mm so it stays delicate. Cure each color step, then top coat, sealing the edges so the plaid feels smooth.
Editor's noteUse gel striping tape as a guide for the rectangle — it keeps plaid from drifting.
Skip thisDon’t make the plaid square too large; oversized checks swallow small nail beds.
11. Beige Gradient with One Ombre Edge
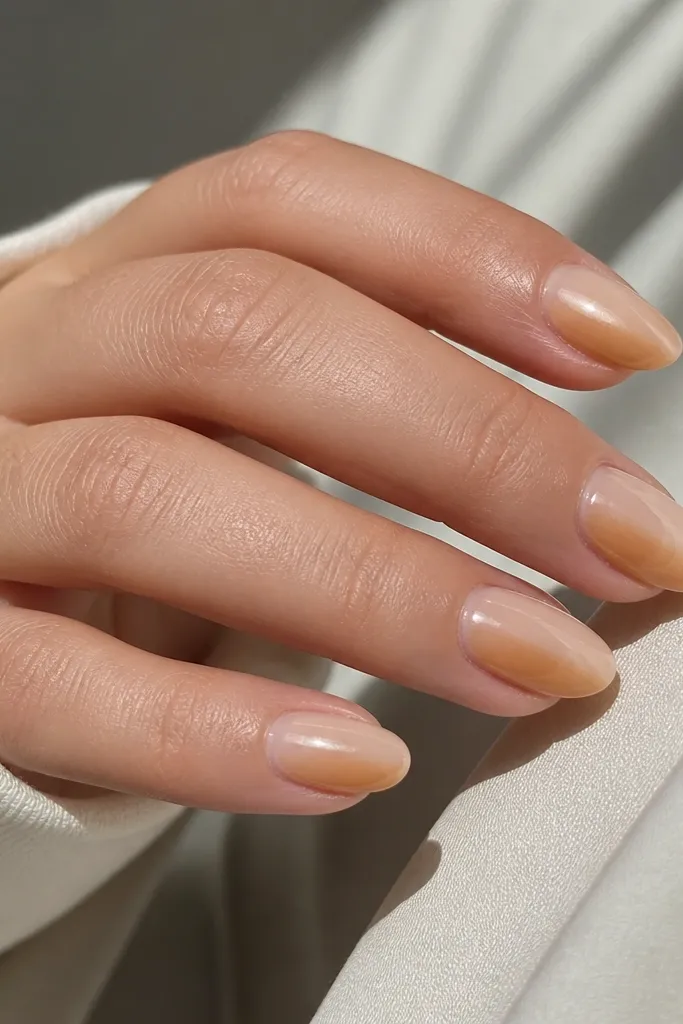
Gradients are great for small space because they look smooth and elongating. I keep this one subtle: a beige fade that’s close to your natural color, plus a soft ombre wash on only one edge. That one-edge accent gives dimension without adding width. Almond nails help the fade look like it’s flowing toward the free edge. Choose a beige that matches your skin undertone — cool beige for neutral/cool, warm caramel beige for warm undertones. It’s also a safe design for work because it looks like a color finish, not loud art.
Apply a sheer nude base and cure. With a makeup sponge or ombre brush, blend a slightly deeper beige starting at the tip and fading upward — keep the blend within the last 2-3 mm. Then take a tiny amount of caramel ombre color and sweep it only on one side edge for a directional look. Clean the sides with a gel-safe brush and alcohol before curing. Seal with glossy top coat to smooth the gradient and make it look even.
Editor's noteWipe off excess color on the sponge edge before you touch the nail so the fade stays light.
Skip thisDon’t blend too high toward the cuticle — high gradients shorten the nail visually.
12. Pearl Half-Tip with Micro Rhinestone Corner
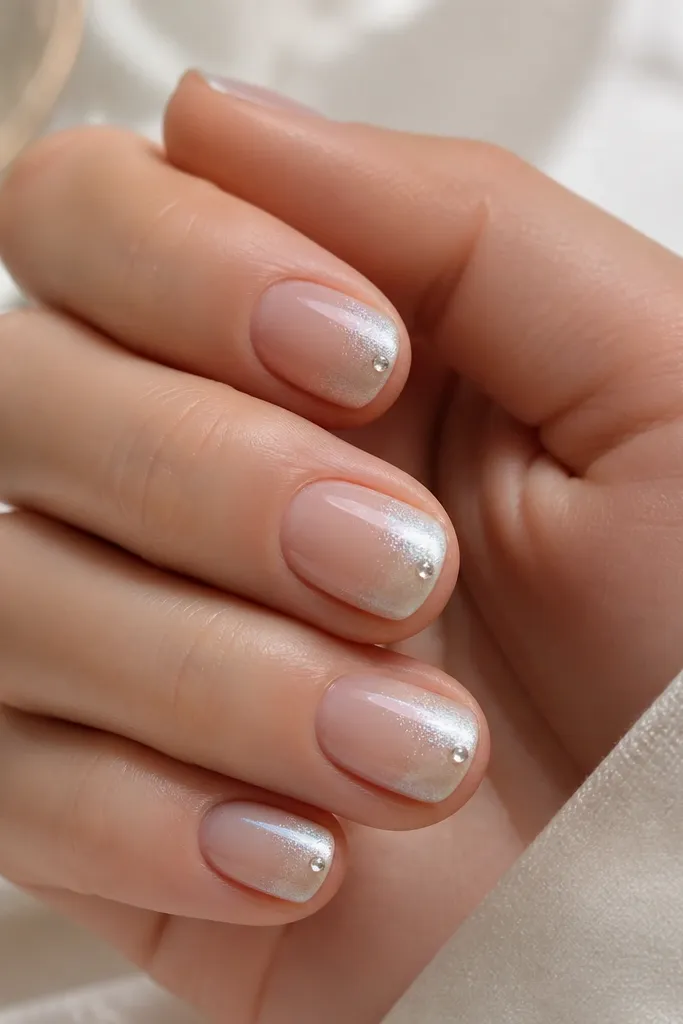
This one is for when you want “special” but you still need it compact. The pearl half-tip adds shine exactly where light hits your fingers, and it doesn’t cover the full nail width. One micro rhinestone at the corner makes it look styled without turning into a full sparkle carpet. I use pearly white because it looks clean on both light and deep skin tones, and it matches most jewelry. The corner placement also helps small nails look longer because it pulls attention to the tip edge.
Start with a sheer nude base and cure. Paint pearly white shimmer only on the top half of the free edge, leaving the lower nail nude — aim for about 2 mm coverage. Use a fine dot of clear gel where you want the rhinestone, then place one tiny stone at the outer corner. Cure, then apply top coat carefully around the stone so it stays anchored and smooth. If you feel a bump, add one more thin clear gel layer over the rhinestone and cure again.
Editor's notePress the rhinestone gently with the flat end of tweezers for 3-5 seconds so it bonds evenly.
Skip thisDon’t place the rhinestone centered — the center makes small tips look wider.
13. Solid Color Tip with Sheer Center Window
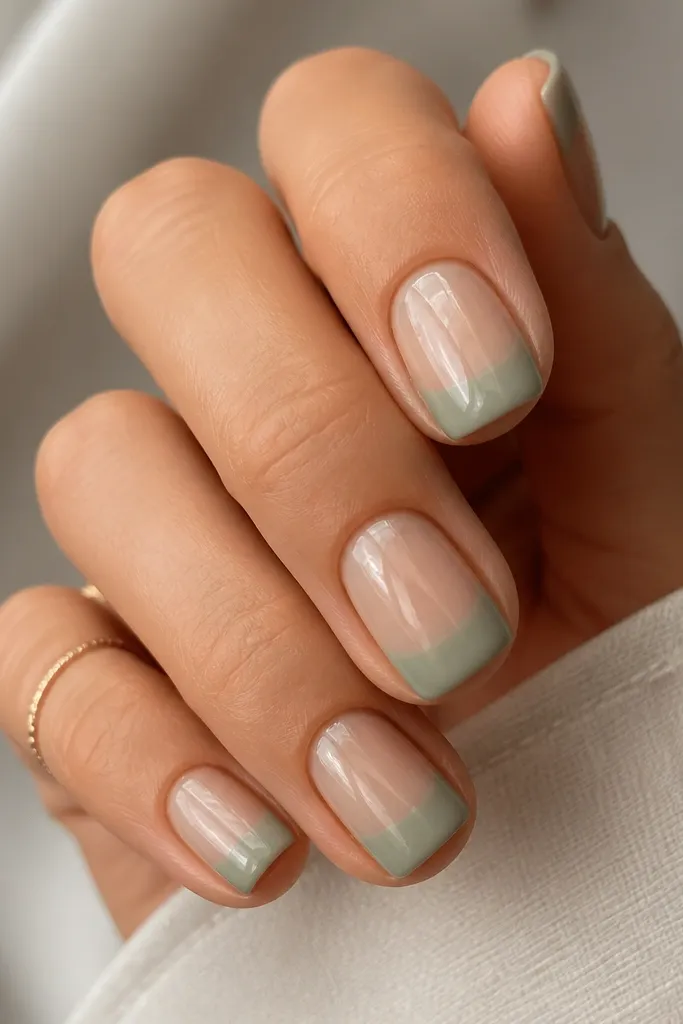
This design uses a sheer “window” so the nail doesn’t look blocky. The solid color tip gives you a bold look, but the center window keeps the eye moving down the finger. I like squoval here because it balances the bold tip with a softer shape. Sage green is a great choice if you want something seasonal without screaming. This also flatters shorter nails because the window creates a vertical line that makes the nail feel longer.
Apply a nude sheer base and cure. Mask a vertical center strip using a thin piece of tape or a gel-safe barrier so you keep the center sheer. Paint the tip in sage green, keeping the color only on the free edge and extending just 2 mm upward. Remove the mask carefully, cure, then blend the edges with a tiny brush so there’s no harsh line. Finish with glossy top coat and cap the tip edge.
Editor's noteIf masking scares you, draw the window with clear gel first, cure, then paint the tip around it.
Skip thisDon’t paint the solid tip too tall — tall blocks shorten the nail.
14. Color-Blocked Side Stripe on Clear Base
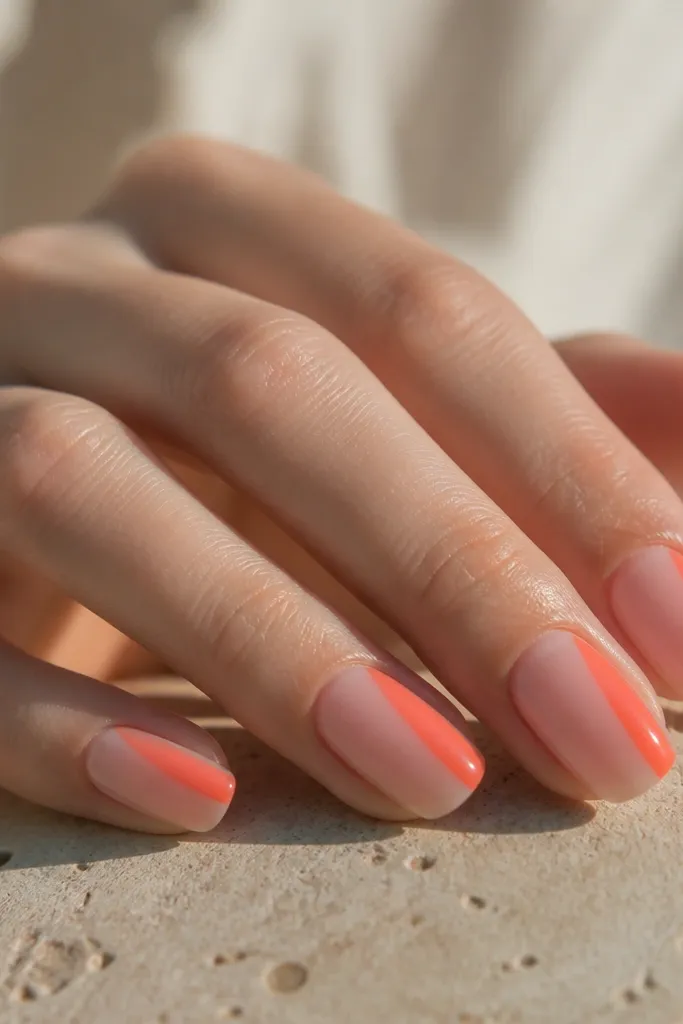
A side stripe is dramatic without taking over the whole nail. Clear base keeps it light, and the thick stripe on one side creates a strong line that still reads length. I prefer this on almond because the side line follows the taper and looks intentional. Coral is the color that makes this design feel fresh, but you can swap it for cobalt blue or deep berry for darker seasons. This works especially well on small nail beds because the stripe is positioned to one side, not stretched across the width.
Start with a clear builder or sheer nude base and cure. Use a striping brush to paint a side stripe on one edge, starting around the middle of the nail and ending at the free edge. Keep the stripe width around 1.5-2 mm so it looks bold but not heavy. Clean the edge with a thin brush and alcohol before curing so the line stays sharp. Top coat with a glossy finish, and cap the tip so the stripe doesn’t chip.
Mark where the stripe starts with a tiny dot guide on the nail before you paint — it keeps the stripe from drifting.
Don’t put the stripe on both sides — symmetry makes small nails look shorter.
15. Mini Watercolor Wash with Center Splash
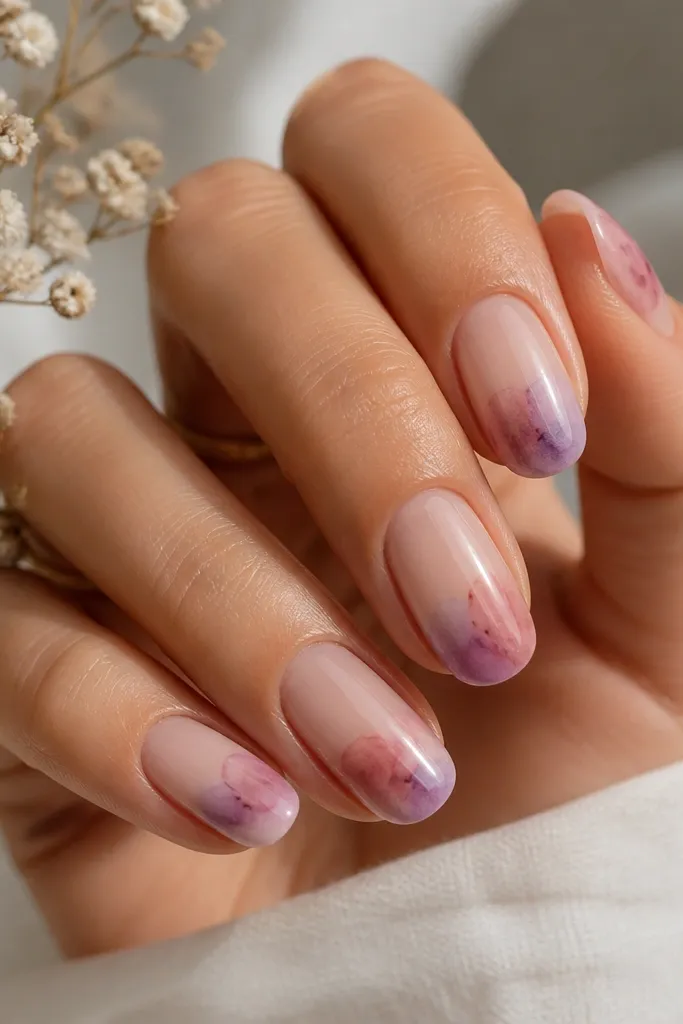
Watercolor can work on small nails if you keep it like a wash, not a painting. The nude base stays dominant, and the color stays near the tip where it flatters the free edge. I add a tiny darker center splash so the design has one focal point. Dusty rose and light lilac are forgiving and look good on every skin tone because they’re not neon. This is a great “I want pretty but not loud” option for spring and summer.
Apply a nude base and cure. With a watercolor gel or diluted pigment on a small brush, add a soft wash at the tip area only, blending outward with light pressure. Add one small darker splash in the center — about the size of a poppy seed — then blot lightly with a clean brush so it doesn’t spread too far. Cure, then apply top coat in thin layers so the watercolor stays glossy and smooth. If the wash looks too strong, dilute the next coat with clear gel and tap over the edges.
Editor's noteWork in fewer strokes — watercolor gels look best when you leave some nude showing through.
Skip thisDon’t drag the color down toward the cuticle — it makes the nail look shorter.