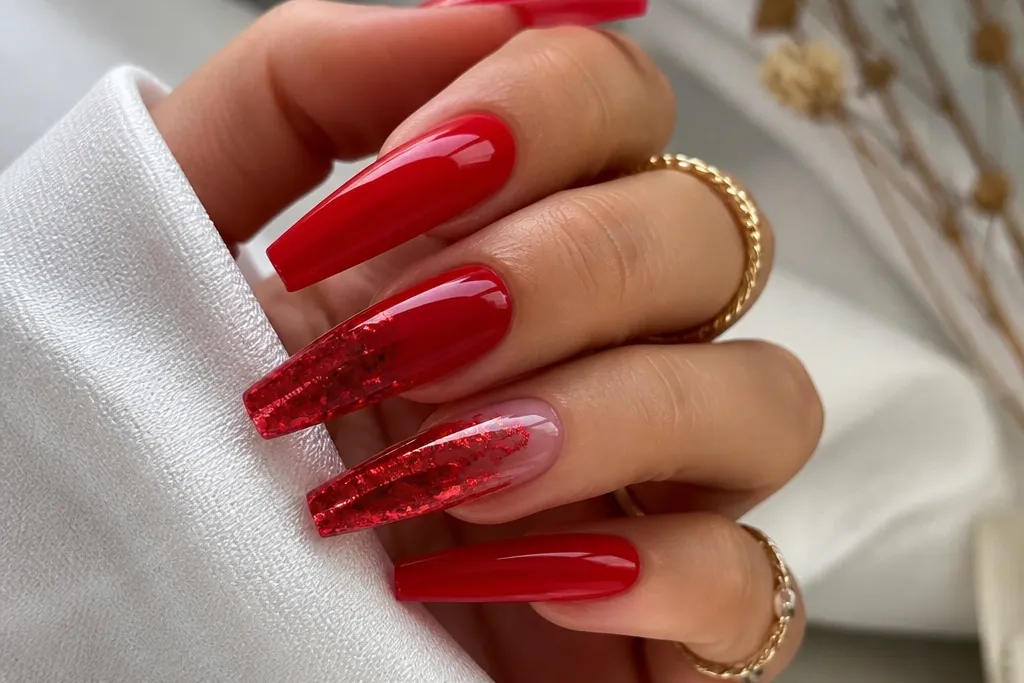
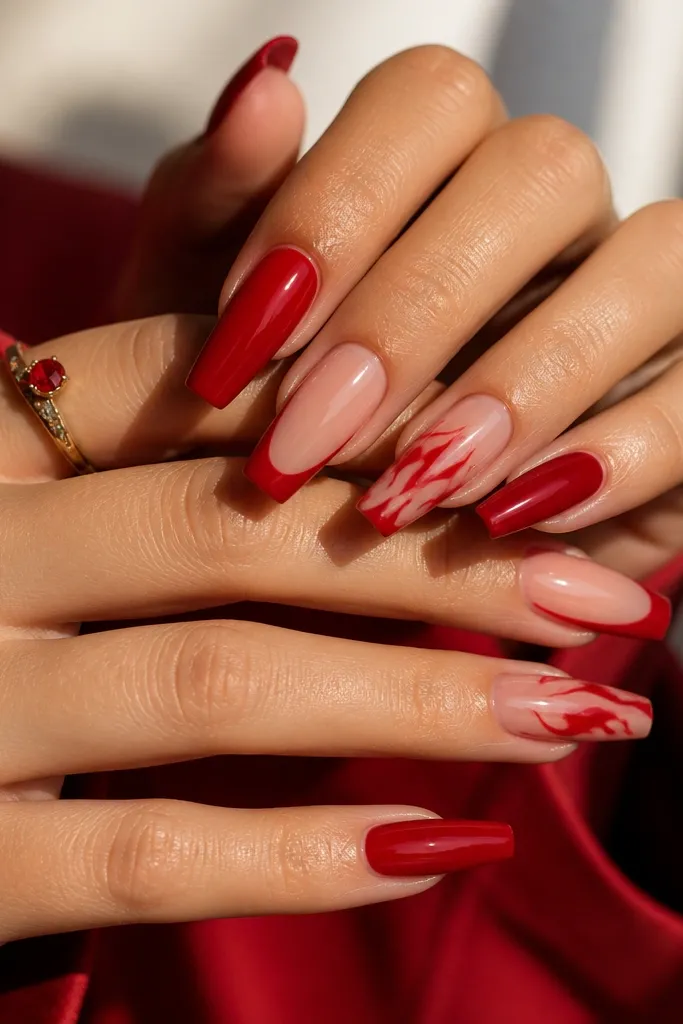
1. Glossy Cherry Ombré with Clear Half-Moon
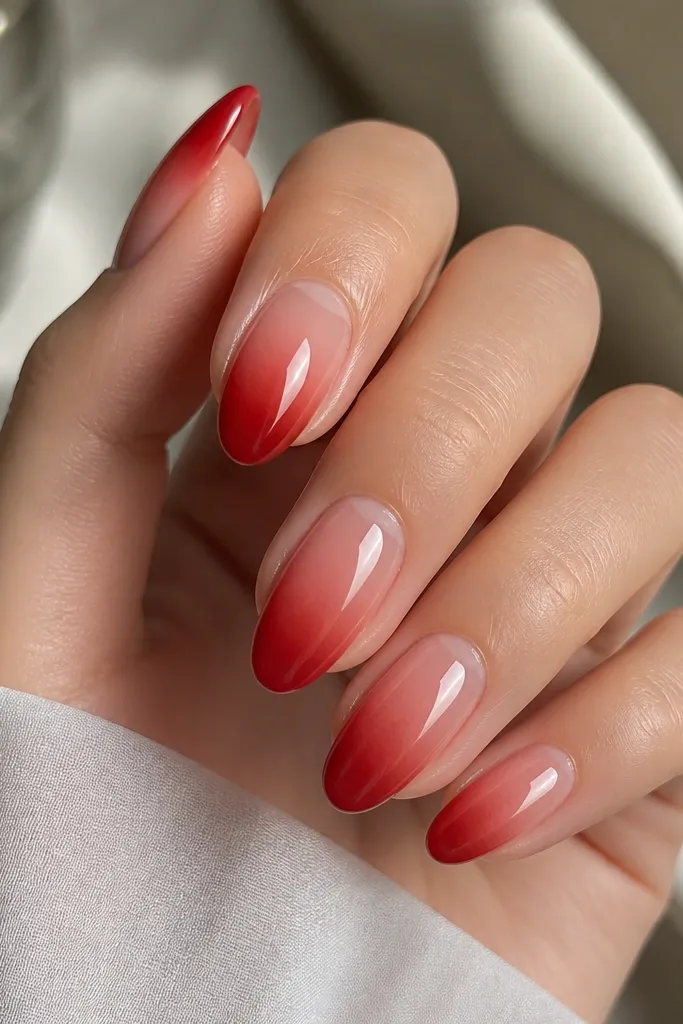
This design is the one I reach for when I want red but not heavy. The clear half-moon keeps the nail looking airy, and the cherry ombré gives you that photo-ready gradient without needing thick art. I’ve worn it on both fair and medium skin tones; the clear area makes the red look sharper and less overpowering. It also flatters hands with wider nail beds because the gradient pulls the eye toward the center instead of the cuticle. For seasonal_evergreen vibes, you keep the red in a cool cherry range and let the glossy finish do the “clean glam” work.
Start by prepping the nail and applying a slip layer. Build your extensions in a soft-oval shape, then apply a sheer nude or builder gel only up to the half-moon boundary — leave the cuticle zone clear. For the ombré, sponge deep cherry gel at the tip and blend upward with a cleaner brush, keeping the center lighter than the ends. Cure fully, then seal with a glossy top coat, focusing on the sidewalls so the gradient doesn’t shrink. Finally, clean up the half-moon edge with a small brush dipped in gel cleanser so the line stays crisp.
Editor's noteIf your ombré looks muddy, wipe your blending brush with cleanser between strokes — it makes the fade look intentional.
Skip thisAvoid dragging red gel into the clear half-moon — that turns the “designer” look into a smoky mess.
2. Velvet-Matte Red with Gold Foil Cuticle Lines
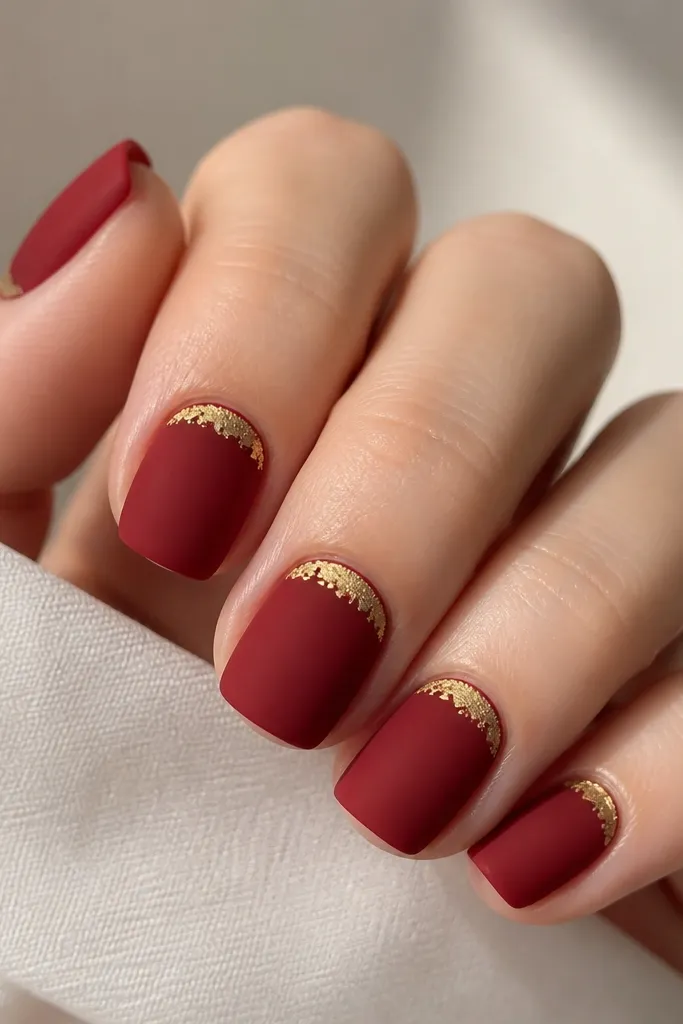
Matte red is my go-to for fall and winter because it reads cozy without losing drama. The gold foil cuticle line adds a little flash when you move your hands, and it’s placed where it won’t overwhelm short nails. This set looks especially good on warm and neutral skin tones because gold warms up the red instead of fighting it. If you have short, wide nail beds, the square shape plus cuticle-only foil keeps the design balanced. The best part is the finish — velvet-matte looks “soft” in person, not flat.
Apply your red extension base in a short square or soft square shape. Cure and then file the surface lightly so the matte top coat looks even, not patchy. Paint on a thin line of tacky gel right along the cuticle line, then press gold foil pieces into that sticky area and seal gently. Cure again, then apply velvet-matte top coat over the entire nail, avoiding flooding the foil so it stays textured. Clean the cuticle edges with a fine brush and cleanser after curing.
Use smaller foil fragments rather than one big sheet — it prevents the line from looking bulky.
Skipping the gentle filing step before matte top coat causes dull spots and visible ridges.
3. Red French Extensions with Cream Micro-Tip
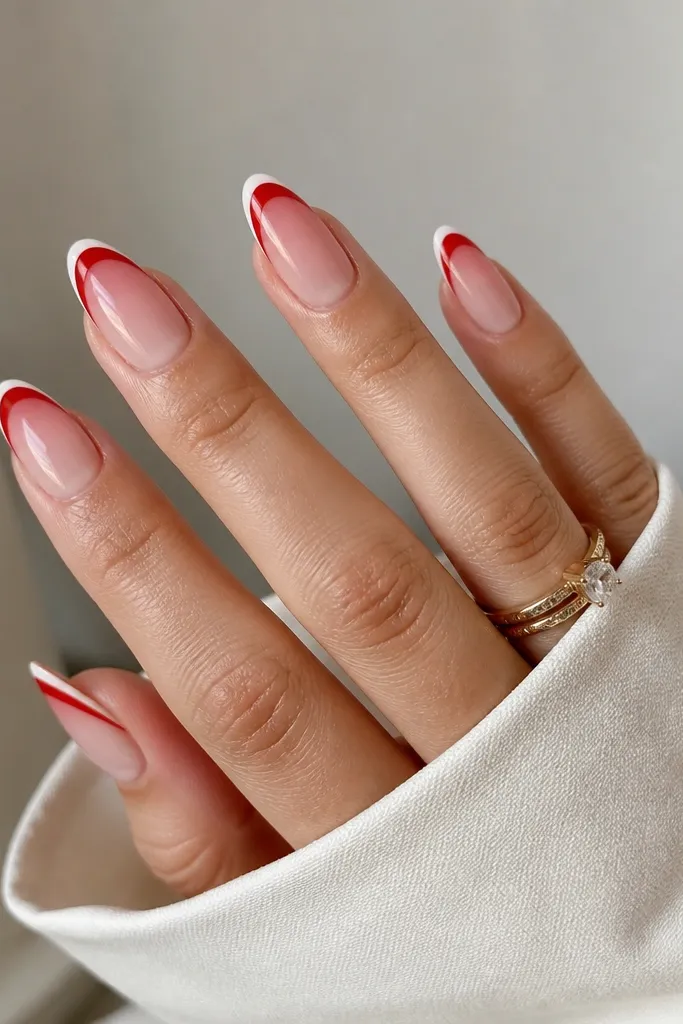
This is clean, sharp red that never looks messy. The cream micro-tip is small enough to feel refined, but it gives the set that “seasonal evergreen” contrast — like winter cream on a red sweater. I like it on medium to deep skin tones because the cream line brightens the nail and makes the red look extra saturated. It also flatters hands with slightly dry cuticles because the nude base hides imperfections while the red French edge looks intentional. If you want something bold that still works for work events, this is the one.
Start with a nude builder gel base, leaving a thin layer around the cuticle for natural coverage. Build your extensions in a medium almond shape, then map the French line with a guide strip if you’re new to arcs. Paint the French arc in opaque red, cure, and keep the curve consistent across nails. Add a tiny cream line right at the tip edge using a striping brush, cure, then seal with glossy top coat. Finish by cleaning the French curve with a brush dipped in cleanser so the arc stays razor-straight.
Editor's noteIf your French line is uneven, use tape as a guide for the first nail, then match the curve on the rest.
Skip thisAvoid a thick cream line — it makes the set look like sticker art instead of a refined micro-detail.
4. Red Marble Veins over Nude Extensions
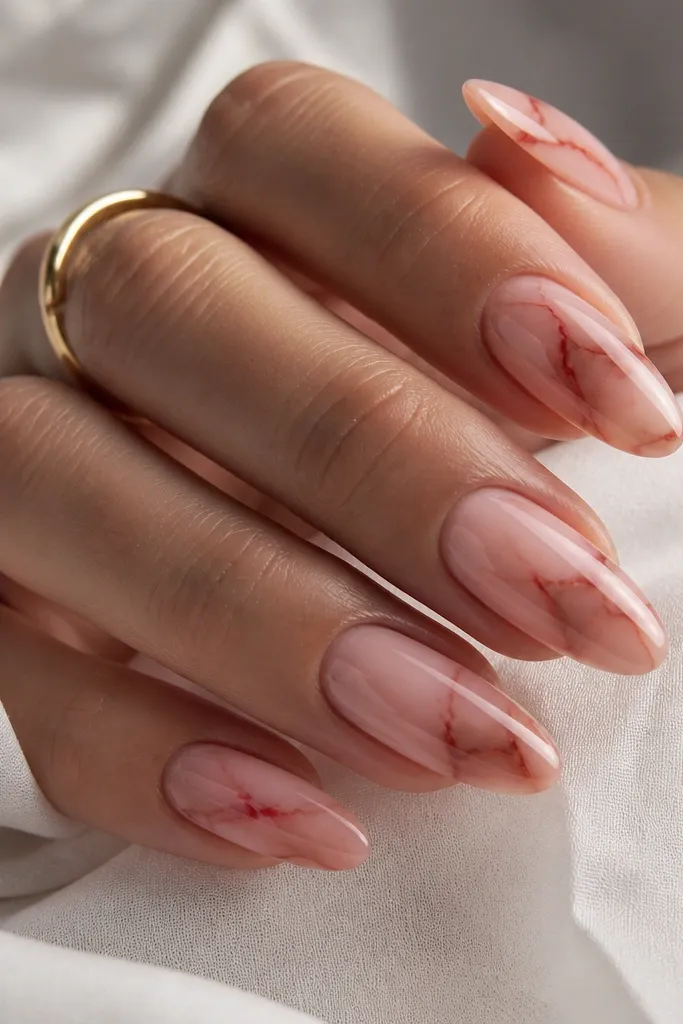
Marble red looks expensive because it’s irregular, not patterned. You get that seasonal feeling without adding tiny holiday symbols. The nude base keeps it wearable for everyday, and the glossy seal makes the veins look deep, like real stone. I’ve worn this on pale skin and on deeper complexions — the nude tone makes the red read as a true highlight instead of overpowering. If your nails are on the shorter side, keep the marble to the top half so it doesn’t crowd the cuticle. This one is also great for photos because the veins catch light from different angles.
Apply extensions in a soft-oval shape and build a sheer nude layer as your base. Drop a few tiny dots of red gel onto a palette, then use a marbling tool or thin brush to drag hairline veins across the nail at a diagonal. Add a couple of darker red accents for depth, then avoid filling the whole nail — keep negative space. Cure, then gently buff only if the veins look raised. Seal with glossy top coat in two thin passes so the marble looks smooth and glassy.
Editor's notePractice on one nail first — marble looks right when you let the lines vary, not when you copy them perfectly.
Skip thisDon’t over-layer red veins — too many lines make it look like a red smudge.
5. Deep Red Bow Tips with Matte Base
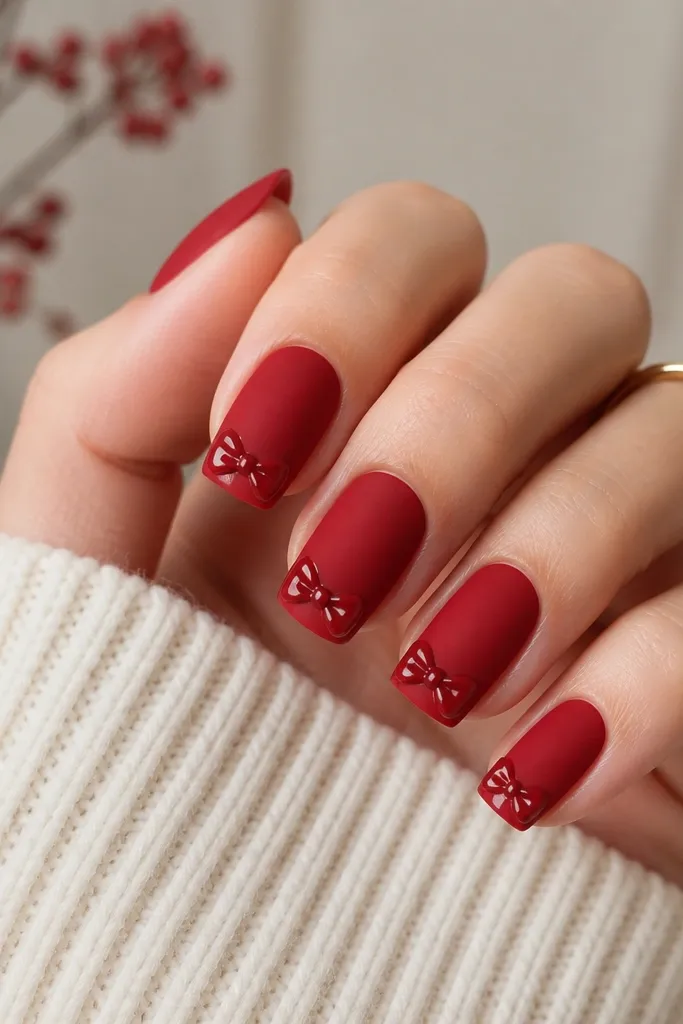
This is the kind of nail you wear when you want “cute glam” that still reads mature. A matte base hides imperfections and makes the bow tips look glossy and raised. The bow placement at the tips is flattering because it elongates the nail without thick art near the cuticle. I’ve done this for winter parties and holiday dinners — it looks playful under warm lighting. On fair skin it pops because the bow is shiny; on deeper skin it still pops because the bow has a high-contrast shine against matte.
Start with a deep red matte base gel and cure it. For the bow tips, use a thin glossy red gel so you can sculpt the loops: first place two small rounded loop shapes on the tip corners, then add a tiny center knot. Keep the bow height low — you want it to catch light, not snag. Cure again, then add a glossy top coat only over the bows, not the whole nail. Finish by wiping the matte surface lightly so it stays velvety and doesn’t turn sticky-looking.
Editor's noteUse a silicone dotting tool for the bow loops so they stay symmetrical.
Skip thisAvoid placing bows too close to the sidewalls — they start to look lopsided as the nail grows.
6. Red and Green Evergreen Micro-Foil Specks
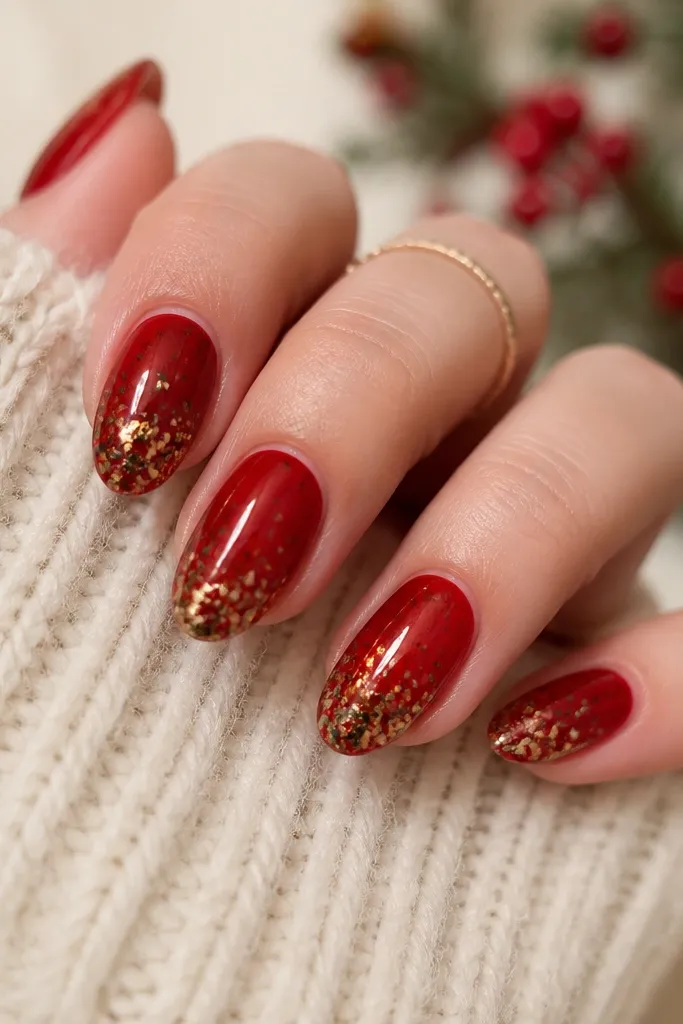
This design gives you seasonal evergreen energy without drawing a single tree. The translucent red base makes the green specks look like ornaments caught in light, and the gold flecks add warmth. I like it on short almond because the confetti effect makes the nail look longer. It works across skin tones since the red is the main color and the green is a controlled accent. If you wear lots of deep green coats or scarves, this set ties in naturally. It’s also forgiving — tiny specks hide minor growth lines.
Build your extensions in a short almond or soft almond shape. Apply a translucent red gel layer, cure, and keep it slightly lighter in the middle. Use a small brush to place deep green pigment specks near the tip area, then add a few gold foil dots on top. Cure, then seal with glossy top coat in a thin layer to lock the specks down. If you see any loose foil, dab a micro amount of clear gel on those spots before the final cure.
Editor's noteFor the “just enough” look, add more specks at the tip and leave the center mostly clean.
Skip thisAvoid big chunks of foil — they lift and catch on sweaters.
7. Cinnamon Red Gradient with Gold Leaf Flicks
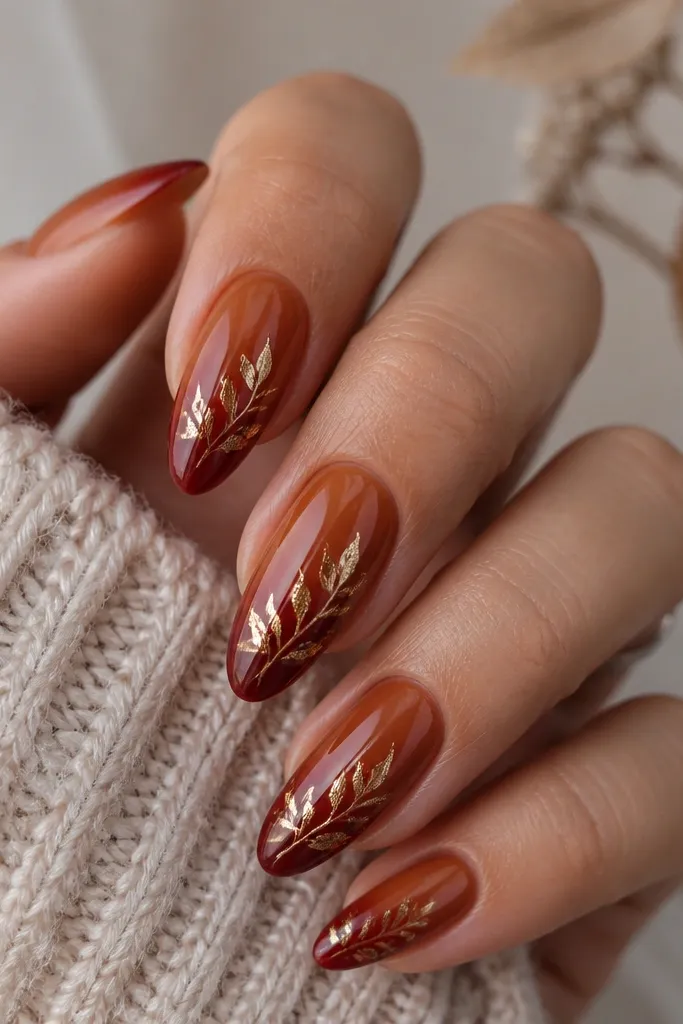
Warm cinnamon-red is the red I wear when the weather turns and my wardrobe shifts to tan, brown, and spice tones. The gradient keeps it from looking flat, and the gold leaf flicks mimic light reflections like candle glow. This set looks great on medium and deep skin tones because the warmth of cinnamon plays nicely with golden undertones. On fair skin, it still works, but I keep the cinnamon slightly deeper so it doesn’t wash out. The styling principle is warmth: you’re matching the red to your fall accessories so the nails look like part of the outfit.
Apply extensions in a medium almond shape and build a base that’s slightly sheer for blending. Sponge or airbrush cinnamon red near the center and blend into deeper red at the tips, keeping the transition smooth. Cure, then add gold leaf flicks by pressing tiny leaf pieces onto a tacky clear gel area in thin upward strokes. Seal with glossy top coat, and cap the sides so leaf edges don’t snag. Clean up around the cuticle with a fine brush and cleanser after curing.
Editor's noteIf gold leaf looks too heavy, use fewer pieces and leave more bare red between flicks.
Skip thisAvoid a harsh color break in the gradient — it reads like stripes instead of a smooth fade.
8. Red Foil Holo Half-Shells on Clear Base
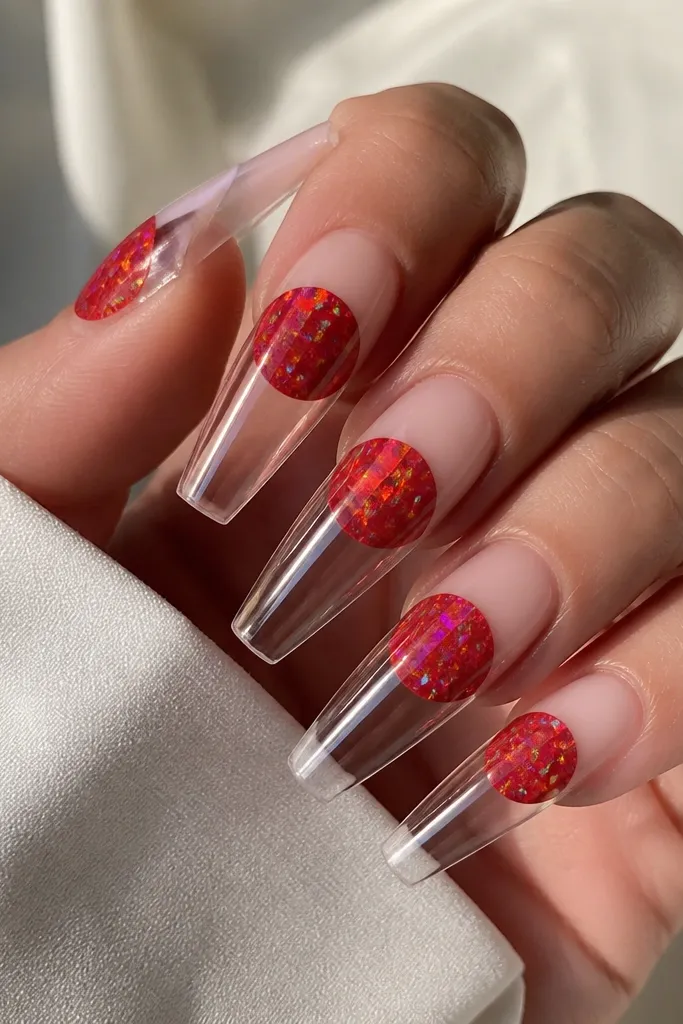
This is for nights out when you want red that looks different from every other red set. The clear base makes the holo foil feel like it’s floating, and the half-shell shape keeps it geometric instead of chaotic. I’ve worn it with silver jewelry and it looks extra clean because the foil flashes rainbow but stays anchored in red. It flatters long nail beds and looks best on coffin or almond where the middle placement has space. The seasonal_evergreen angle is the red-forward foil — it looks winter-luxe, not summery.
Start with a clear or nude base layer on your extensions, leaving the center area available for placement. Cure, then add tiny tacky gel patches where each half-shell will sit. Press red holo foil onto the tacky gel and shape it with a silicone tool so the arc looks like a shell. Cure again, then seal with a glossy top coat thick enough to smooth any foil texture. Finish by checking the sidewalls — foil edges should be fully capped so they don’t lift.
Use a lint-free wipe and extra top coat around each foil arc so the surface feels perfectly smooth.
Avoid placing shells too close to the cuticle — they can look crowded as the nail grows.
9. Red Lace Linework with Nude Negative Space
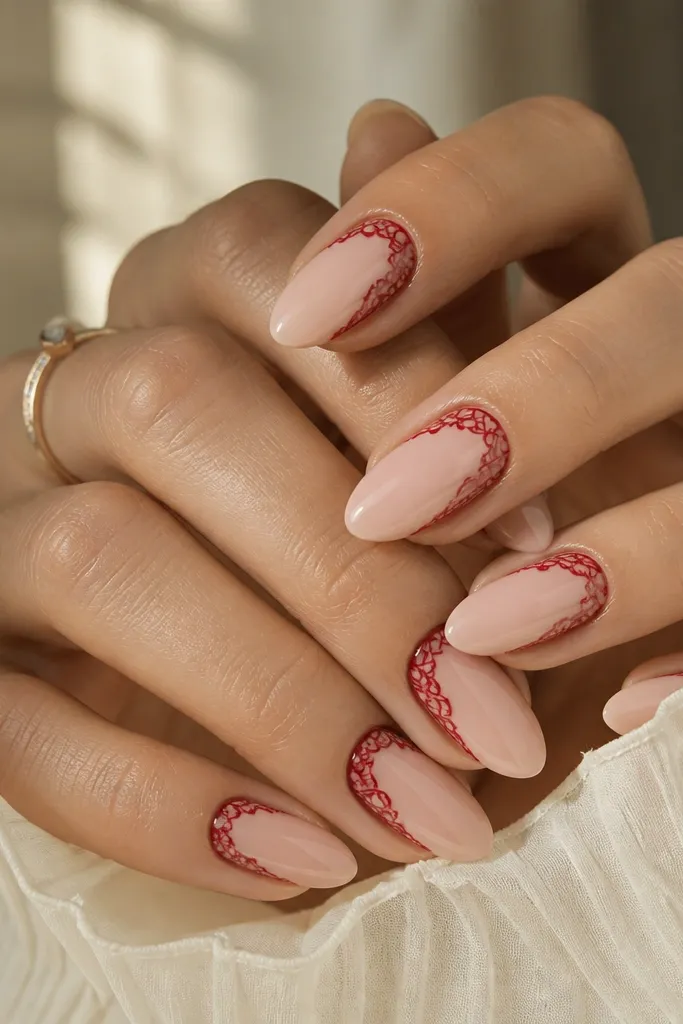
Lace linework makes red feel delicate instead of loud. The nude negative space is what keeps it wearable, and the lace V-shape flatters because it draws the eye upward and toward the center. This set looks great on all skin tones because nude acts like a neutral frame for the red lines. If you have short nail beds, keep the lace only in the top third so it doesn’t shrink the nail visually. For seasonal wear, this one works year-round, but it feels especially good in winter because the lace looks like a red knit pattern without being bulky.
Build your extensions in a medium almond shape and apply a sheer nude base, cure. With a fine striper brush, draw a V-shape lace pattern starting near the cuticle center and extending toward the sidewalls, leaving space between lines. Add small loops and arches like you’re tracing lace, but keep the thickness consistent. Cure, then apply glossy top coat carefully so the lines don’t bleed. If you want extra definition, do a second thin line pass after the first cure and seal again.
Use gel paint with a thin consistency — thick gel makes lace look like scribbles.
Avoid filling the whole nail with lace — too many lines makes it look like a red net.
10. Classic Red Chrome with Black Micro Dots
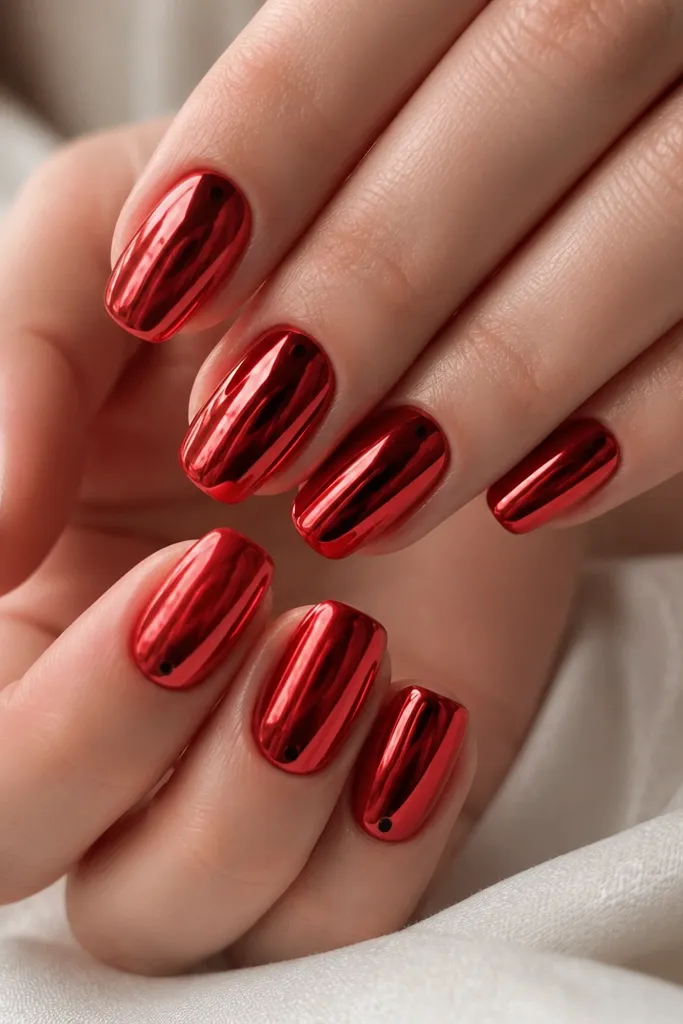
Chrome red is bold, but it looks clean when the pattern is minimal. The mirror finish makes your hands look polished even if you’re wearing a plain outfit, and the black micro dots add a graphic detail without turning it into a full art set. I’ve done this on both fair and deep skin tones — the chrome catches light and smooths the look of the nail surface. For fingers that look a bit short, squoval helps because the chrome reflects and elongates. This is a great “seasonal evergreen” choice for holiday events because it reads glam without needing seasonal icons.
Apply extensions in a medium squoval shape and build a smooth base layer. Paint an opaque red gel and cure fully. Apply chrome powder using a sponge applicator — buff lightly until it turns mirror smooth, then seal with a top coat made for chrome so you don’t dull it. Add black micro dots with a dotting tool on only one or two accent nails, placing them near the cuticle center. Cure again and check the shine under a lamp to confirm you didn’t dull the chrome.
If chrome looks patchy, buff the base smooth before you apply red gel — texture ruins reflectivity.
Avoid sealing chrome with a normal thick top coat — it dulls the mirror effect.
11. Red Velvet Gradient with Smoke-Gray Tips
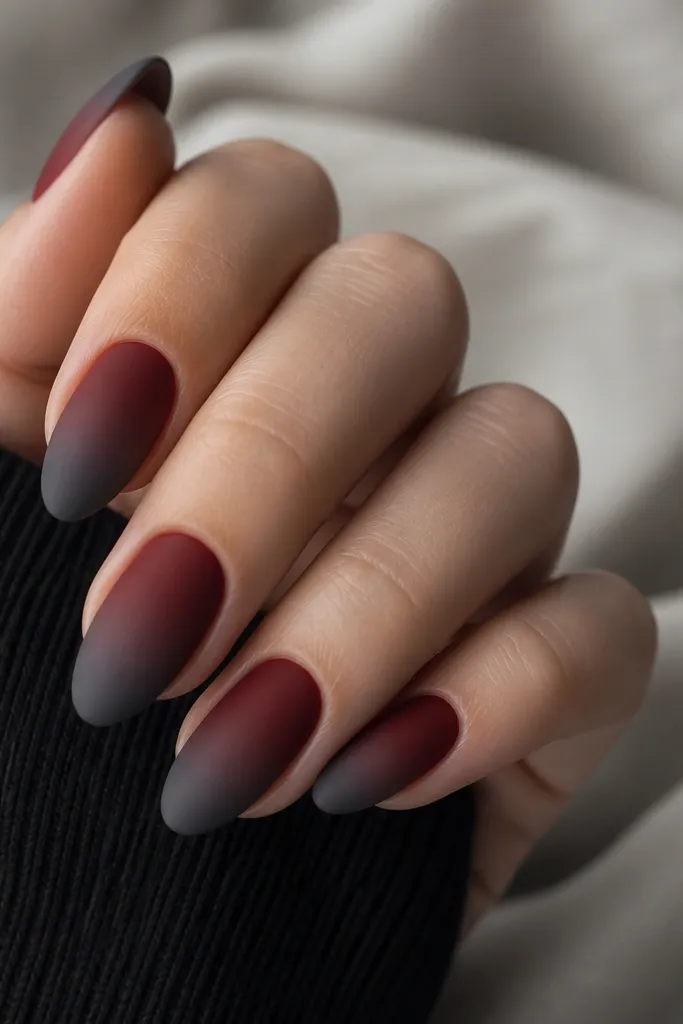
This combo looks like cozy winter clothing — red that feels warm, then gray that feels smoky and modern. The velvet-matte finish makes the gradient look soft, and the smoke-gray tips keep it from looking like regular red polish. I like this on medium and tan skin tones because the gray balances warmth and keeps it flattering. If you’re pale, choose a slightly deeper gray so it doesn’t look icy. The styling principle is temperature control: warm red plus cool gray reads intentional and feels seasonal.
Build your extensions in a medium almond shape and apply a red velvet-matte base, curing each layer. For the gradient, sponge smoke-gray gel on the tips and blend upward into the red with a makeup sponge or blending brush. Keep the transition airy — you want it to look like fog, not a stripe. Cure, then seal with velvet-matte top coat over the whole nail. Clean up the cuticle edge with a small brush so the red fade starts clean.
Editor's noteUse a makeup sponge for the fade. Brushes can leave streaks that show through matte top coat.
Skip thisAvoid a straight line between red and gray — it ruins the soft, snowy vibe.
12. Red and Cream Sweater Knit Texture on Accent Nails
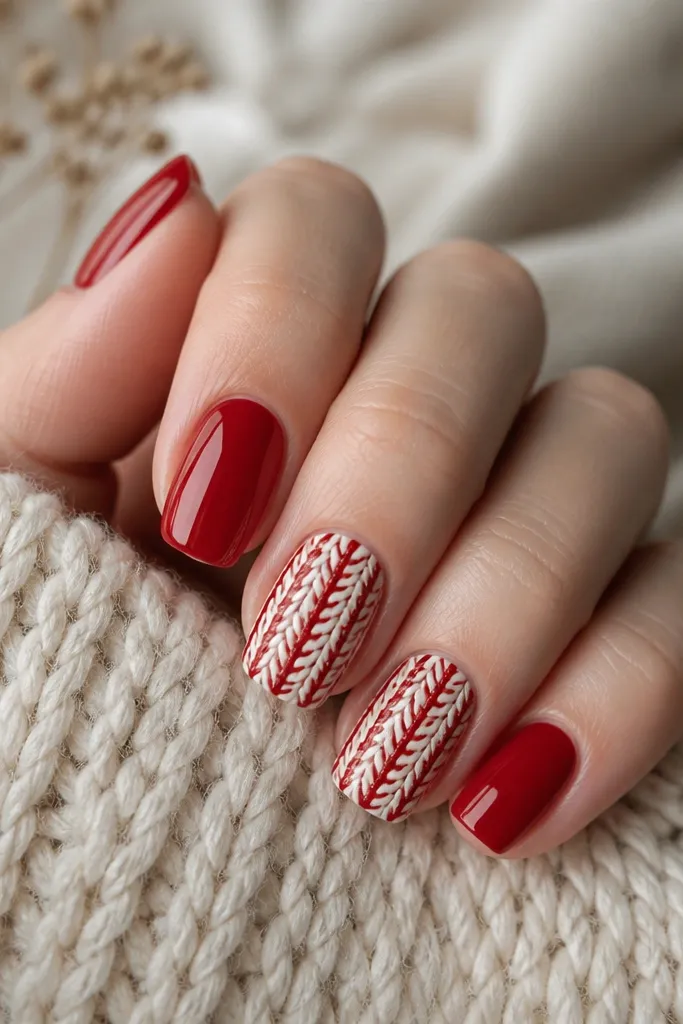
Texture nails are the fastest way to make red feel seasonal without changing the shade. The sweater knit pattern on cream looks like winter fabric, and the raised loops catch light differently than flat gel. I keep this design on accent nails because texture can feel heavy if you do it on all ten. It flatters hands with shorter nail beds because the pattern stays near the center and doesn’t crowd the cuticle. On all skin tones, cream makes the red look brighter and less harsh. For everyday wear, this is also forgiving because the texture hides tiny surface imperfections.
Start with glossy red extensions in a short-to-medium shape and cure a smooth top coat base. Choose two accent nails and apply a cream base, curing fully. Add sweater knit texture using a gel texture tool or a thin sculpting gel line technique: draw vertical and horizontal lines, then add small loop bumps at intersections. Cure carefully so the raised texture sets. Seal with a slightly thicker top coat only on the red nails, and on the knit nails use a thinner coat to avoid flattening the loops.
Editor's noteIf the knit pattern looks too flat, add a second tiny layer of loop gel on the intersections and cure again.
Skip thisAvoid applying thick top coat over texture — it turns “knit” into “lumpy shine.”
13. Red Micro Rhinestone Crescent at Cuticle
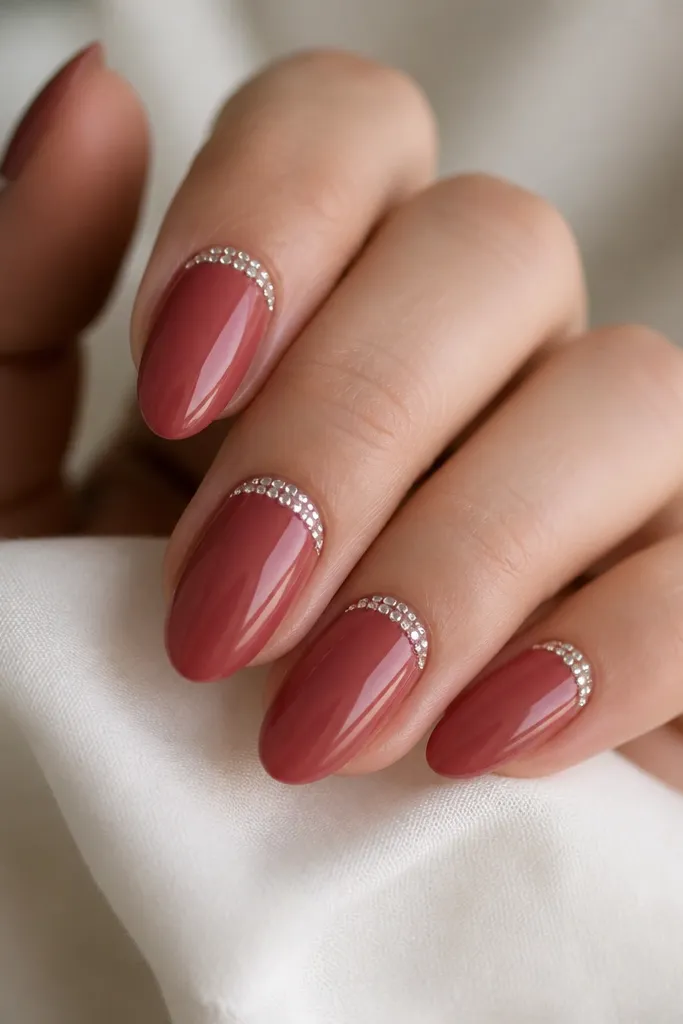
A micro rhinestone crescent is the cleanest way to wear sparkle with red. Because the stones sit at the cuticle line, they frame your nail and make your hands look brighter without covering the whole nail. This is flattering for almost everyone because it doesn’t add width — it follows the natural curve. On fair skin, the stones contrast beautifully against red. On deeper skin tones, the stones still pop because the rhinestones reflect cool light. For seasonal_evergreen, it reads “holiday glam” in a controlled, modern way.
Apply your red extensions in a medium almond shape and build a glossy red or nude-red base, curing fully. Apply a thin tacky gel strip in a curved line at the cuticle edge, keeping it centered. Place tiny clear rhinestones with tweezers or a rhinestone picker, pressing each stone gently so it sits flush. Cure and then cap the line with a thin layer of clear gel so the stones are secure. Finish with a glossy top coat over the rest of the nail, avoiding dragging gel across the stone tops.
Use a smaller stone size at the ends of the crescent so the curve stays smooth.
Avoid big stones — they lift faster and make the crescent look heavy.
14. Red and Black Diagonal Pinstripe with Clear Top
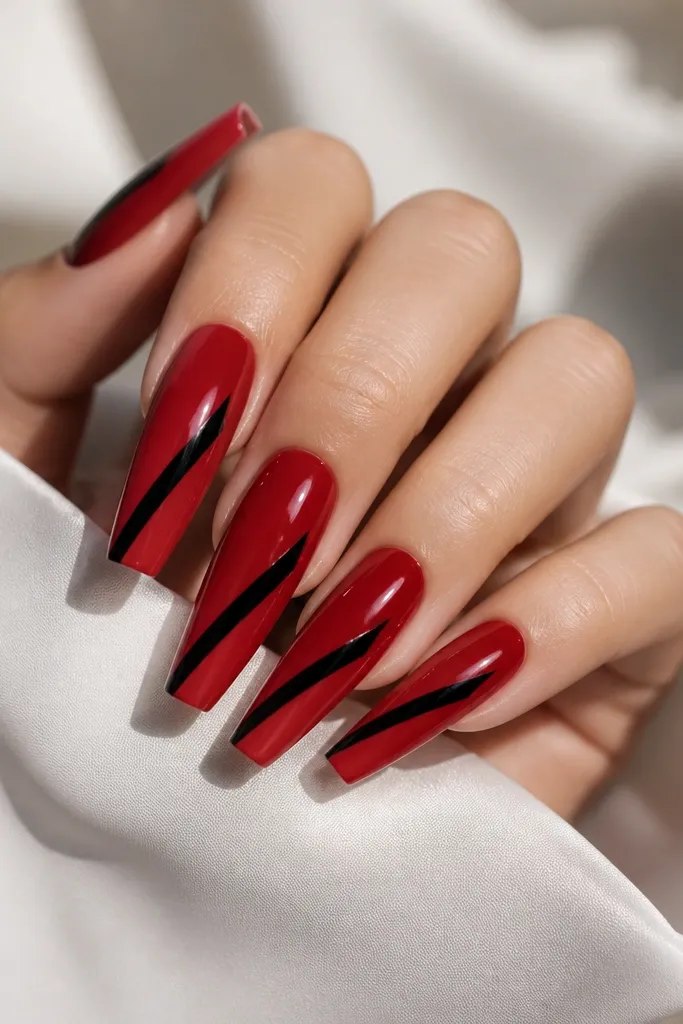
This is my “bold but clean” red set for nights out and events. The diagonal black pinstripe adds edge without turning the nail into a busy design, and the long coffin shape makes the diagonal feel sharp. It flatters long fingers by emphasizing the line, and it still looks good on shorter fingers because the diagonal draws attention upward. I’ve worn it with black boots and a red bag — the nails match the outfit without looking like a costume. For seasonal_evergreen, the red stays deep and the black stays matte or semi-matte so it reads wintery.
Build extensions in a long coffin or long almond shape and apply a deep red glossy gel base, curing fully. Use striping tape or a steady hand to mark a diagonal path; I like placing it slightly off-center so it feels more modern. Paint a thin black line over the guide, cure, then remove tape if you used it. Seal with a clear glossy top coat, making sure the line is fully capped so it doesn’t catch on fabric. Clean the edges with a small brush to keep the stripe razor-straight.
Editor's noteIf your stripe is wobbly, do a first thin black pass, cure, then correct with a second ultra-thin pass.
Skip thisAvoid thick pinstripes — they look like marker lines and ruin the sleek effect.
15. Red Heart Negative Space with Tiny Gold Dots
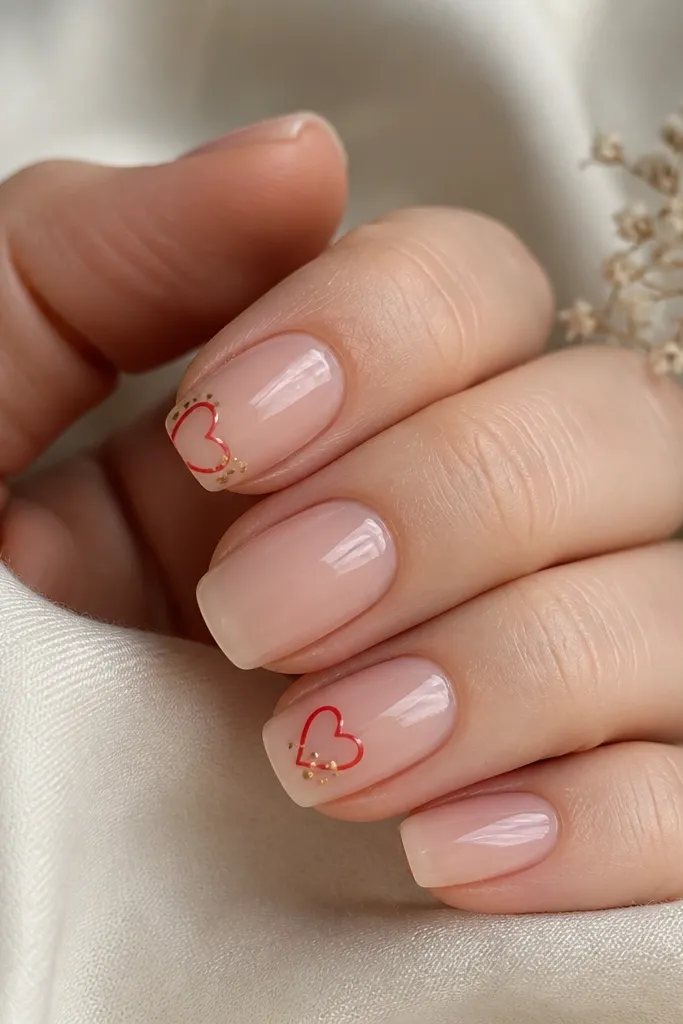
This is romantic without going full Valentine overload. The heart is made with negative space and a red outline, so it stays airy and doesn’t look bulky at the cuticle. The tiny gold dots add a warm sparkle that feels seasonal in colder months. I like this on squoval because it keeps the heart shape clean and not stretched. On deeper skin tones, the nude base makes the red outline look crisp. If you want red extensions that still feel soft and wearable, this is the one.
Start with a sheer nude base on your medium squoval extensions and cure. Use a thin liner brush to draw a small heart outline near the center of the nail, keeping it away from the cuticle so it doesn’t blur as it grows out. Fill the outline with opaque red gel only along the border, leaving the heart center nude. Cure, then add tiny gold dots around one side of the heart using a dotting tool. Seal with glossy top coat, ensuring the heart lines are capped so they don’t snag.
Make the heart slightly taller than wide — it looks more flattering on squoval shapes.
Avoid filling the whole heart solid red — it turns into a sticker block instead of a clean outline.