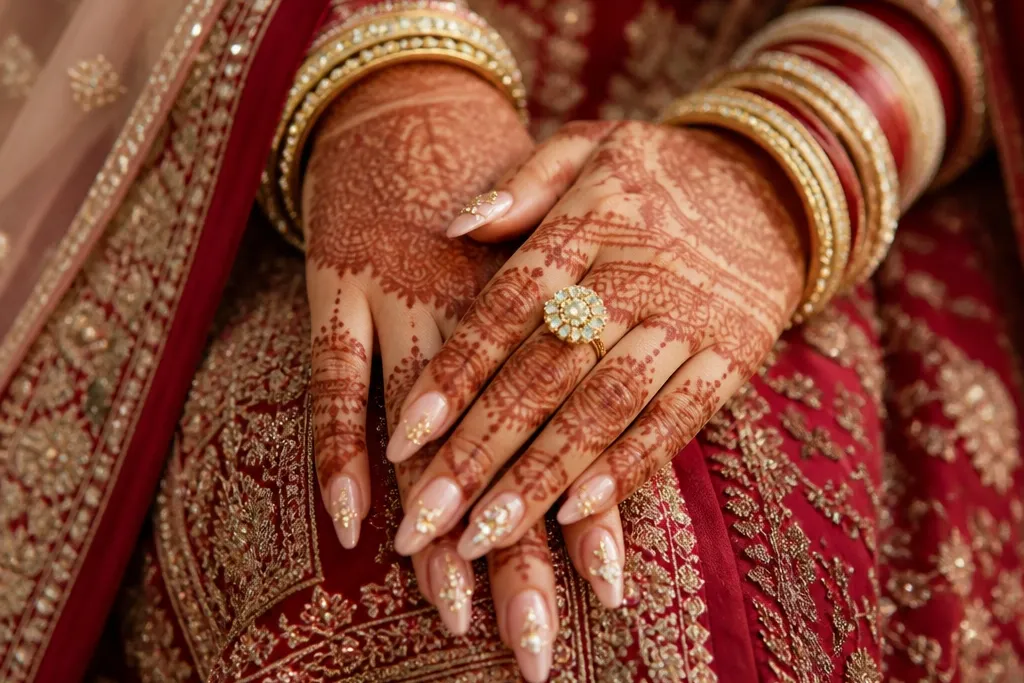
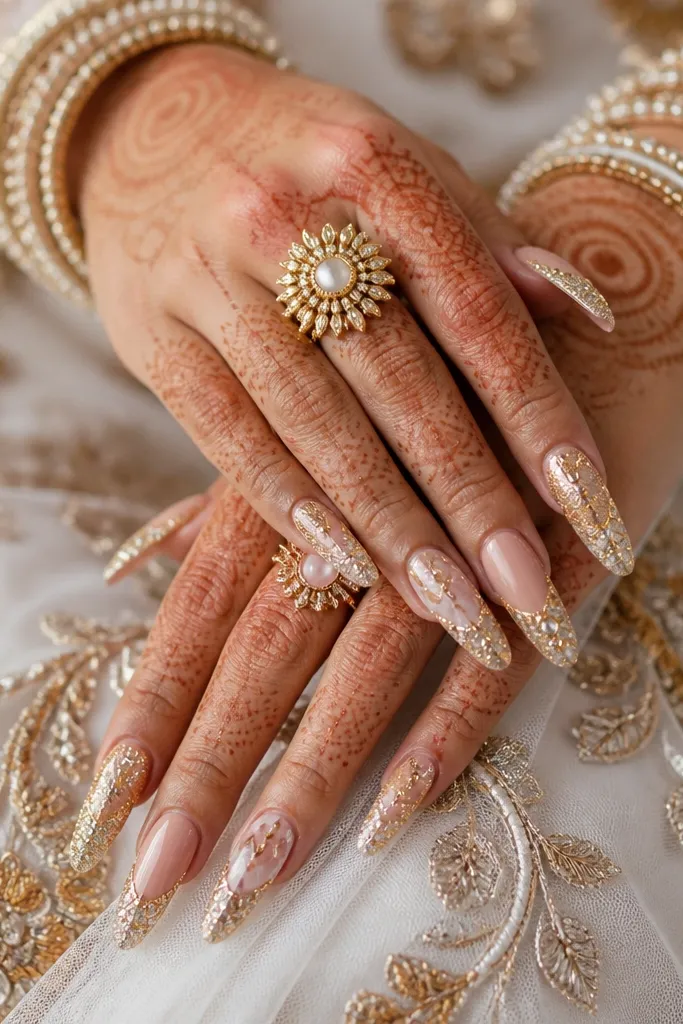
1. Kundan-Glaze Nude with Gold Micro Tips
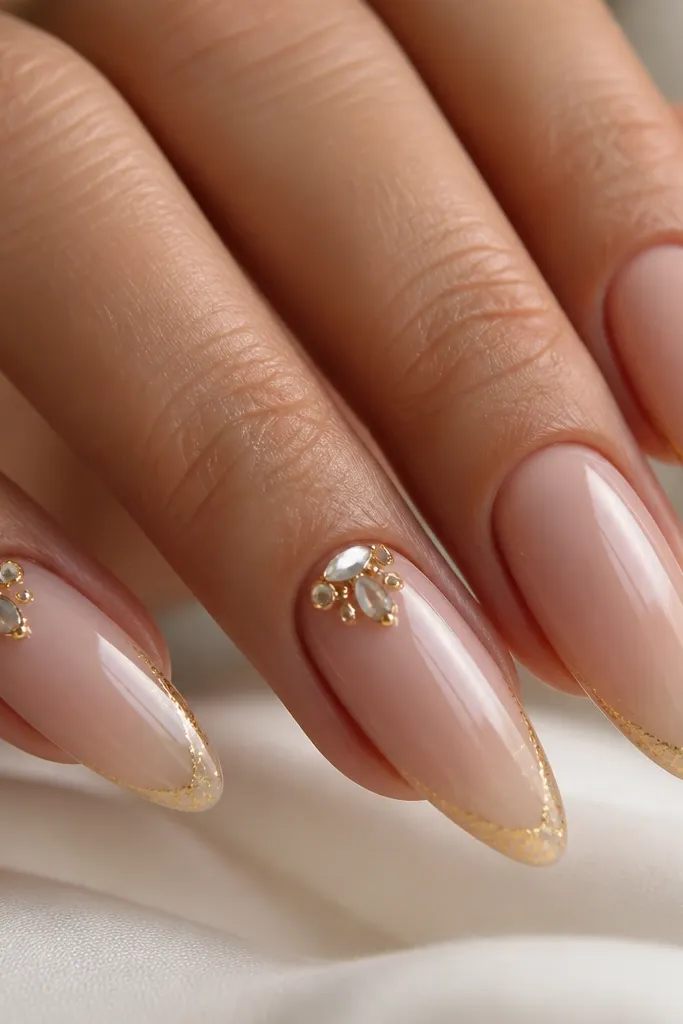
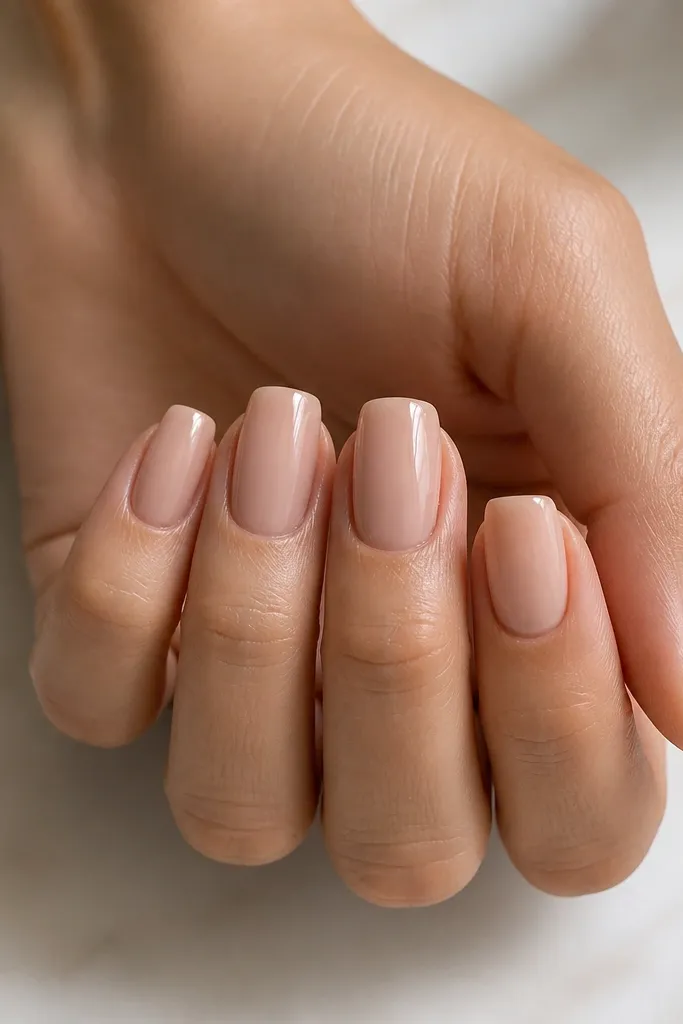
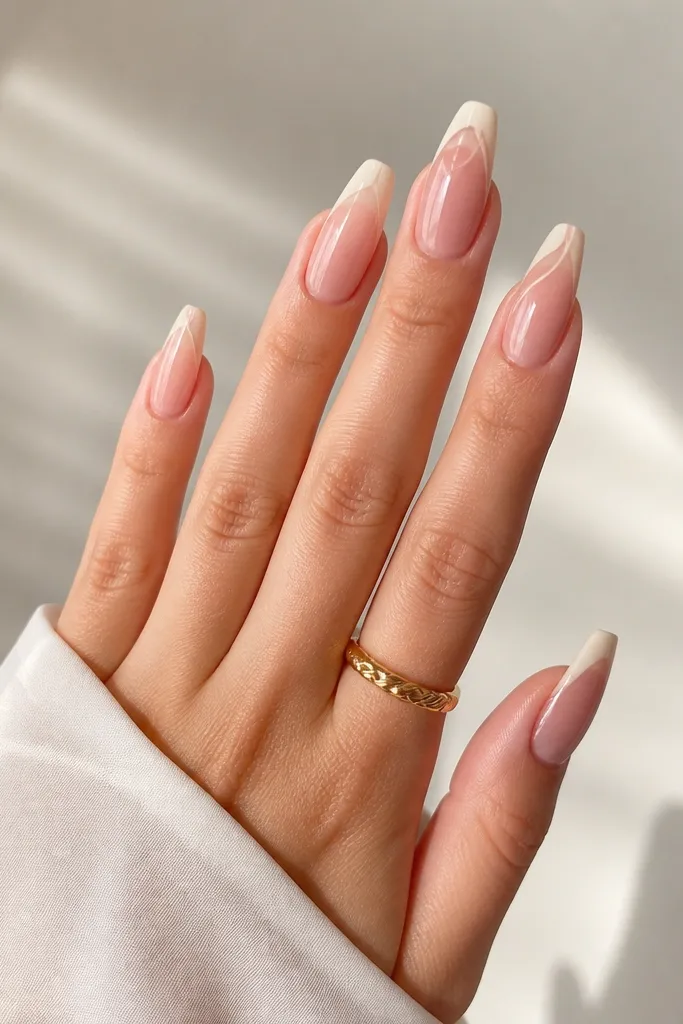
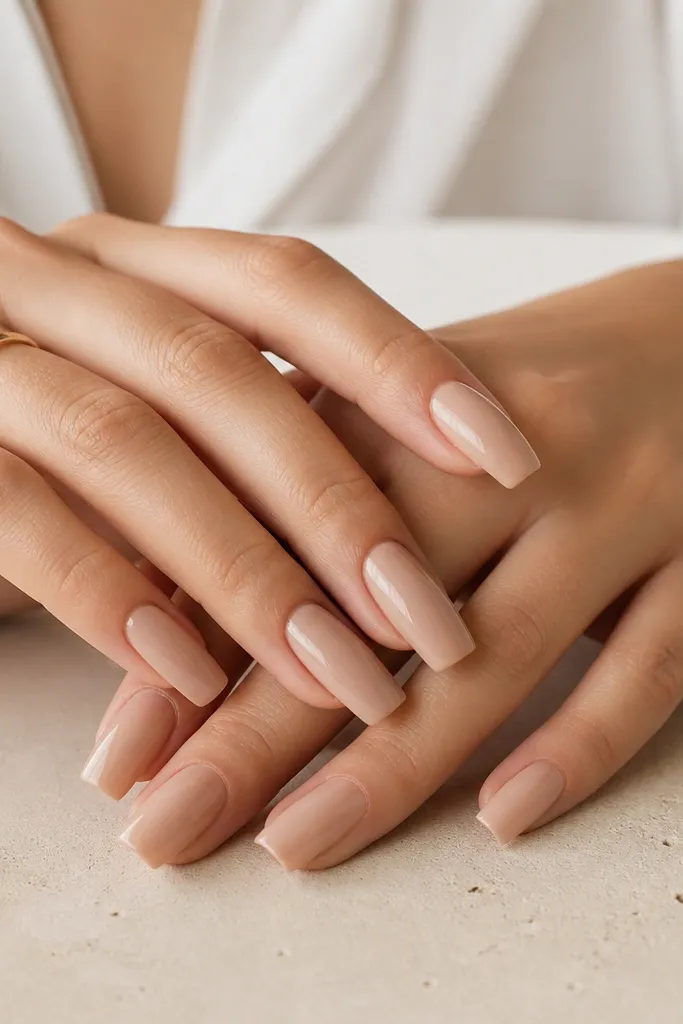
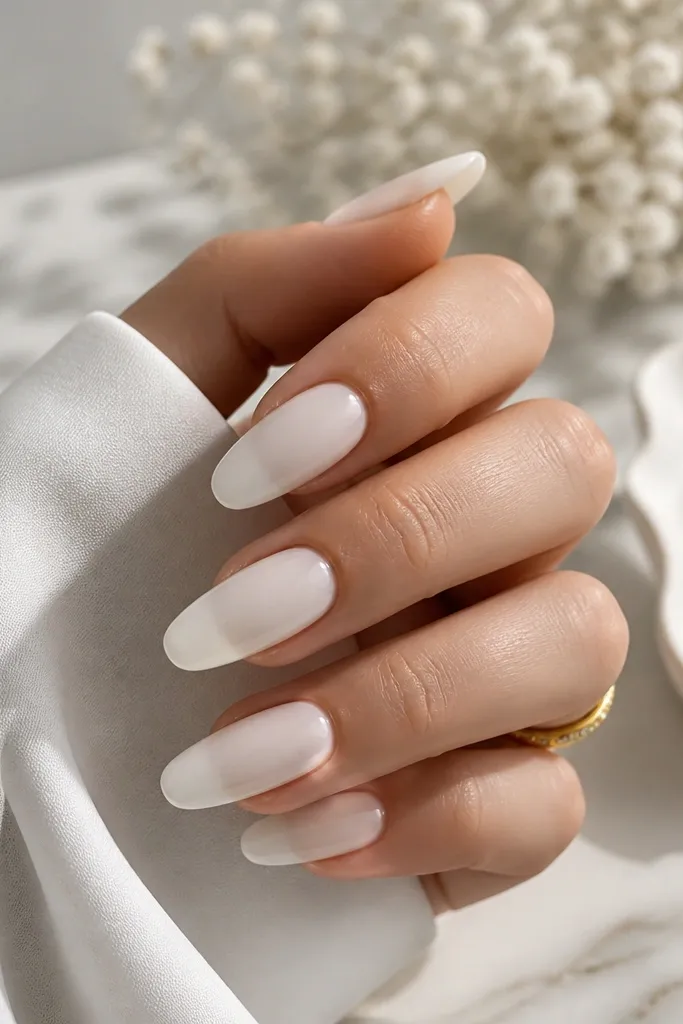
This is my go-to when a bride wants bridal glam without loud color. The sheer nude base blends with warm Indian skin tones and makes the gold look expensive instead of yellow-orange. I’ve worn this look with both ivory lehengas and deep maroon outfits — the gold micro tips echo temple jewelry and keep the hands looking elongated. The stones near the cuticle add the bridal “wow” in photos, especially when your mehndi is already doing the talking.
Start by asking for an almond extension shape with a smooth sidewall finish so the nude stays clean. Apply a sheer nude gel in two thin coats, curing each coat fully. Add a micro gold foil line only at the tip edge, not halfway up the nail, then sprinkle tiny gold micro glitter just along that foil for a crisp border. Place 1-2 small kundan-style stones near the cuticle on accent nails, then seal everything with a thick glossy top coat that covers stone edges.
Tell your nail tech to buff the top coat around each stone slightly so the edges don’t catch on sleeves.
Don’t paint nude too opaque — thick nude makes the gold look dull and can look mask-like in flash photos.
2. Deep Maroon Velvet Base with Pearl Drop Tips
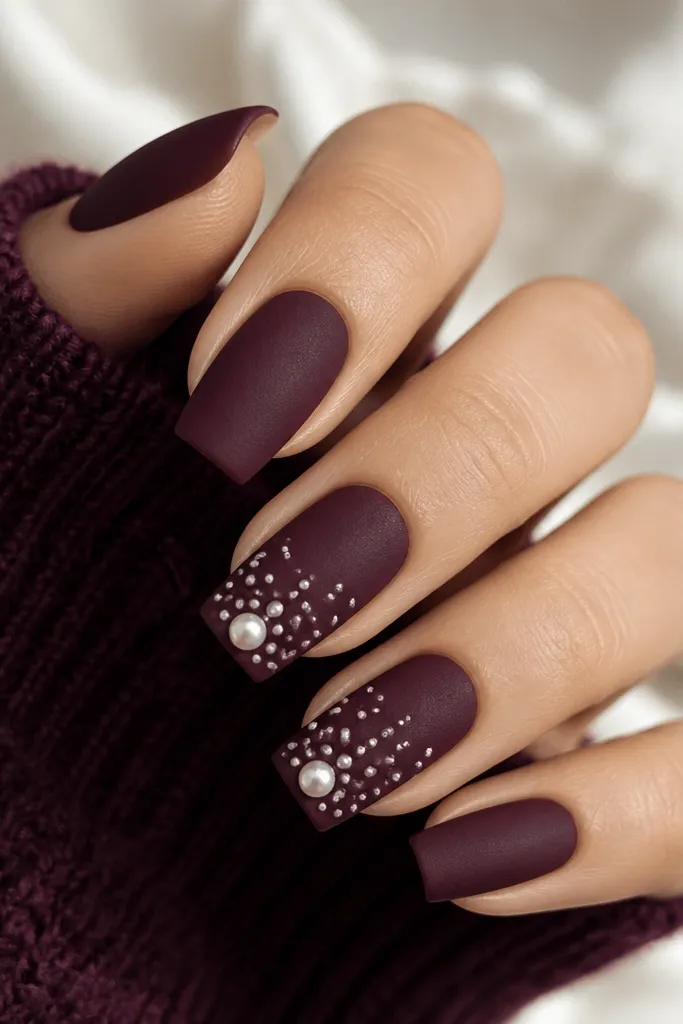
This design looks rich because the maroon reads like velvet under indoor lighting, and it matches heavy bridal fabrics well. The pearls at the tips give you that classic Indian bridal feel, but placing them at the tip keeps the look modern and not too old-school. I’ve seen it work especially well for brides with warm undertones and gold jewelry — the maroon pulls the gold out and the pearls brighten the hands. If you’re wearing a heavily embroidered lehenga, this keeps your nails from competing with the outfit.
Editor's noteKeep pearl sizes uneven by a millimeter or two — the slight variation looks natural in photos.
Start with a squoval extension for comfort during wedding-day activities. Apply a deep maroon gel base in two thin coats, then finish with a velvet matte top coat so the color looks soft, not shiny. On two accent nails, place a small pearl bead line starting 1-2 mm below the tip, then add one slightly larger drop pearl at the very center. Use a gloss top coat only over the pearls so they shine while the base stays matte. Cure fully and check the underside edges so pearls don’t snag on dupattas.
Skip thisDon’t matte the whole nail with a heavy hand — too much matte can look dusty and cheap next to bright jewelry.
3. Champagne Sheer with Rose-Gold Foil Vein Marble
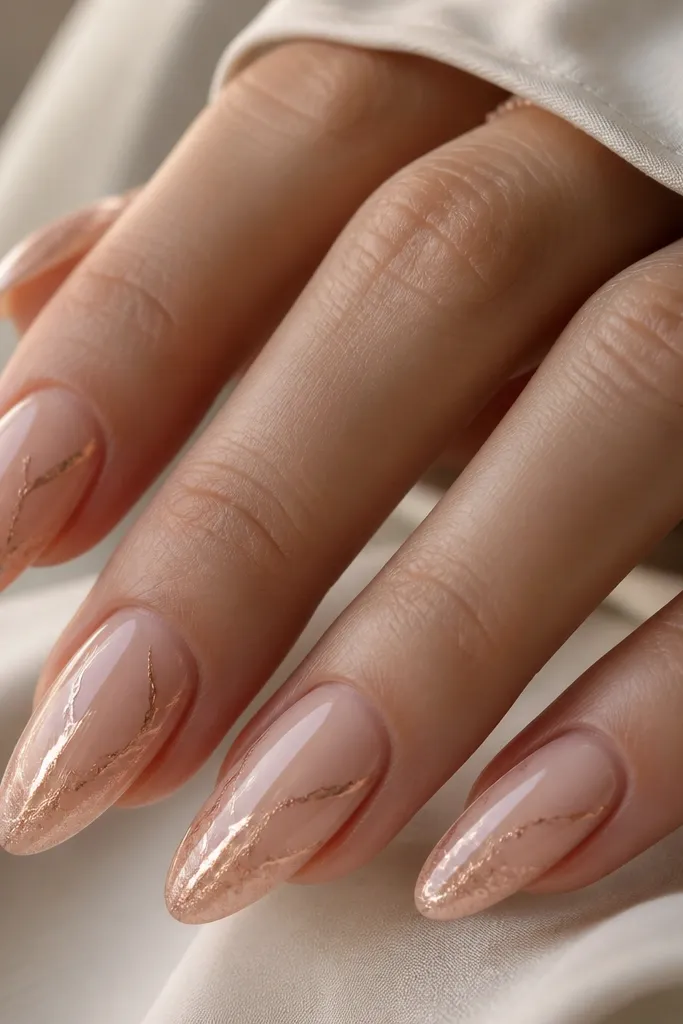
If your wedding look is champagne, gold, or blush-heavy, this is a flattering nail extension design. The champagne sheer base looks clean on medium to fair skin tones and keeps your hands looking bright even in low light. The rose-gold foil vein pattern adds movement, so the nails don’t look flat when you move your hands. I’ve used this with sarees that have metallic embroidery, and the foil veins mirror that reflective detail without turning into chunky glitter.
Begin with almond extensions and a sheer champagne base gel in two coats. Cure well, then take a fine nail art brush and place rose-gold foil pieces using a peel-and-stick foil gel or a thin tacky layer. Drag the foil into vein-like lines — keep them thin and leave gaps so the marble looks airy. Add a light shimmer dust at the tips, then seal the entire nail with a high-gloss top coat to smooth out any foil edges.
Keep the veins mostly on the outer half of the nail — it makes fingers look slimmer.
Don’t cover the whole nail with foil — full coverage turns marble into a metallic smear.
4. Teal-Green Mehndi Aura with Silver Holographic Specks
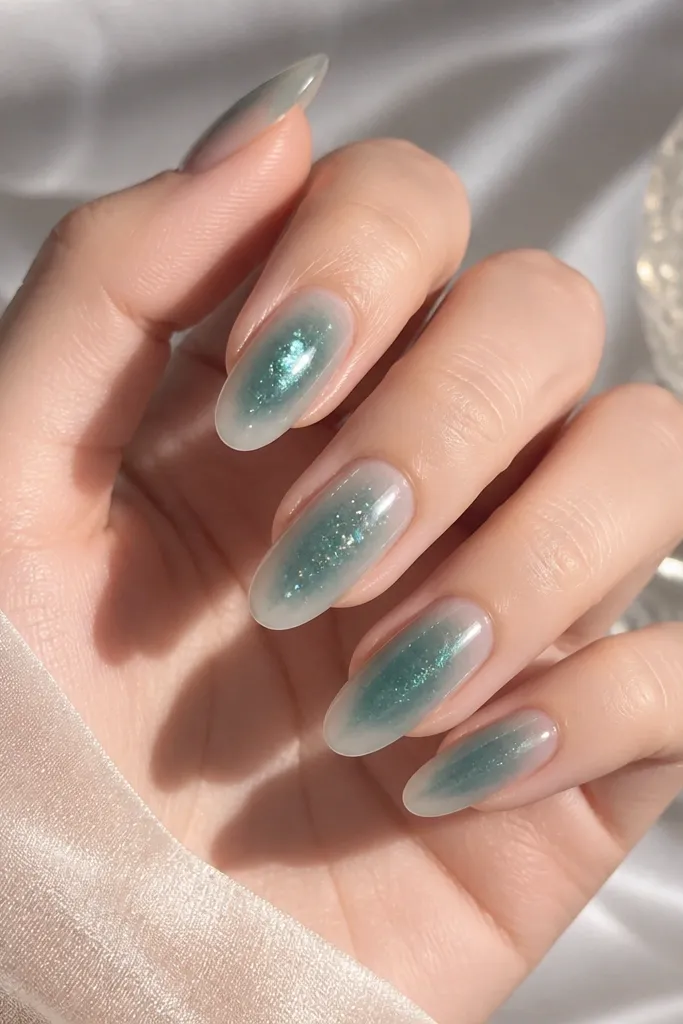
This one is for brides who want something bridal but not red and not pink. The teal-green aura gives you a “mehndi-inspired” vibe while still looking polished. Silver holographic specks add sparkle that reads in motion, especially during dancing and outdoor evening shots. I’ve noticed it flatters deeper skin tones beautifully because teal looks vivid without turning neon, and the holographic specks keep the look celebratory rather than moody.
Editor's noteUse a makeup sponge for the aura — finger-brush blending leaves streaks on camera.
Start by building an almond extension with a medium-length free edge so the aura has space to breathe. Apply a sheer base first, then sponge a teal-green gradient only around the center and slightly toward one sidewall. Keep the tips semi-sheer to avoid a heavy block of color. Add holographic silver specks with a dotting tool — focus them where the gradient is strongest. Finish with a glossy top coat and make sure specks are fully sealed so they don’t catch on fabric.
Skip thisDon’t make the base fully opaque teal — it kills the aura effect and looks like regular nail polish.
5. Classic Red Gel with Gold Cuticle Chain
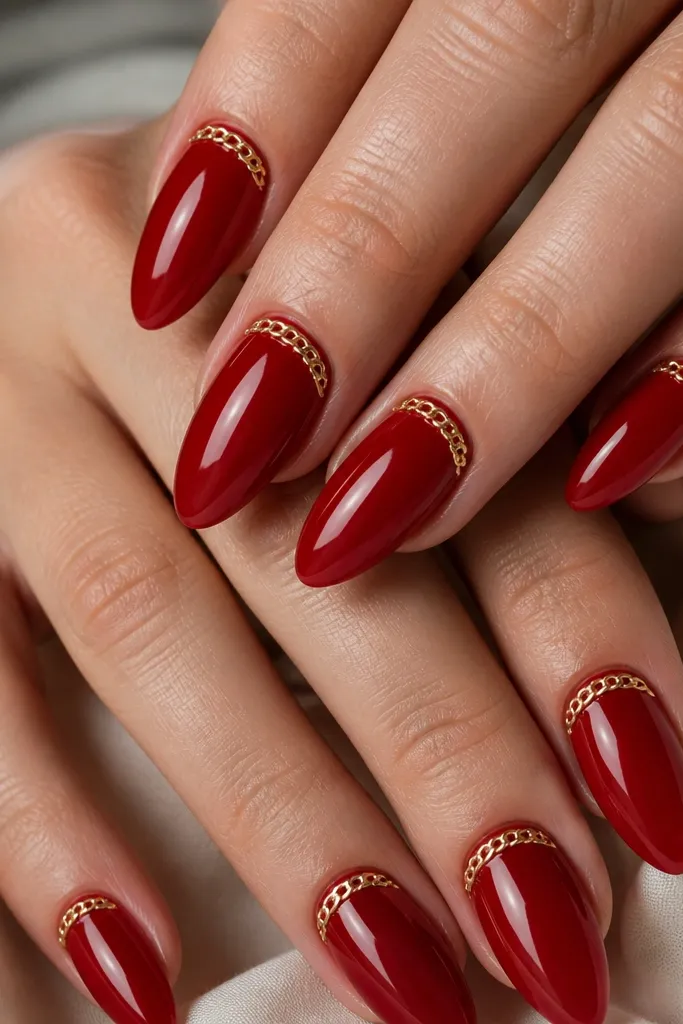
This is the “always works” bridal red, and it looks stunning against both gold and kundan jewelry. The gold cuticle chain gives you that temple-ornament feel without adding bulk at the tip. I like this for brides who want traditional color but don’t want heavy stones everywhere. On fair skin, the red looks bright and youthful. On deeper skin tones, the red reads jewel-toned and the gold chain pops clearly in close-ups.
Editor's noteDo the chain on 4-5 nails, not all 10 — spacing makes it look intentional.
Ask for almond extensions with a slim sidewall so the cuticle chain sits neatly. Apply classic red gel in two thin coats for full coverage without thick ridges. Cure each coat fully, then add a thin line of gel around the cuticle and place a micro gold chain using tweezers. Press lightly so the chain adheres evenly, then cap the entire nail with a clear gel layer and finish with glossy top coat. Check the chain edges by running a gloved finger over them — they should feel smooth.
Skip thisDon’t skip the gel capping step — chain details that stay unsealed catch on hair and fabric.
6. Ice Pink Glaze with Tiny Crystal Constellations
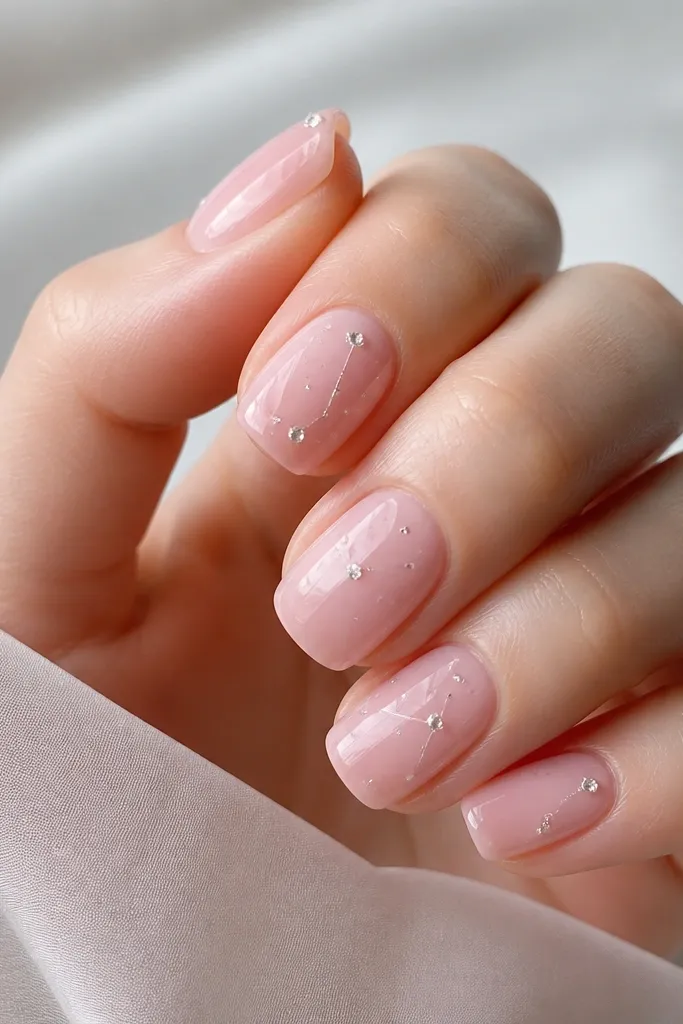
This design is perfect when you want bridal sparkle but your hands need to look neat for daily tasks. Ice pink flatters most Indian skin tones because it’s light without going chalky, and the clear crystals look like “real light” instead of chunky glitter. The constellation placement keeps the nail from looking busy, which matters when you have mehndi patterns already on your hands. I’ve done this for brides who want minimal but still want that close-up sparkle.
Editor's notePick crystals with the same cutter shape so the sparkle is consistent across nails.
Start with squoval extensions if you want comfort and less snagging. Apply an ice pink gel glaze in two coats, keeping it slightly sheer at the edges for a smooth blend. Place tiny clear crystals using a placement gel — keep 2-3 crystals per nail and vary sizes so it looks natural. Add one crystal cluster near the tip on two accent nails only. Seal with a glossy top coat, and file gently under the nail tip so the crystals don’t lift.
Skip thisDon’t place crystals in a straight line across the whole nail — it turns into a cheap sticker look.
7. Gold Leaf Tips over Sheer Rosy Nude
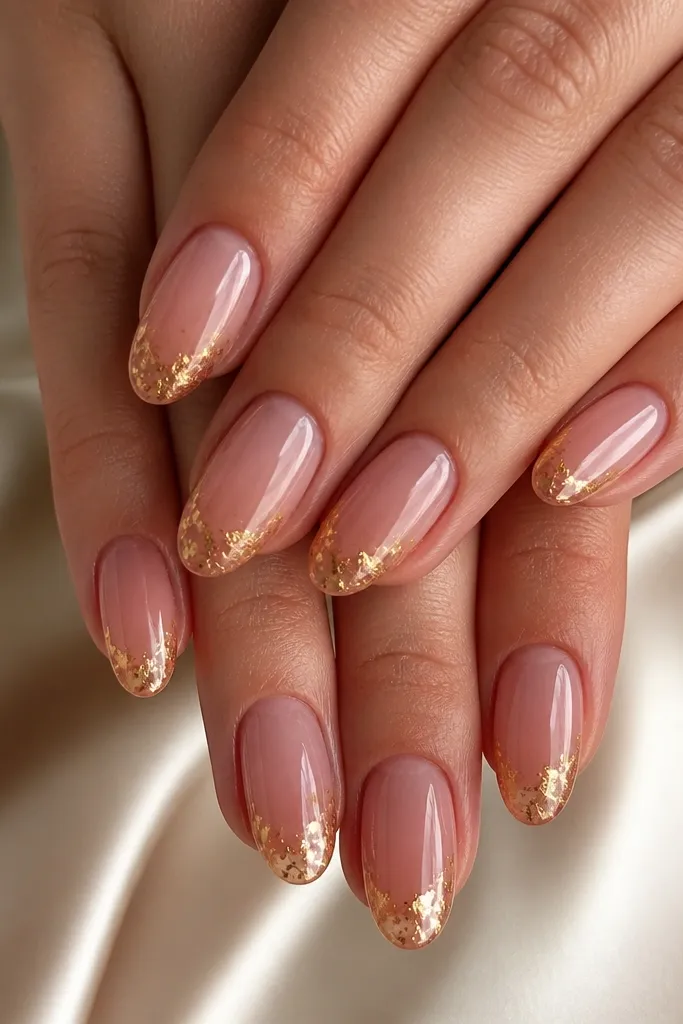
Gold leaf tips give you that high-end editorial vibe, and they work even if you don’t want stones. The sheer rosy nude base flatters medium and wheatish skin tones, and the gold leaf reads warm instead of brassy. Because the gold leaf is irregular, it looks real and not perfectly printed, which is why photos look better than standard foil stripes. This is also great for brides who want something that matches both heavy gold jewelry and lighter sets.
Ask your nail tech for almond extensions with a slightly rounded tip edge so leaf doesn’t lift. Apply sheer rosy nude gel in two coats. Use a gold leaf adhesive gel at the tip area only, then press small gold leaf pieces and leave gaps for the natural look. Lightly brush away loose edges so it stays crisp. Finish with glossy top coat in two passes to fully seal the leaf and stop snagging.
Keep the leaf confined to the last third of the nail — more coverage starts looking messy.
Don’t use thick metallic paint under gold leaf — it creates heavy patches that show through.
8. Ivory Lace Overlay with Micro Glitter French
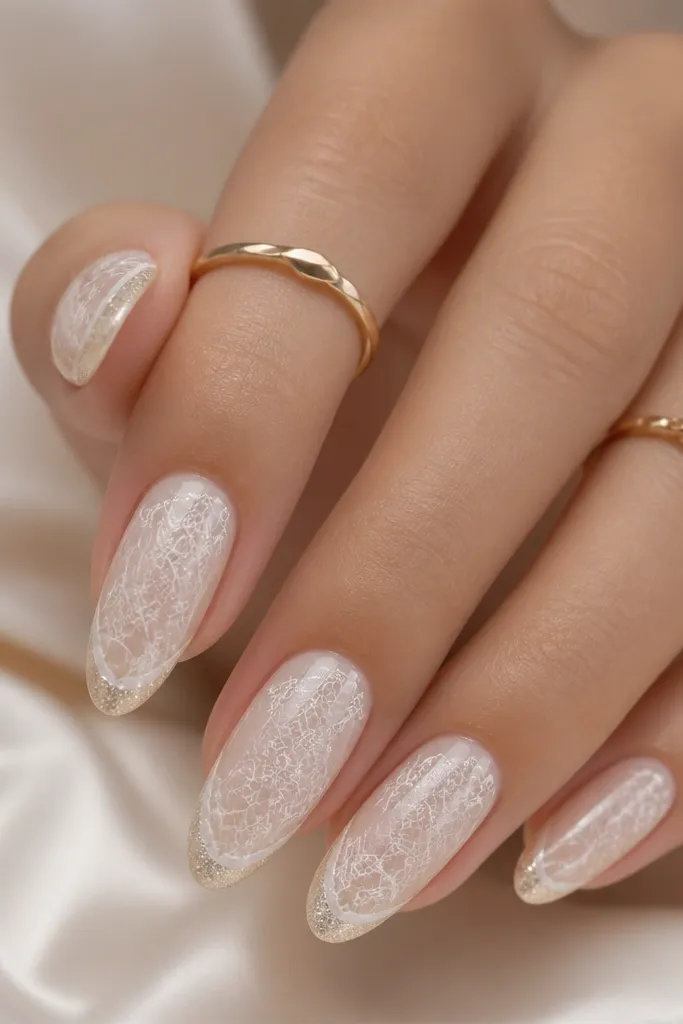
This is the bridal nail design that matches ivory lace and saree borders without needing big stones. The ivory sheer base keeps it elegant, and the micro glitter French tip adds the wedding sparkle while staying delicate. I’ve used it for brides who hate chunky gems but still want their nails to look “done” in close-up. It flatters fair to medium skin tones, especially with warm undertones, because ivory doesn’t pull gray.
Editor's noteUse a fine-tip brush for the French line so it stays sharp at the smile curve.
Start with almond extensions and buff the surface lightly so the lace overlay sticks. Apply a sheer ivory base and cure. Create the lace effect using lace nail art stickers or a stamped lace plate, but keep it thin — cover only the center and outer sides, not the whole nail. Add a micro glitter French tip line with a fine brush, then seal with a glossy top coat that levels everything smoothly. If you use stickers, cap around the sticker edges so they don’t curl.
Skip thisDon’t go too opaque with the ivory — thick ivory can look like regular off-white polish.
9. Saffron Ombre with Gold Spark Dust Fade
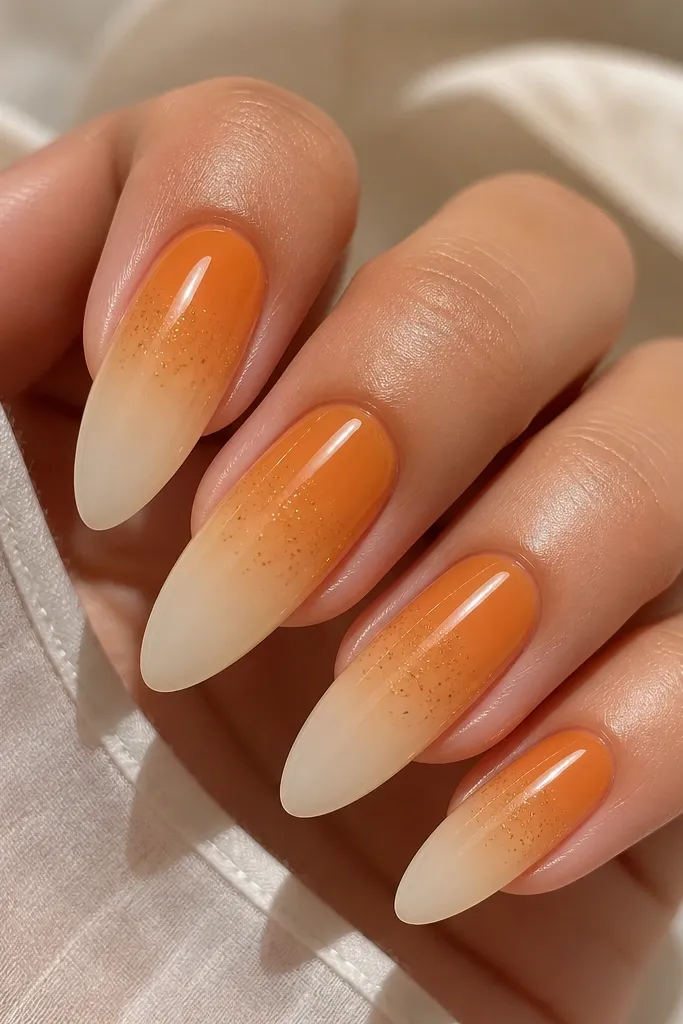
Saffron ombre nails look festive without screaming orange, and they pair beautifully with haldi setups and bright dupattas. The gradient from saffron at the cuticle to cream at the tip makes fingers look longer and slimmer. Gold spark dust near the transition point gives you a natural “glow” effect when you move your hands. I like this for brides who wear warm makeup tones and gold jewelry because it ties the whole look together.
Editor's noteBlend the ombre with two sponge passes, not one heavy pass — it stops harsh lines.
Begin with almond extensions and a sheer base coat. Sponge saffron gel at the cuticle area, then blend upward and toward the tip using a clean sponge section. Fade into a cream sheer at the tip so the gradient stays soft. Dust gold spark powder only where the colors meet, then tap off excess so it doesn’t look gritty. Seal with a glossy top coat and cure well to keep the blend smooth.
Skip thisDon’t add gold spark dust all the way to the tip — it makes the nail look dirty in indoor light.
10. Black Cherry Gloss with Rose-Gold Crisscross Studs
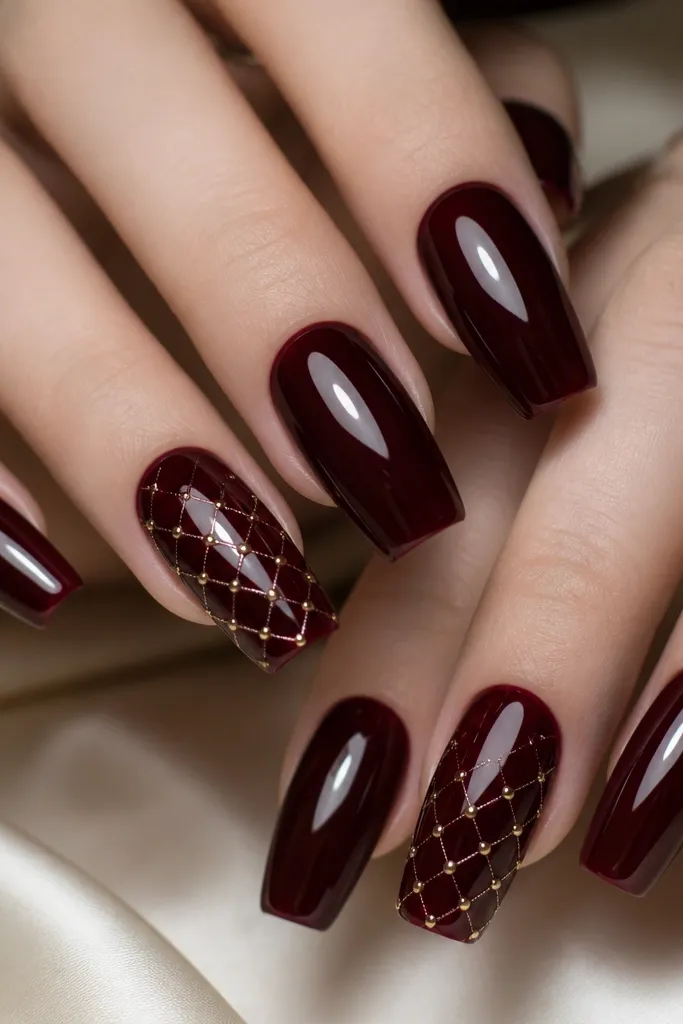
This design is for brides who want drama and a modern edge under traditional outfits. Black cherry stays flattering because it’s deep and wine-toned, not pure black, so it looks expensive on camera. The rose-gold crisscross studs add structure and catch light in a clean geometric way. I’ve seen this look work especially well with silver jewelry or mixed metal sets because rose-gold studs still read warm against dark color.
Editor's noteAsk for micro studs, not chunky stones — micro studs look sharp and bridal instead of bulky.
Start with a long squoval extension for a stable surface for studs. Apply black cherry gel in two thin coats, curing fully. Keep most nails plain, then choose 2-3 accent nails for the crisscross studs. Place a few micro studs in a diagonal grid pattern using a placement gel, then cap with clear gel so the studs don’t snag. Finish with a high-gloss top coat on all nails for that wet look.
Skip thisDon’t overdo studs on every nail — it turns festive into costume fast.
11. Peachy Pink Base with Silver Beaded Border Half-Moon
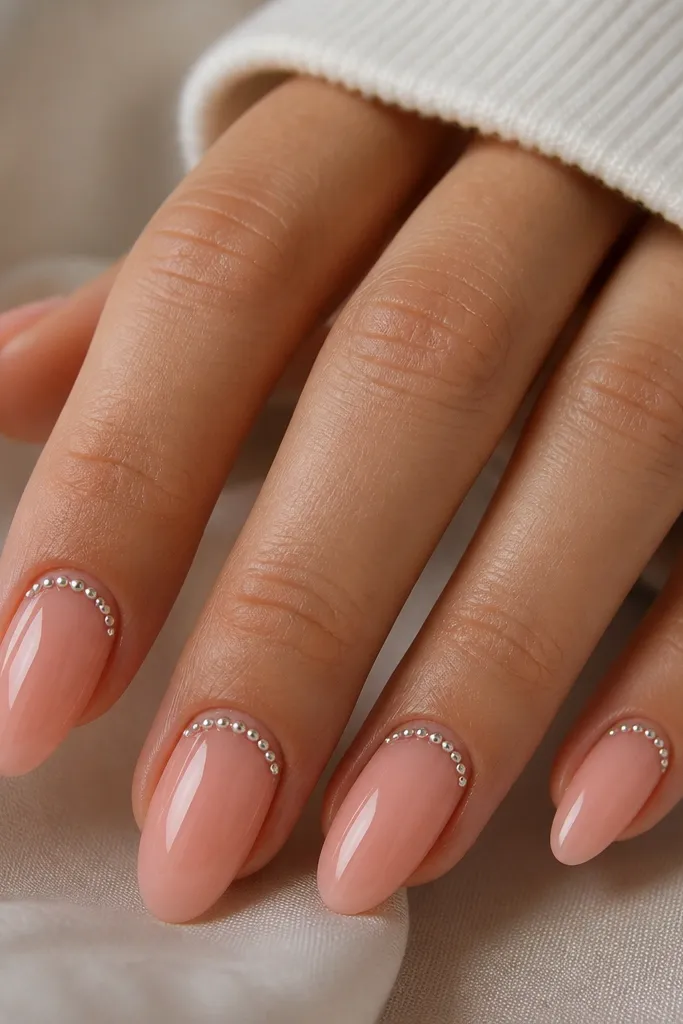
This half-moon border gives a bridal frame to the nail, and it looks neat even when your hands are moving. Peachy pink is flattering on a wide range of Indian skin tones because it’s warm and soft, not bubblegum. Silver beads add a cool sparkle that balances gold jewelry if you’re mixing metals. I like this for brides who want a feminine look but still want clear structure in photos.
Start with medium almond extensions so the half-moon has enough space. Apply a peachy pink gel base in two coats and cure. Place a line of thin gel across the cuticle curve, then add tiny silver bead clusters only along that crescent. Leave the rest of the nail plain and glossy. Cap the beads with clear gel and finish with a smooth top coat, then file the side edges lightly so beads don’t lift.
Keep the half-moon border thin — a narrow crescent looks more expensive than a wide one.
Don’t place beads too high up on the cuticle — it can look messy when the nail grows.
12. Rose Gold Mirror Tips with Clear Nude Center
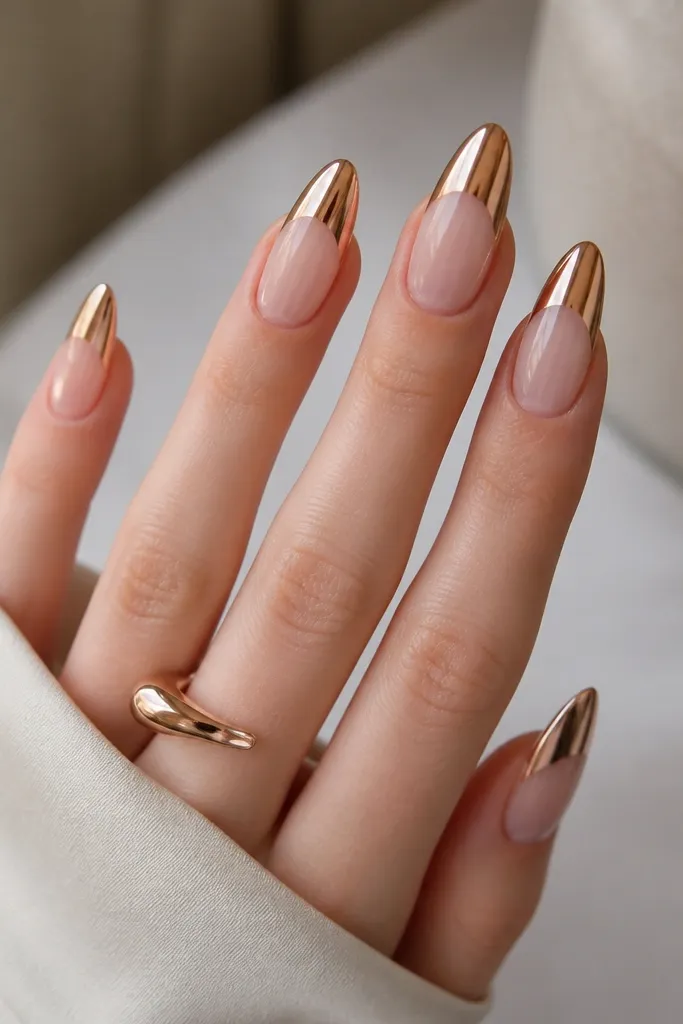
Mirror tips look stunning under wedding lights, and the clear nude center keeps the design classy. This is a great pick if you want length and shine without clutter. Rose gold mirror flatters warm skin tones, and the sharp tip line makes fingers look longer. I’ve used this with bridal outfits that have metallic rose-gold embroidery and it matches the undertone without needing extra stones.
Editor's noteUse tape to create a clean boundary — freehand mirror lines always look slightly crooked.
Start with almond extensions and keep the center base sheer, almost like a clear nude gel. Paint a clear nude gel and cure, then apply rose-gold mirror powder/foil only on the tip area using a mirror gel. Keep the boundary sharp by using a thin strip of tape as a guide, then remove tape carefully after curing. Add a glossy top coat over the mirror tips if your product needs sealing, or use a non-wipe top coat that won’t dull the mirror. Check for smoothness at the boundary so the line doesn’t feel rough.
Skip thisDon’t blur the boundary — a faded edge makes mirror tips look like smudged foil.
13. Emerald Cutout Negative Space with Gold Dot Halo
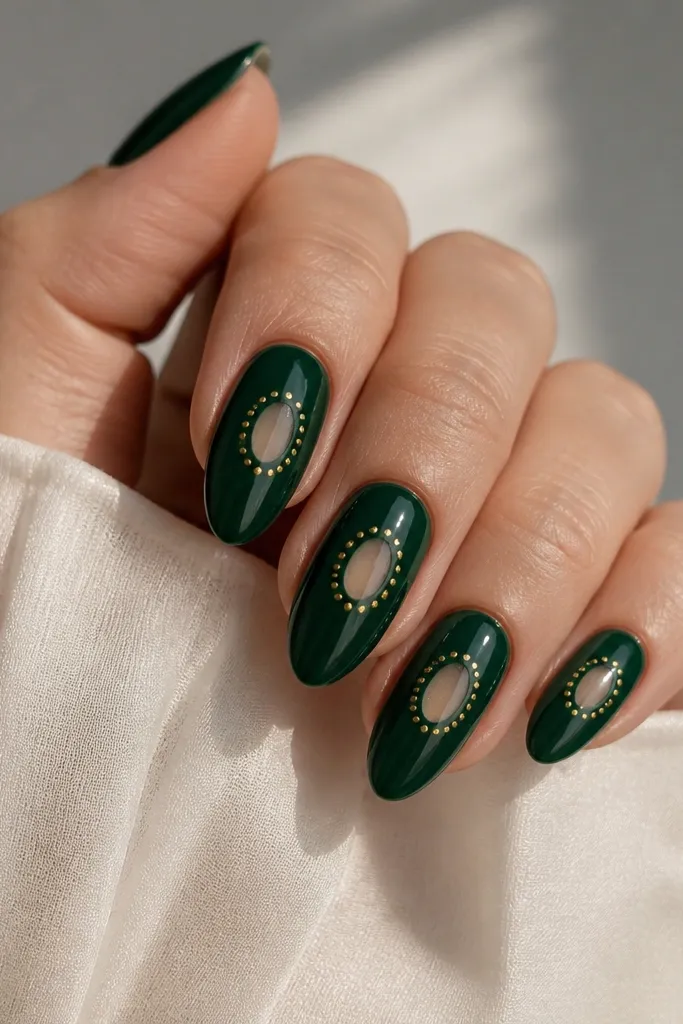
Negative space is the secret weapon when you want bridal nails to look sleek instead of heavy. Emerald is a show-stopper with Indian outfits, especially when you have green stones, kundan sets, or deep jewel embroidery. The clear cutout keeps the design airy and makes your hands look lighter. The gold dot halo adds a traditional “jewelry” feel without using large gems, which I love for brides who want something different from red and pink.
Editor's noteMake the cutout slightly off-center toward the outer side — it looks more flattering than dead center.
Start with almond extensions and apply an emerald gel base in two thin coats. Protect the negative space by placing a small barrier with gel or using a nail art stencil window before you cure the base. After base curing, apply the gold dot halo around the cutout using a dotting tool and gold gel paint. Keep dots small and evenly spaced so it looks like a halo rather than random specks. Seal everything with glossy top coat and gently cap over the halo so dots don’t lift.
Skip thisDon’t make the cutout too big — large negative space can look unfinished on wedding photos.
14. Satin Nude with Maroon Thread French and Tiny Studs
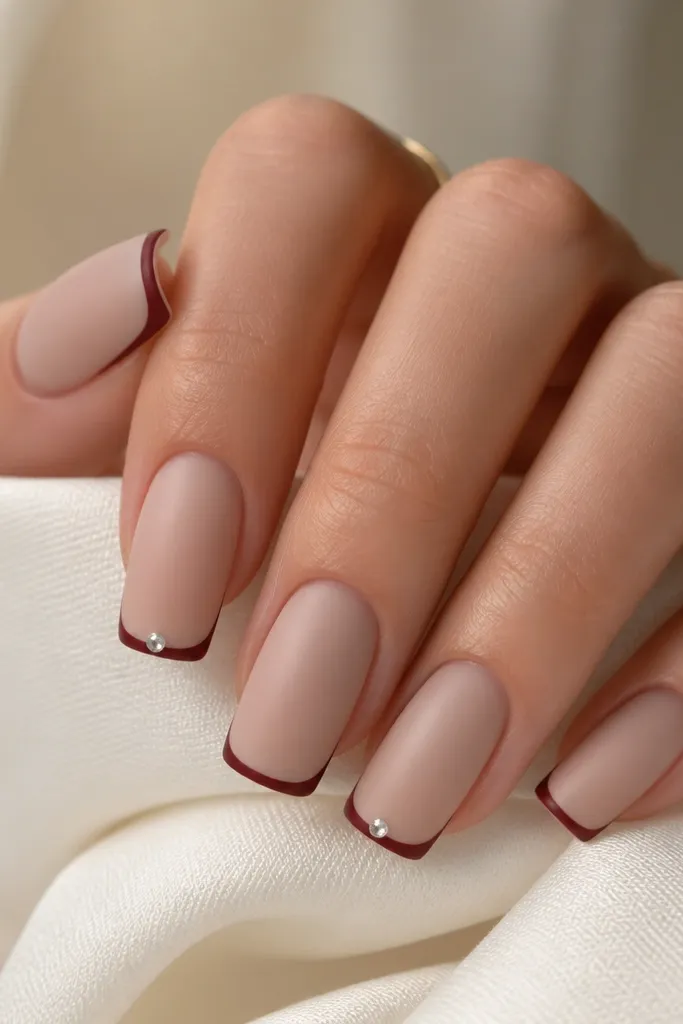
This one looks expensive because it mixes a soft satin base with sharp, minimal detailing. Satin nude flatters most skin tones and gives a wedding-skin glow effect, while the maroon thread French ties into classic Indian bridal color without going full red. The tiny studs at the tip ends make the smile curve look intentional and frame the nail. I’ve seen it photograph beautifully with both heavy embroidery and simpler outfits because the detailing stays fine, not chunky.
Editor's noteKeep the maroon line slightly thicker on the outer corner — it lifts the look of the hand.
Start with squoval extensions and apply a satin nude base using a satin-finish top coat after the base color cures. Then create a thin maroon thread French line using a striping brush — keep the line narrow so it looks like thread, not paint. Place tiny clear studs at the ends of the French line on two accent nails only. Use a clear gel cap over the studs and then a glossy top coat just on the stud area if you want contrast, or use full glossy if you prefer a uniform shine. Cure and check the edges for smoothness.
Skip thisDon’t make the French line too wide — wide French on satin base looks like press-on nails.
15. Pearl-Butterscotch Almonds with Temple Gold Bands
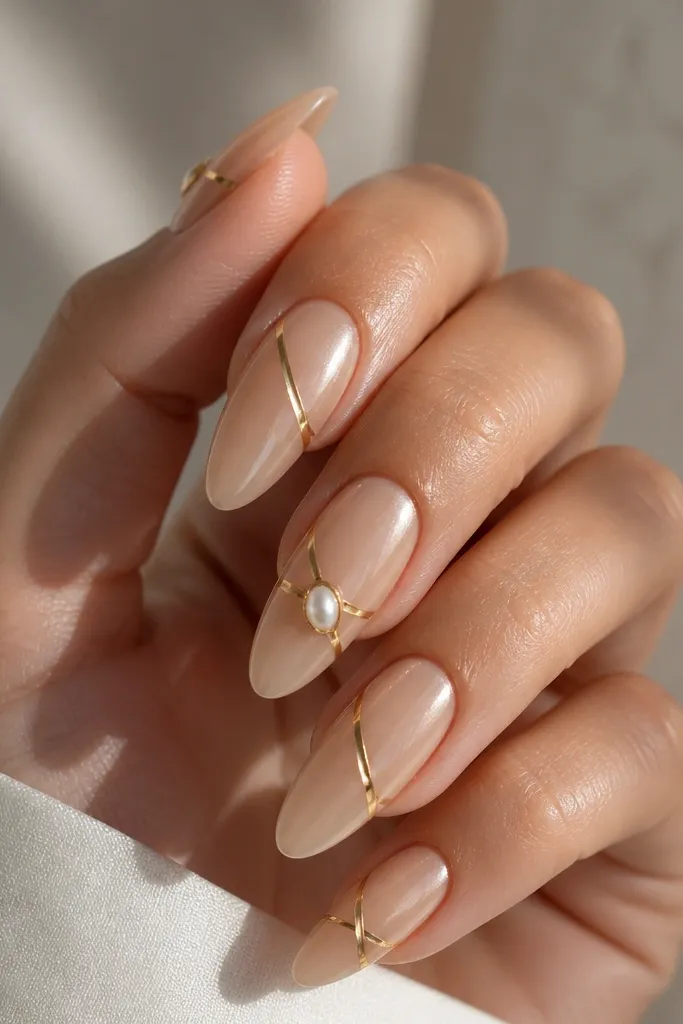
This set looks bridal without going full “all-over sparkle,” and that matters when your hands are close to your face during photos. The butterscotch base flatters Indian skin tones because it has warm undertones, not pink-only or beige-only. The gold bands are placed diagonally, so your nails look longer even before you see the length. I’ve done this on brides who want a clean mehndi-to-wedding transition because it still reads festive under daylight and flash. The pearl sheen ties it to jewelry — especially if you wear a temple necklace or pearl drop earrings.
Editor's noteIf your gold bands look thick, thin the striping tape first by trimming the tape strip with scissors — less width reads more “temple jewelry” and less “craft foil.”
Start with a milky butterscotch builder gel base. I use two thin layers, curing 60 seconds each, then I wipe the tacky layer with a lint-free pad and 70% isopropyl to keep it smooth. Place two diagonal gold bands using striping tape as a guide, then remove the tape before curing so the edge stays crisp; cure each band 30-45 seconds. On your accent nail, set a tiny teardrop pearl at the band crossing with gel glue, then cap over it with a clear gel layer. Finish with a high-gloss top coat and cure fully so the pearl sheen stays glassy, not grainy.
Skip thisSkip laying gold bands too close to the cuticle — they lift faster and can catch on dupatta fabric during the first wedding day hours.