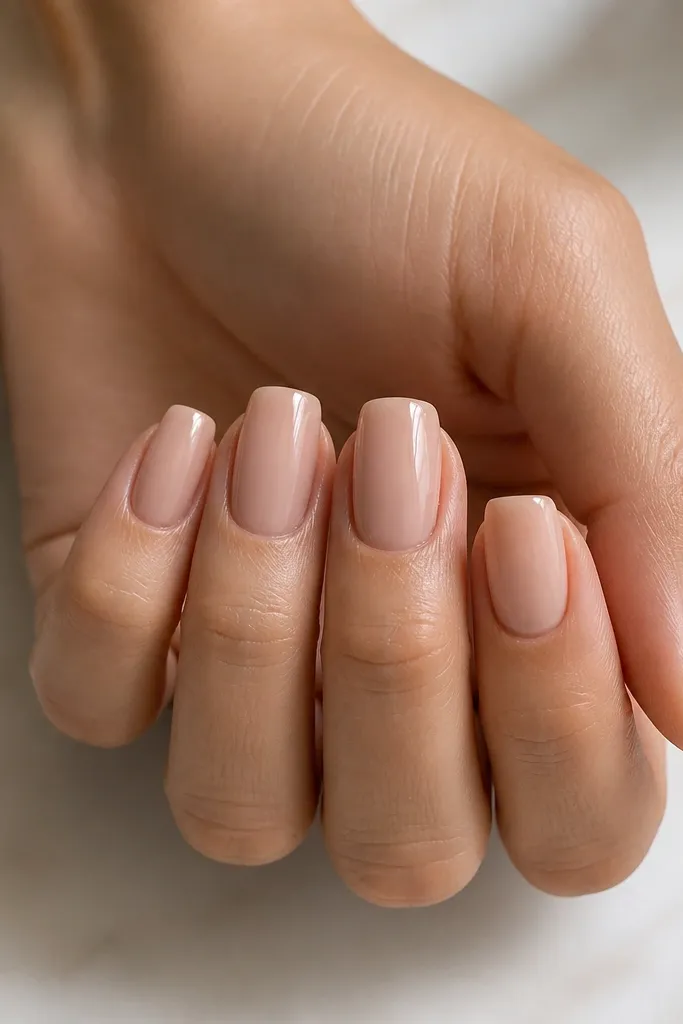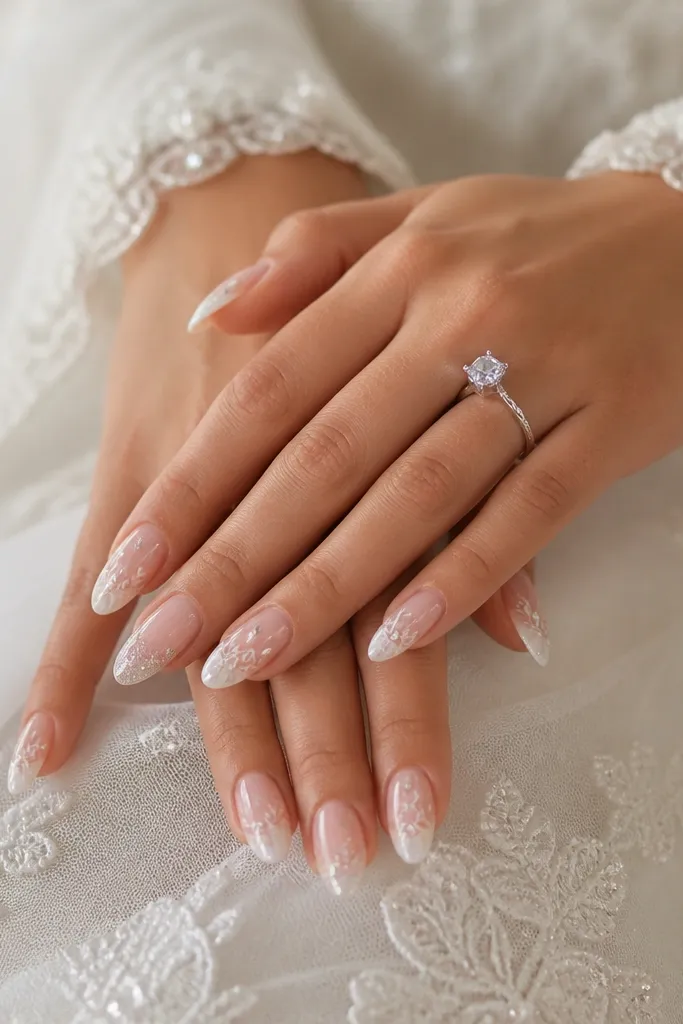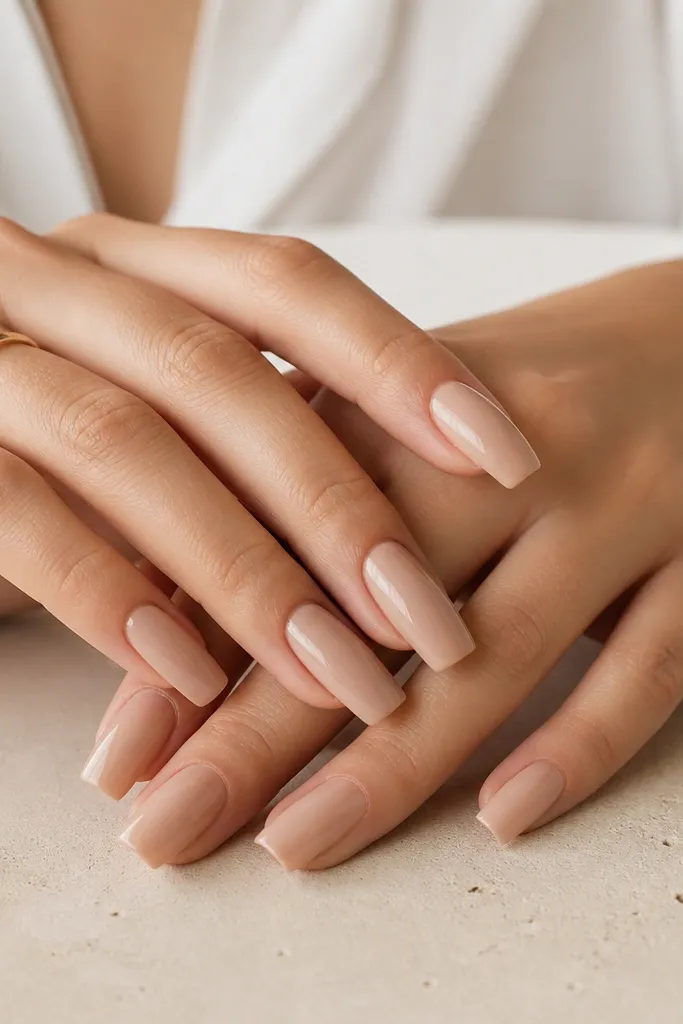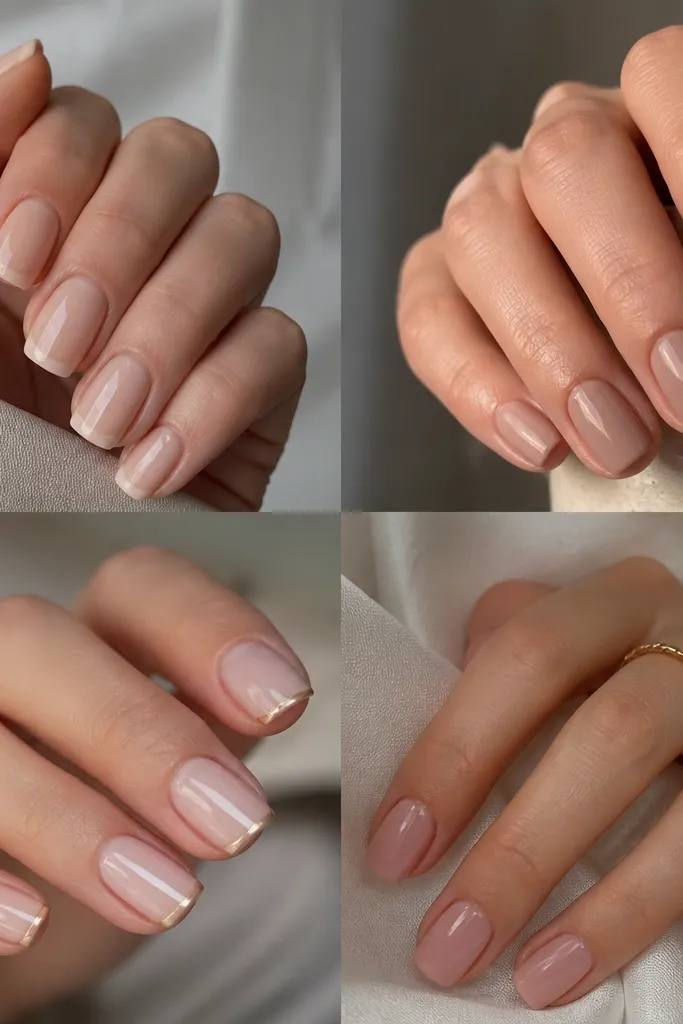
1. Neon French Fade with Tip-Size Storage Labels
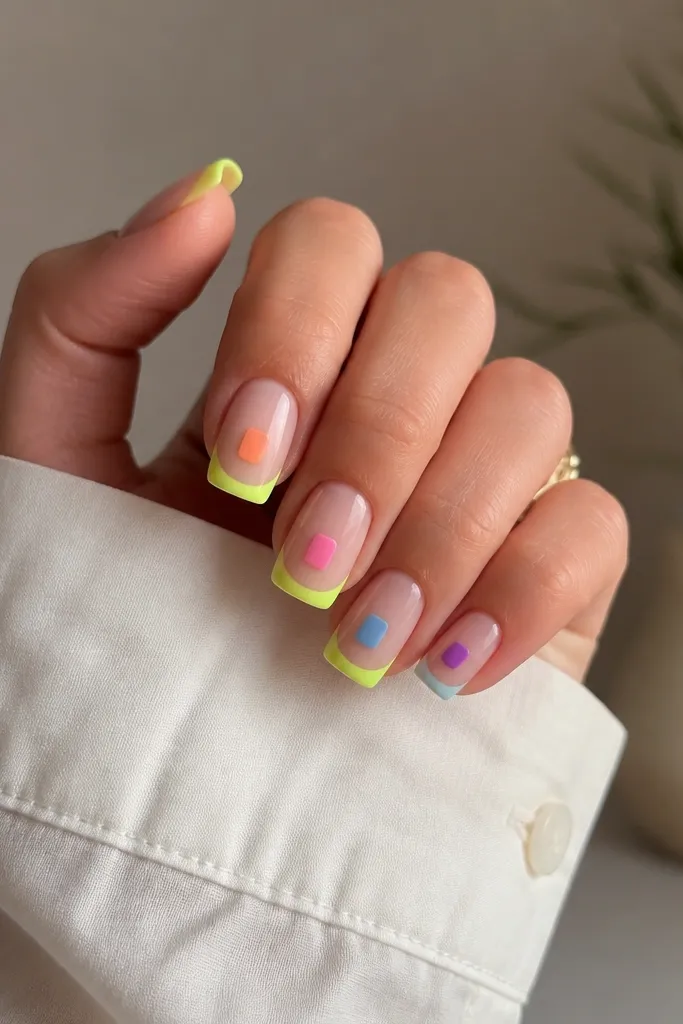
This design works because the French layout gives you a built-in guide, and the neon fade looks clean even when the extension length varies. I use a nude base that matches your skin tone (for me it’s a sheer pink-beige) so the neon sits on top without looking harsh. The hot coral to coral-orange fade flatters warm undertones and looks extra bright on medium to deep skin tones. On shorter fingers, keep the fade narrow — about 1.5-2 mm at the widest part — so the tips don’t visually shorten your nail bed. Storage-wise, you’ll be reaching for gel liner or a small brush more than you’ll be mixing colors, so it’s easy to keep that neon set together.
Start by applying a thin nude builder gel or extension base, then cure. Place a French guide with a striping tape so you get a straight tip boundary; aim for a smile line that sits just above the natural nail’s free edge. Sponge or brush the neon coral at the very tip, then fade it inward with a second color (coral-orange) before curing. Finally, trace a super thin neon-near-white line at the outer edge using a gel liner brush, cure, and seal with glossy top coat. Store your tips by width in labeled compartments so you can grab the right size before you start the fade.
For the smooth fade, wipe your sponge brush edge on a lint-free wipe between nails so the color doesn’t pool.
Avoid painting neon all the way to the center — it makes extensions look bulky and blocks light.
2. Glazed Mocha Swirl on Almond Extensions
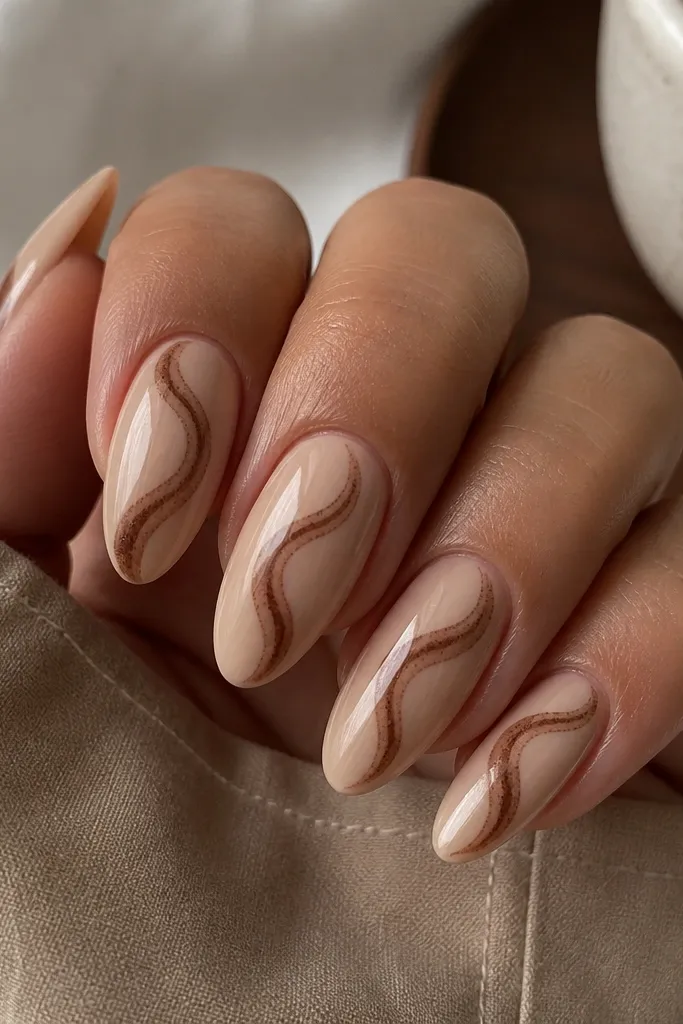
Mocha swirls look expensive because they read like marbling, not stickers. I choose a sheer caramel nude base and a medium cocoa swirl so the design feels warm and wearable for fall and winter. This flatters olive and warm skin tones, and it also looks good on cool tones if you keep the nude base slightly peach. The almond shape helps the swirl stay elegant instead of turning into a blob near the corners. It’s also storage-friendly because you only need two browns and a fine detail brush — everything stays in one small gel kit.
Start with a sheer nude base and cure fully. Use a gel liner or detail brush to pull a thin swirl line from the lower cuticle area toward the side, then loop it inward so each nail has one main curl. Add micro-speckle texture by tapping the tip of a liner brush with a tiny amount of cocoa gel near the swirl path, then cure. Finish with a glassy top coat in two thin layers so the swirl looks like it’s under the surface. Keep your detail brush and brown gels in the same organizer pocket so you don’t hunt for them mid-set.
Editor's noteIf your swirl looks messy, clean your brush with 91% alcohol, then re-load with a smaller amount of gel for the next nail.
Skip thisSkip thick lines — swirls that are too wide look like paint instead of glaze.
3. Pearl Half-Moon with Clear Builder Base
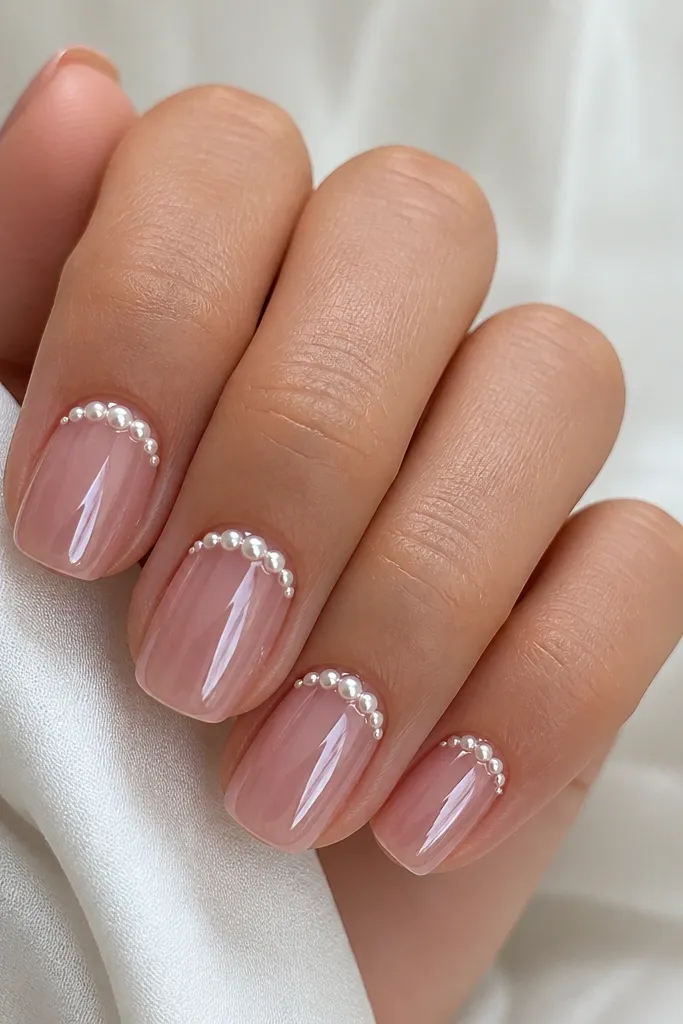
This design is clean and glossy, and it’s the one I reach for when I want “done” nails without busy art. The clear builder base makes the half-moon pearls look like they’re floating, which is why it photographs well. I use a soft milky blush tint under the clear so it flatters fair to medium skin tones and doesn’t wash out your cuticle area. Squoval is best here because the half-moon edge stays crisp along the corners. You’ll love it if you keep a storage system because pearls come in small jars that you can stack by size.
Start by applying clear builder gel over the extension and cure. Mix a tiny amount of milky blush gel into clear (or use a milky clear base) and paint a thin wash over the nail plate so the pearls don’t sit on bare clear. Use a half-moon stencil or freehand a curved guide, then place micro pearl beads along that curve with a dotting tool; press lightly so they don’t pop up. Cure, then seal with a thick-ish clear top layer to smooth over the pearls. Store pearl jars in a small compartment organizer and label by size so you grab the right bead without dumping the whole box.
Editor's notePlace pearls on a tacky layer only — once the gel fully cures, beads won’t stick cleanly.
Skip thisAvoid skipping the smoothing top coat — ridges catch on fabric and snag hair.
4. Forest Green Velvet Tips with Gold Foil Specks
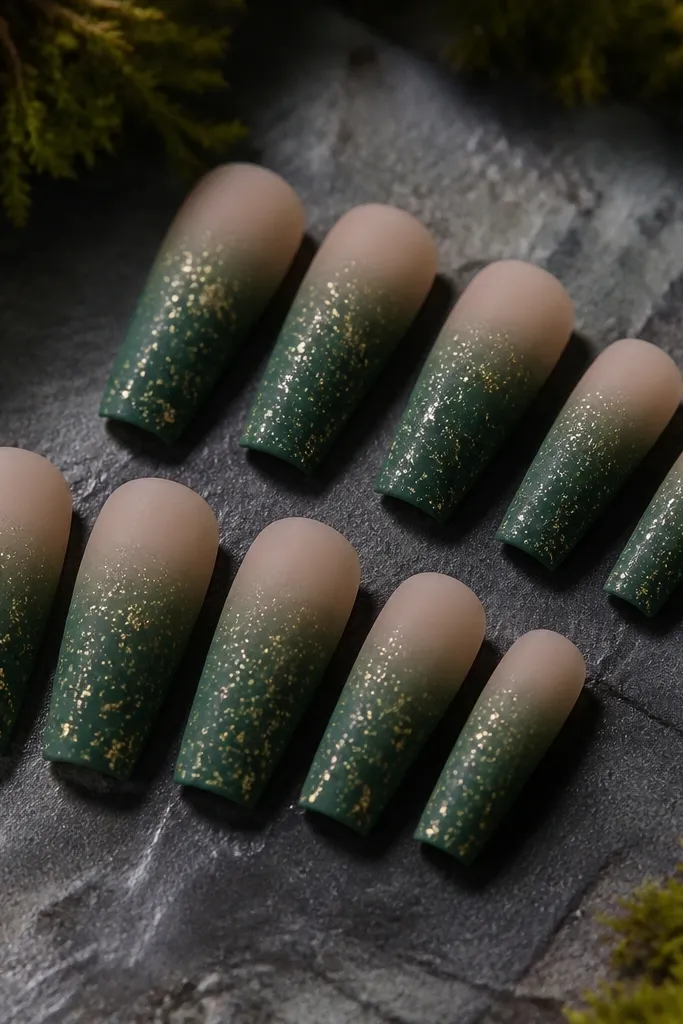
Velvet-matte tips look like fabric and they hide minor extension ridges better than high-gloss colors. I like forest green because it’s bold without looking neon, and gold specks make it feel like holiday décor even in January. This design flatters darker skin tones and also looks striking on fair skin because the green stays saturated. Almond shape gives the matte tips a smooth curve, so the gold looks intentional instead of random. For storage, matte velvet gel and gold foil are easy to separate — keep them in two different compartments because the foil gets everywhere.
Apply a nude base and cure, then use striping tape to mark the tip zone so the velvet edge stays straight. Paint the forest green velvet gel on the tips only, keeping the band about 3 mm wide at the widest point. Cure under the lamp with the velvet gel’s full cure time. Add gold foil flecks by pressing tiny foil pieces or tapping foil dust onto the edge of the green while the surface is tacky. Finish with matte top coat everywhere except the gold area if you want the gold to reflect more.
Editor's notePress foil with a flat silicone tool, not your finger — it keeps the flecks tiny and controlled.
Skip thisDon’t cover velvet tips with glossy top coat — it removes the velvety look.
5. Sky Blue Micro-Check on Clear Tips
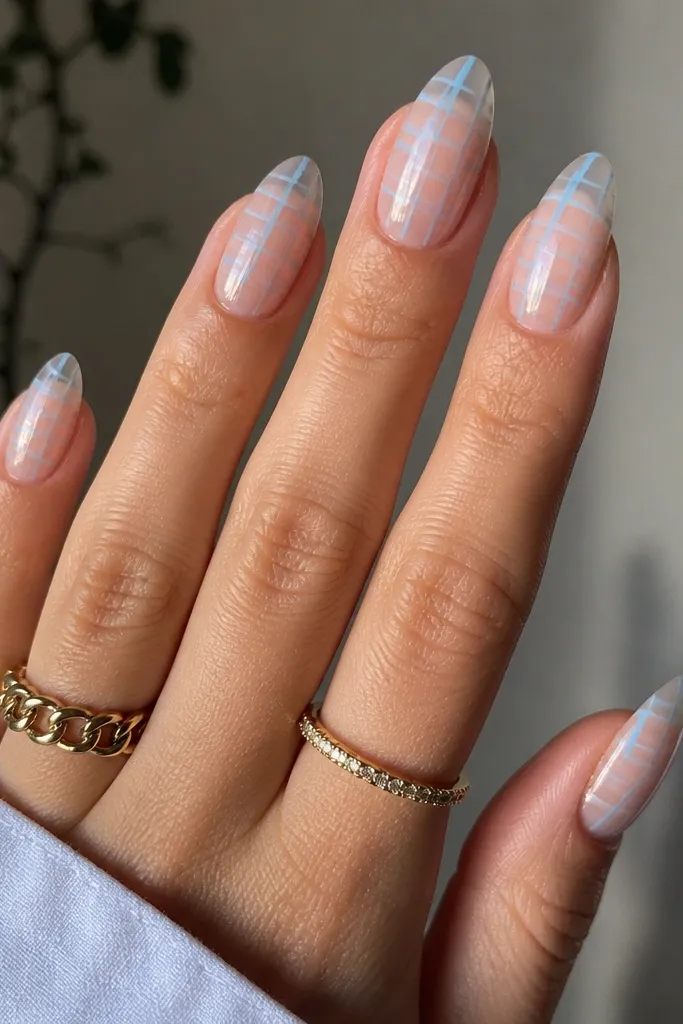
Micro-check looks crisp because it’s small and repetitive, so even slight nail shape differences still read as design. I do this on clear tips with a sheer nude base so the pattern looks airy, not heavy. Sky blue is flattering on cool undertones and it also brightens warm undertones if your base has a pink tint. The almond shape keeps the grid straight along the sides. Storage-wise, you need gel striping tape or a liner brush — both store neatly in a slim organizer slot.
Start with a sheer nude wash over the nail plate and cure, then build clear extension gel if you’re using tips. Use a thin striping tape grid guide: lay two thin vertical strips, cure briefly if your system requires it, then remove and replace with horizontal strips to form the check spacing. Paint sky blue gel into each tiny square area using a liner brush, then cure. Remove any tape residue carefully, then seal with glossy top coat in two thin layers. Keep your striping tape rolls in one labeled drawer because they tangle and bend if they’re loose.
Editor's noteUse a magnifying lamp or phone camera zoom while you paint the grid — it stops wonky spacing fast.
Skip thisAvoid thick lines — wide check borders look like nail art from far away, not micro-detail.
6. Rose Quartz Chrome with Irregular Glitter Veins
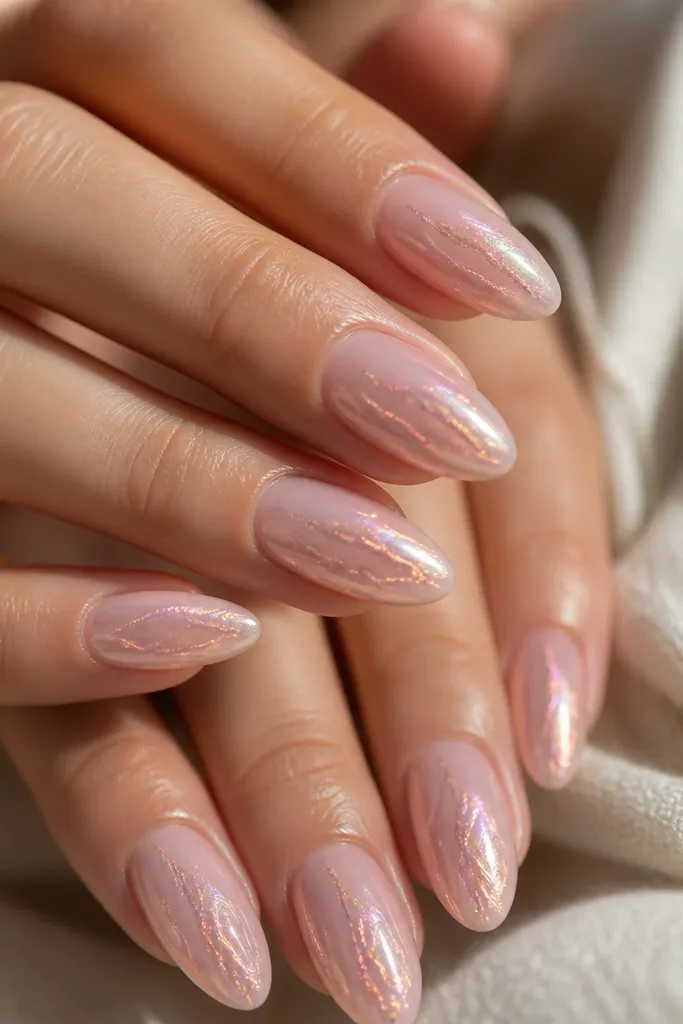
This one is for when you want “pretty” without tiny stickers. Rose quartz chrome gives you that soft, cloudy glow, while irregular veins keep it from looking flat. I use a milky pink base so the chrome shift shows up as rosy instead of silvery. This flatters fair, medium, and deep skin tones because the color reads through the chrome layer. Almond extensions make the veins look natural because the lines can taper slightly as the nail narrows. Storage-wise, chrome powders are messy, so I keep them in a sealed container with a dedicated makeup sponge.
Start with a milky pink gel base and cure. Add thin irregular vein lines using a translucent pink gel mixed with fine glitter, then cure. Apply rose chrome powder using a foam applicator in small circular motions until you get even coverage; wipe off excess with a clean brush. Seal with a gel top coat that’s safe for chrome (avoid overly thick coating at first). Store chrome in a lidded box and keep the applicator sponge in a separate zip pouch so powder doesn’t contaminate everything.
Editor's noteIf the chrome looks patchy, buff the surface lightly before chrome — smooth equals even shift.
Skip thisDon’t press glitter veins too thick — they turn into lumps under chrome.
7. Black Tuxedo Lines with Clear Negative Space
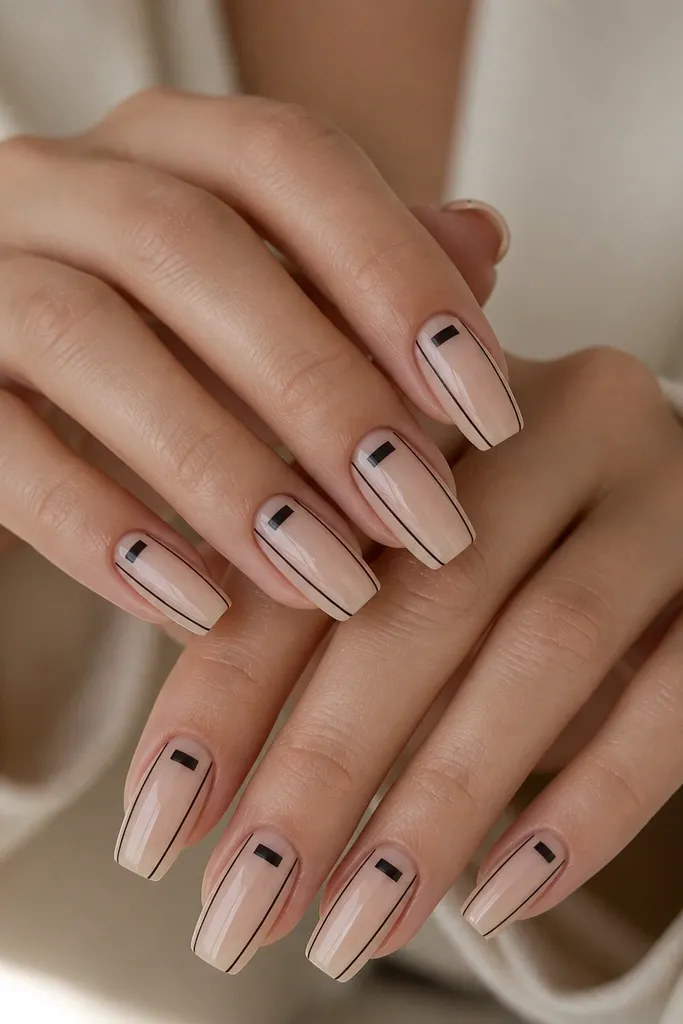
Tuxedo nail art looks sharp because the negative space gives your hand structure. I do it with a clear center panel so the design feels modern instead of heavy. Black lines stay crisp on extensions when you use a gel liner brush and keep the lines thin. This flatters most skin tones, but it’s especially striking on medium to deep tones because the negative space makes your nails look bright and clean. The squared almond shape keeps the lapel lines straight without rounding too much. Storage is simple: you just need black gel liner, a nude base, and a top coat.
Start with nude base gel at the sides and near the cuticle, leaving a clear center strip about 2-3 mm wide. Cure. Use a fine liner brush to draw two vertical black lines along the edges of the clear panel, then connect them with a small horizontal line near the cuticle to mimic lapels. Add a tiny bow tie bar — just a short line centered, or two short diagonal strokes if you want it more bow-like. Cure and seal with glossy top coat, keeping a steady brush so the clear panel stays clear. Store your liner brush upright in a small cup so the tip doesn’t splay.
Editor's noteUse tape as a “center panel” mask for the first nail — once you have the width, freehand the rest.
Skip thisSkip chunky black — thick lines make the design look like marker.
8. Pastel Rainbow Side-Swipe on Squoval Extensions
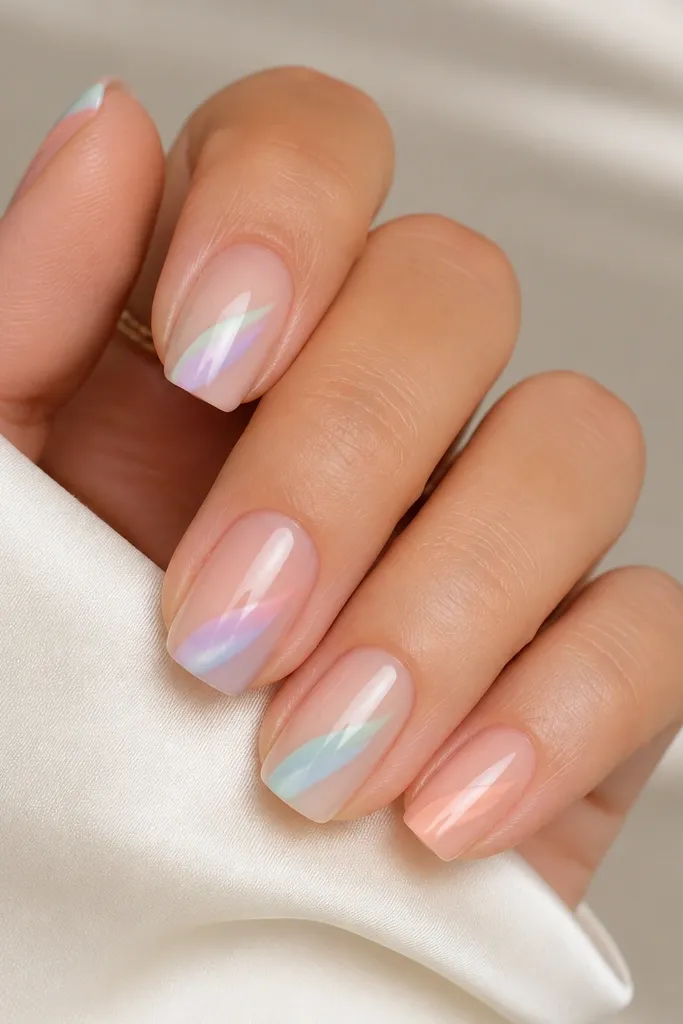
Diagonal side-swipe art makes your nails look longer because the streak pulls the eye up the nail. Pastels look soft and wearable, and squoval shape keeps the diagonal line from curving awkwardly. I like this on fair to medium skin tones because the nude base blends and the pastel colors pop without screaming. The trick is to keep each color band thin and separate — they should look like clean brush strokes, not mixed paint. This design also fits storage well because you only need a small set of pastel gels and a liner brush that you can store with tape and a practice card.
Apply a sheer nude base and cure, then place extensions or use pre-shaped tips. Use striping tape to mask a diagonal path (about 2 mm wide) so the rainbow streak stays straight. Paint mint first, cure, then remove tape and add lilac, baby blue, and pale coral in narrow adjacent bands while keeping edges clean; cure after each band if your gel needs it. Finish with glossy top coat, then clean up the edges with a gel wipe tool or brush dipped in cleaner. Store each pastel gel in a tray by color family so you don’t mix up mint and aqua mid-set.
Editor's noteDo one accent nail with a thicker streak — it makes the set look intentional instead of “all the same.”
Skip thisAvoid letting colors touch before curing — the streak turns muddy fast.
9. Marigold Sunburst with Tiny Star Studs
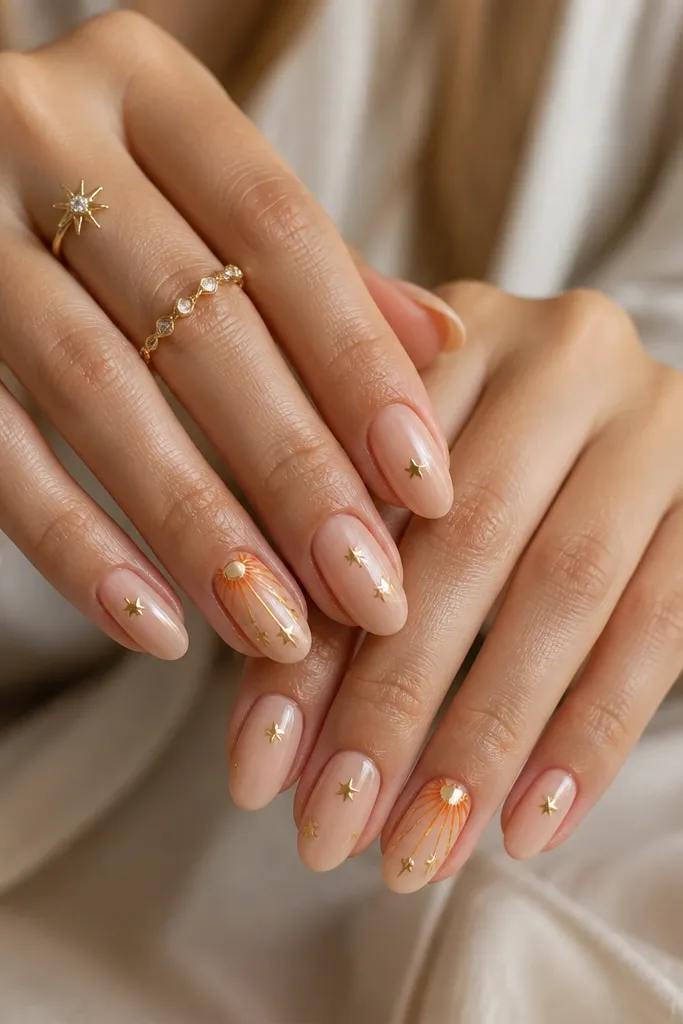
Sunburst designs look like nail jewelry when you keep the rays narrow and the center tight. Marigold is a perfect seasonal color because it reads warm and bright without neon brightness. This set flatters warm undertones and looks amazing with gold jewelry because the star studs catch light the same way. Almond extensions help the rays fan out cleanly as the nail narrows. It’s also easy to store: star studs go in one small jar, and marigold gel goes in another — you can plan the whole set around a quick grab.
Start with a nude base and cure. For the sunburst nail, place a small marigold dot near the lower cuticle and drag thin rays outward with a detail brush, keeping them about 1-2 mm long before the ray hits the nail’s midline. Cure, then add tiny gold star studs along a few rays with tacky gel so they sit flat. On the other nails, place one star at the side of the cuticle line instead of repeating the whole burst. Seal with glossy top coat, and store star studs in a compartment divider so they don’t roll into the wrong jar.
Editor's noteUse tweezers with a flat tip for studs — you get cleaner placement than with a dotting tool.
Skip thisSkip giant rays — big sunbursts overpower short extension lengths.
10. Icy Blue Drip Tips on Clear Builder
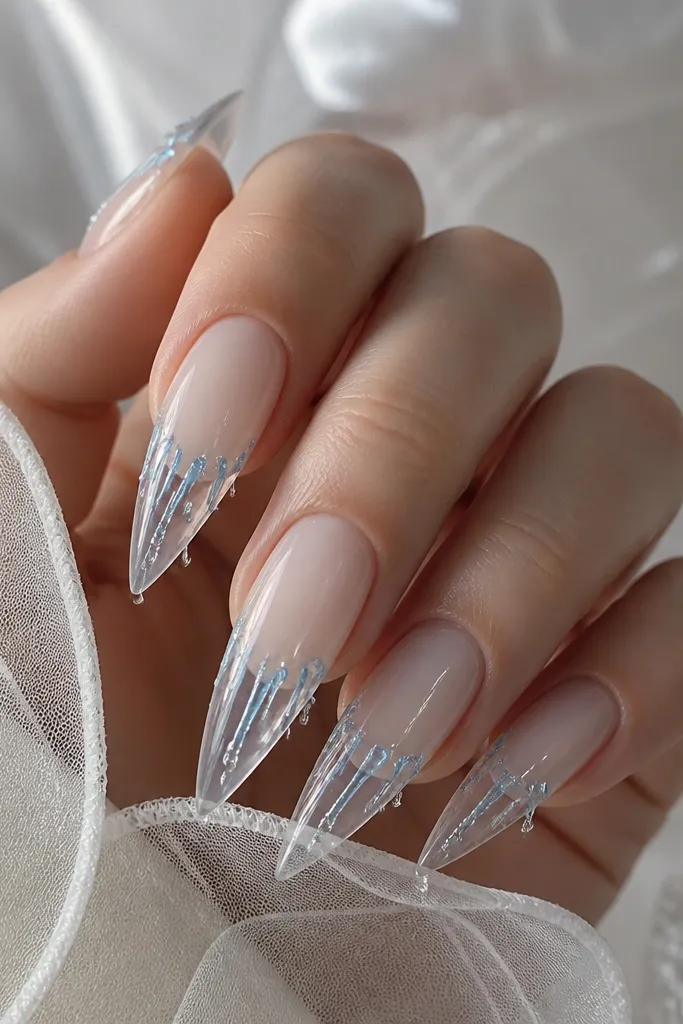
Drip tips are dramatic, and icy blue keeps them from looking messy. I build this on a clear builder base so the drips look like they’re suspended in glass. Frosty sparkle at the drip ends makes the design feel wintery but still clean because the sparkle is concentrated. This flatters fair to medium skin tones and also pops on deeper tones because the blue reads cool and bright. Almond shape gives the drips room to hang without hitting the sidewalls too soon. Storage is easy since you only need clear gel, icy blue gel, and a tiny amount of fine glitter.
Start with clear builder gel on the extension and cure. Paint a thin milky tint band at the tip base (about 2 mm) so the drip has a glowing anchor. Use an icy blue gel to create 3-4 thin drips that start at the tip edge and taper downward; cure each nail in full. Add fine frosty glitter at the drip ends while the surface is still tacky, then cure. Seal with a glossy top coat that covers the drips without flooding them. Keep icy blue gel and glitter in separate sealed containers so glitter doesn’t contaminate the gel cap.
Editor's noteFor cleaner drips, load your brush with a small bead of gel and pull straight down — no side swipe.
Skip thisAvoid thick drips — they drag the nail and look uneven at the edges.
11. Berry Jelly Gradient with Micro Glitter Cuticle Halo
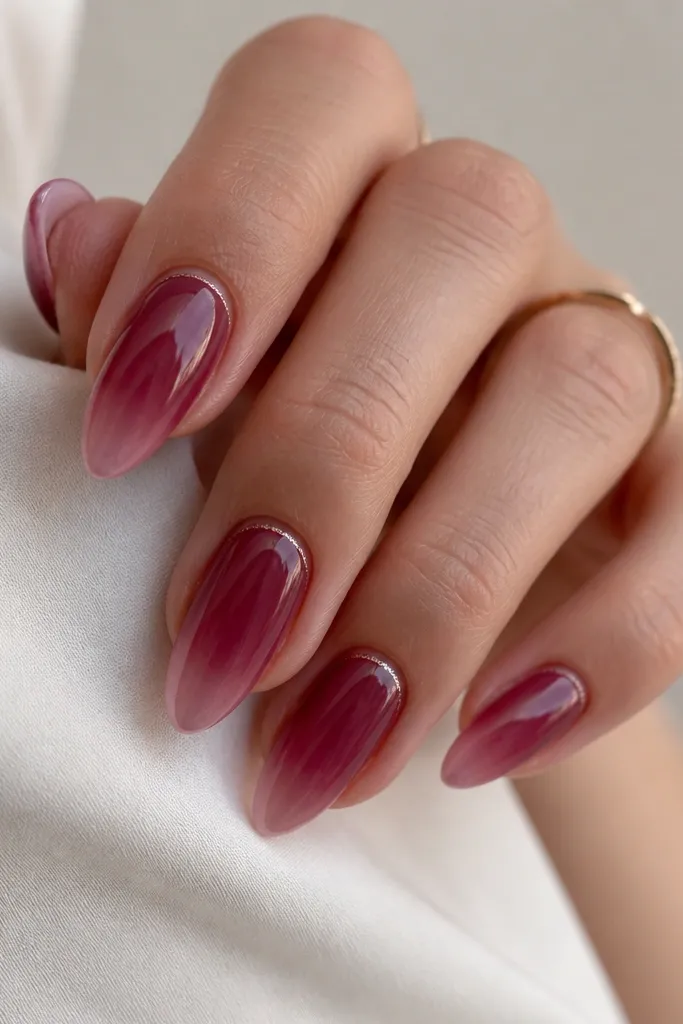
Jelly gradients look soft and expensive because the color is see-through, not opaque. I put the deepest berry near the cuticle and let it fade out so the nail looks longer and the cuticle area looks dressed up. Micro glitter halo adds shine where your eye naturally lands, which makes the set feel intentional even on short nails. This flatters cool undertones and looks stunning on fair to medium skin tones; on deep skin, choose a berry that leans magenta so it doesn’t turn brown. Almond extensions keep the fade smooth and prevent the gradient from pooling. Storage-wise, this design uses one berry shade and one glitter — easy to keep together.
Apply a sheer pink base or clear builder and cure. Paint a berry jelly gel near the cuticle first, then pull the color outward toward the tip with a damp brush so it fades; cure. Repeat one more thin gradient layer if you want more opacity at the cuticle, then cure again. With a detail brush, paint a thin curved line around the cuticle and tap micro glitter onto it while tacky, then cure. Seal with glossy top coat and store your micro glitter jar with a label and a small funnel so you don’t spill.
Use a slightly damp brush for the gradient — it smooths the jelly edges without dragging color.
Don’t put glitter all over — halo glitter looks clean, full coverage looks chunky.
12. White French with Tiny Red Ribbon Bow Accent
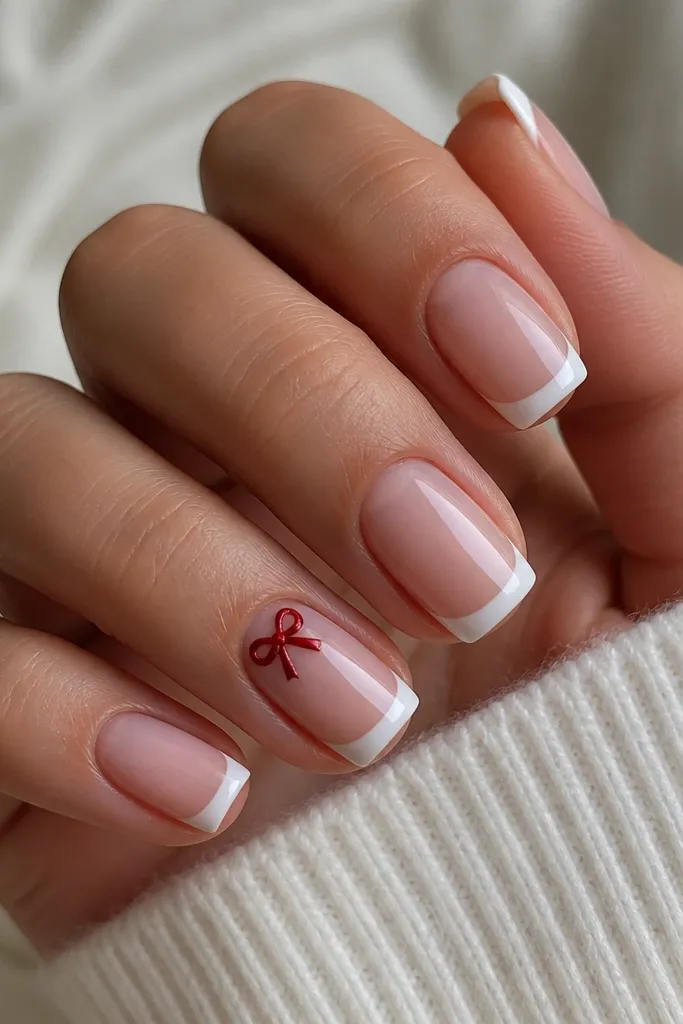
This is the “cute but not childish” French set I wear when I want something photo-ready without heavy gems. Sharp white French looks best on squoval because the tip stays straight while the nail bed stays roomy. The red ribbon bow adds a focal point without covering the entire nail, and it flatters fair to medium skin tones by creating contrast against the nude base. If you wear gold hoops or a red lip, this set matches fast. Storage is simple: white gel, nude gel, and a tiny gem/ribbon kit you can keep in one mini organizer tray.
Start with nude base gel and cure, then apply white French tips using French guides or a striping tape stencil. Keep the white band about 2-3 mm so it stays crisp and not too wide. For the bow accent nail, place a small red gel dot near the cuticle, then shape two loop pieces on each side using a thin gel brush or pre-made ribbon bow pieces if you have them. Add a tiny center knot piece and cure. Finish with glossy top coat, and store your French guides and striping tape in the same drawer as your white gel so you don’t hunt mid-set.
Use a dotting tool to place the bow center — it keeps the knot perfectly centered.
Avoid thick white tips — they look chalky and can lift at the edges.
13. Seafoam Marble with Clear Tape Lines
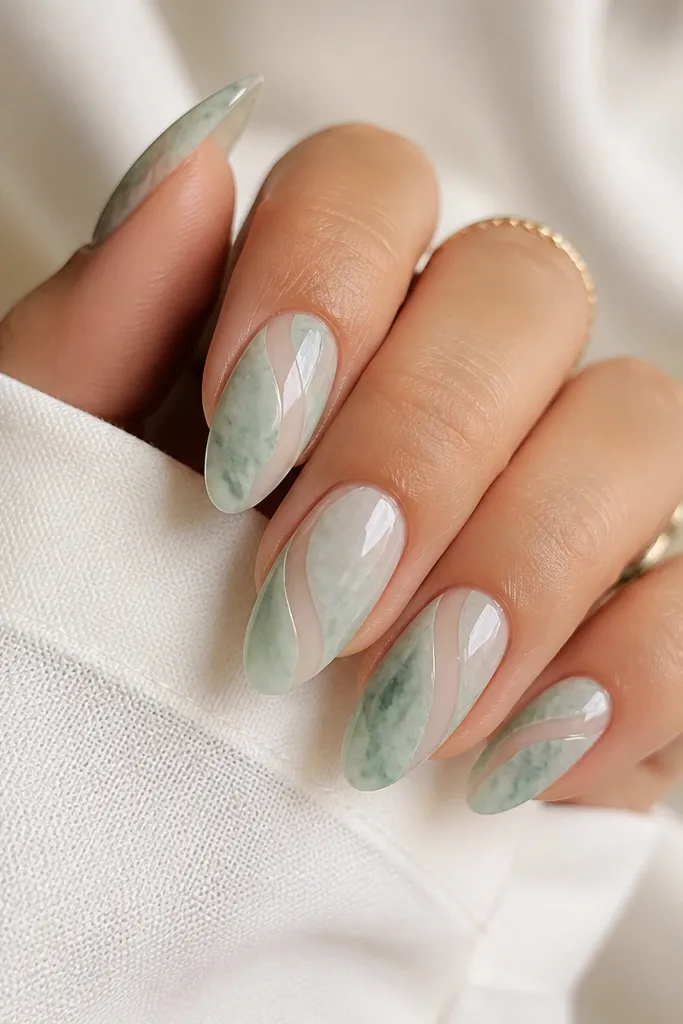
Marble looks best when you control the movement, and clear tape lines do that for you. Seafoam marble is soft and fresh, and it flatters olive and warm undertones because it’s green without being neon. I keep the base semi-translucent so the marble veins look like they’re floating inside a gel layer. Almond shape helps the marble veins taper and stay natural as the nail narrows. This design is storage-friendly because tape, a seafoam gel, and a white gel are easy to sort and grab quickly.
Start with a semi-translucent base and cure. Lay thin striping tape in vertical and diagonal sections to create the marble “channels,” then paint seafoam gel over the exposed areas; cure. Remove tape while the surface is still protected, then add thin white vein lines using a detail brush to mimic marble movement; cure again. Seal with a glossy top coat in two layers so the marble looks smooth and glassy. Store striping tape flat in a folder-style organizer so it doesn’t curl and leave gaps.
Editor's noteRemove tape at a slight angle to keep the edges sharp instead of tearing the gel.
Skip thisAvoid over-buffing after marble layers — it dulls the shine and can blur vein edges.
14. Rose Gold Chain Link Accent on Nude Extensions
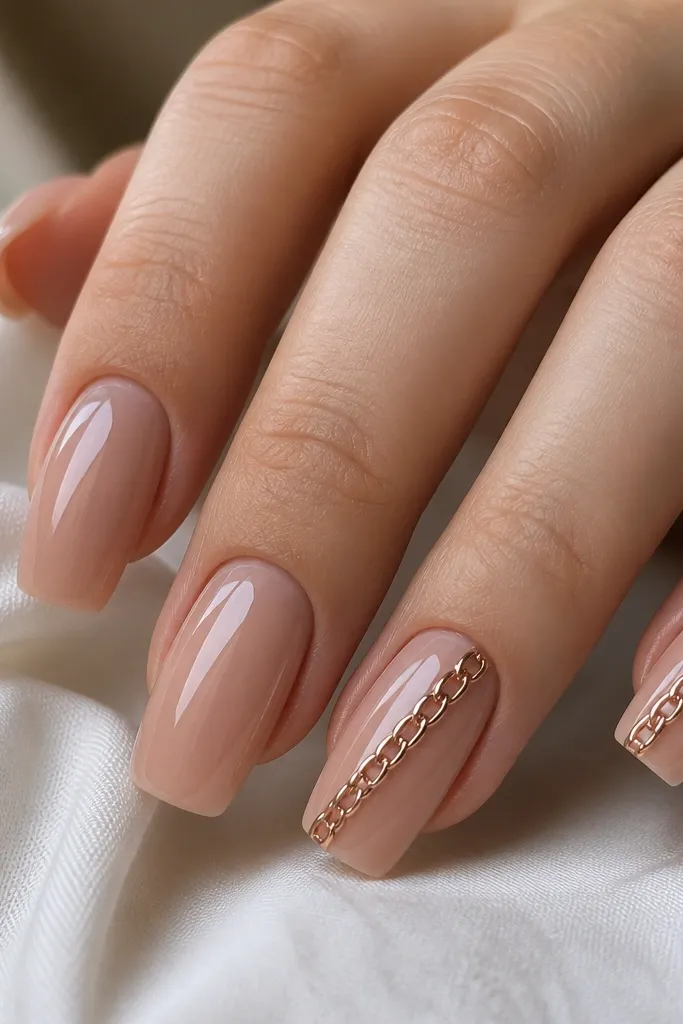
Chain link accents look like jewelry because the lines are thin and reflective. I keep the base a sheer nude so the chain reads crisp, not heavy. Rose gold matches warm undertones and also flatters cool skin when you choose a nude base that’s slightly rosy. Squoval nails make the diagonal chain sit cleanly without curving into the sidewalls. This design is perfect when you want a “statement” nail without using big gems. For storage, keep your chain strips in a flat sheet or small envelope so they don’t tangle.
Apply a sheer nude base and cure, then add builder gel if you’re using extensions. Decide your diagonal angle — I place it about 30-40 degrees from the cuticle toward the tip. Apply a thin layer of tacky gel where the chain will sit, then press the chain strip into place and cure. If you need extra hold, add a very thin layer of clear gel over the chain links and cure again so the top coat doesn’t snag. Finish with glossy top coat over everything. Store chain strips flat and separated by size so you don’t grab the wrong length and end up cutting unevenly.
Editor's noteCut chain strips with clean snips and file the edges — rough cuts lift faster.
Skip thisAvoid thick gel over chain — it turns the links into lumps instead of metallic details.
15. Lavender Galaxy with Storage-Ready Star Stickers
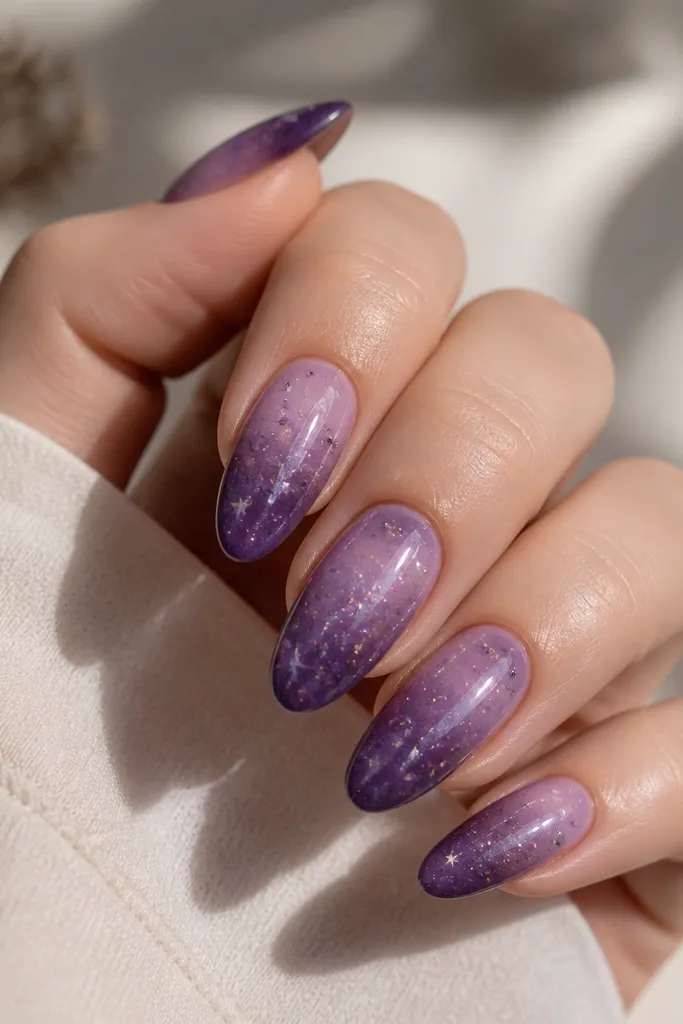
Galaxy nails look best when the base has depth and the star details are placed in a pattern, not sprinkled randomly. Lavender gives you the dreamy effect without the harshness of deep black, and it flatters fair to medium skin tones especially well. I keep the swirl soft and let the stars pop over it, so the set reads like a night sky even on short-to-medium extensions. Almond shape helps because the galaxy gradient looks like it’s wrapping around the nail. Storage-wise, star stickers are easy to keep in flat sheets, and you can grab them quickly without opening glitter jars.
Start with a lavender gradient: paint a lighter lavender near the cuticle and blend toward a darker shade near the tip, then cure. Add a faint galaxy swirl by dragging a lighter lavender or white gel in a soft curve, then cure. Place star stickers or tiny star decals on top while the surface is tacky (if your system needs tack), pressing gently so they lie flat. Seal with a glossy top coat in thin layers so stickers don’t lift at the edges. Store your star sticker sheets in labeled folders by size — small stars and medium stars should not mix.
Editor's noteUse a toothpick to place stars — it picks up details without leaving fingerprints.
Skip thisAvoid skipping top coat thickness control — too thin makes stickers lift, too thick makes edges look raised.